Provider: Google Calendar
With Google Calendar, you and your team can easily create and schedule events and resources, share group calendars, track schedules, and more. Based on the convenience of google calendar in reservation scenarios, OpenCUI provides Google Calendar Reservation extension, which allows you to use reservation-related functionality directly in chatbot without additional development.
Google Calendar Reservation works across Google Workspace. Before you begin, make sure you are done with signing up for Google Workspace.
Set up Google Workspace
Each Google Workspace app or integration has its own Google Cloud project where you configure APIs, set up authentication, and manage deployments. To get started, you need a Google Cloud Project.
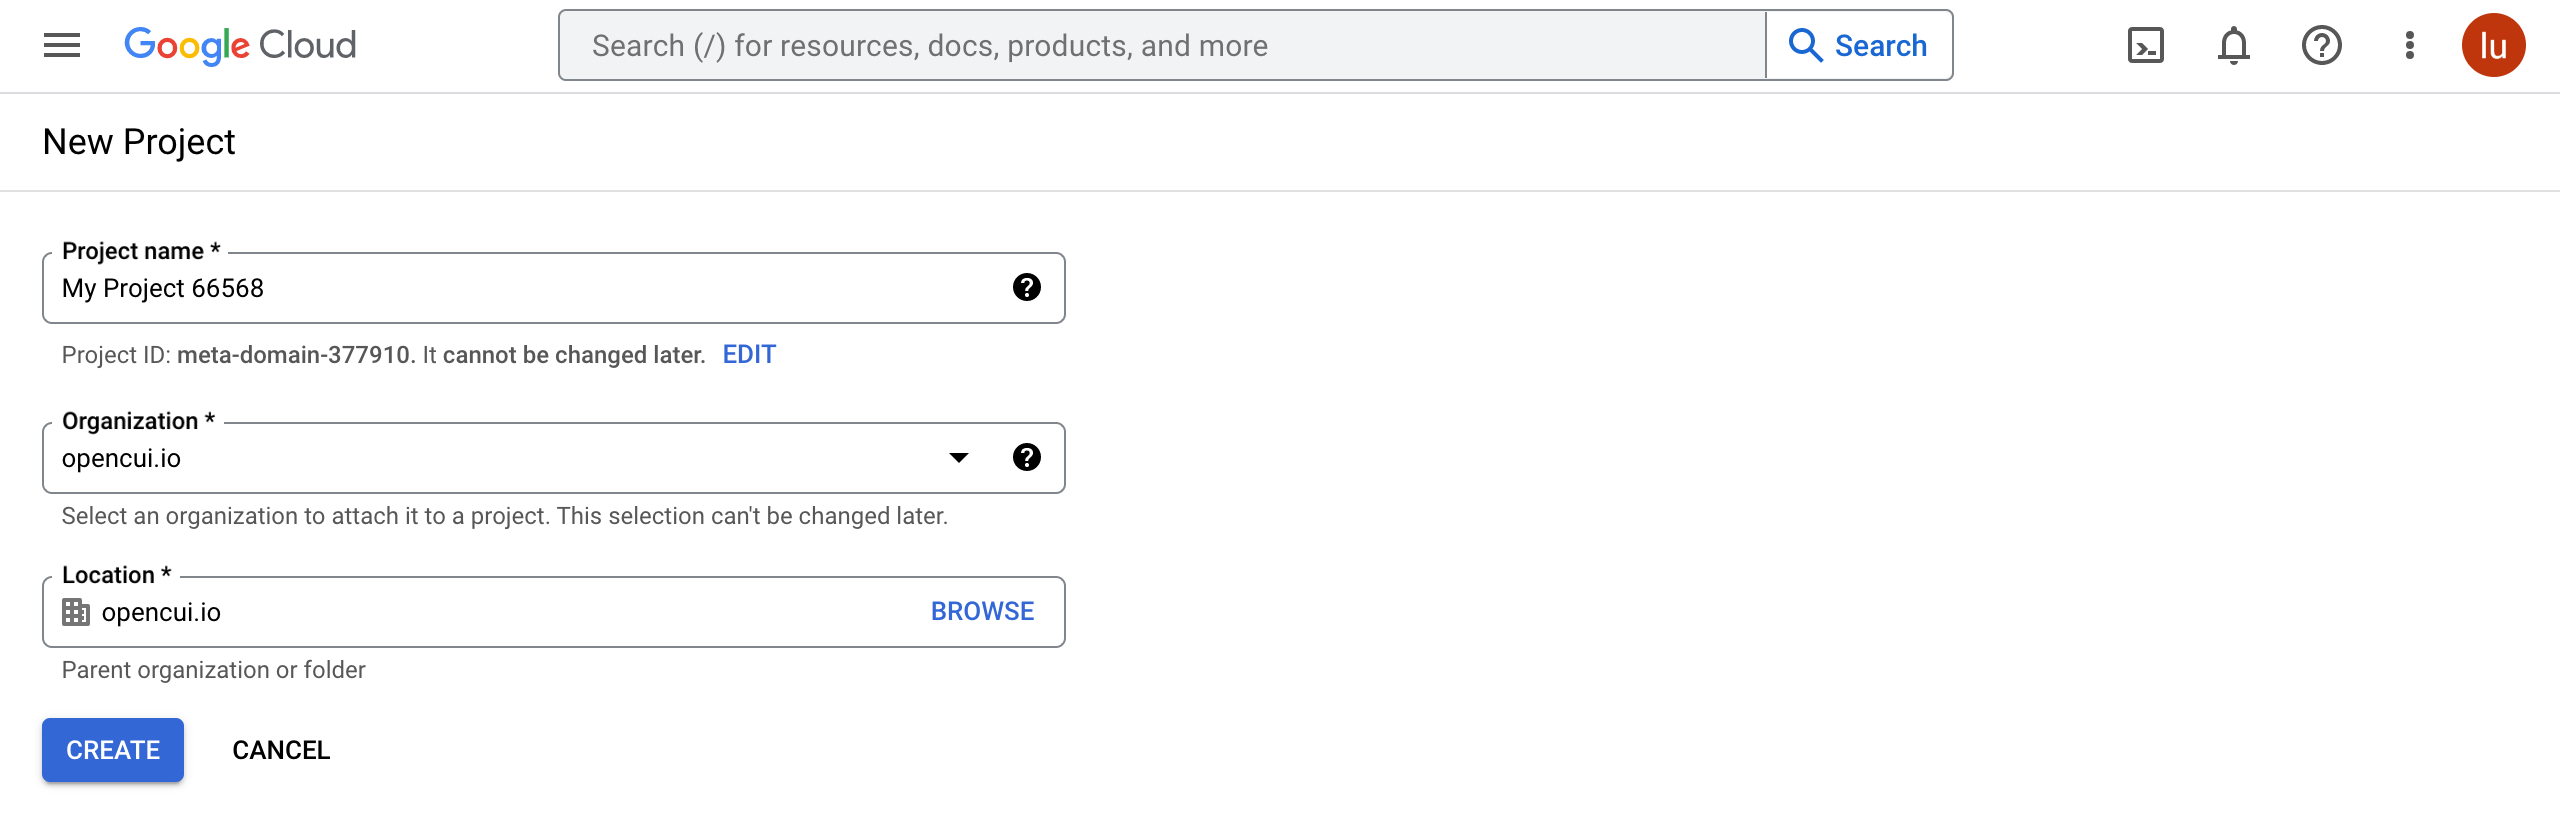
Create a Google Cloud Project
- Click here to Create a Project. Or in the Google Cloud console, go to Menu > IAM & Admin > Create a Project.
- In the Project Name field, enter a descriptive name for your project.
Optional: To edit the Project ID, click Edit. The project ID can't be changed after the project is created, so choose an ID that meets your needs for the lifetime of the project.
- In the Location field, click Browse to display potential locations for your project. Then, click Select.
- Click Create. The console navigates to the Dashboard page and your project is created within a few minutes.
For further information on Google Cloud projects, refer to Creating and managing projects.
Enable Google Workspace APIs
To make Google Calendar Reservation extension work, you need to enable APIs below in your Google Cloud project:
In the Google Cloud console, go to Menu > More products > Google Workspace > Product Library.
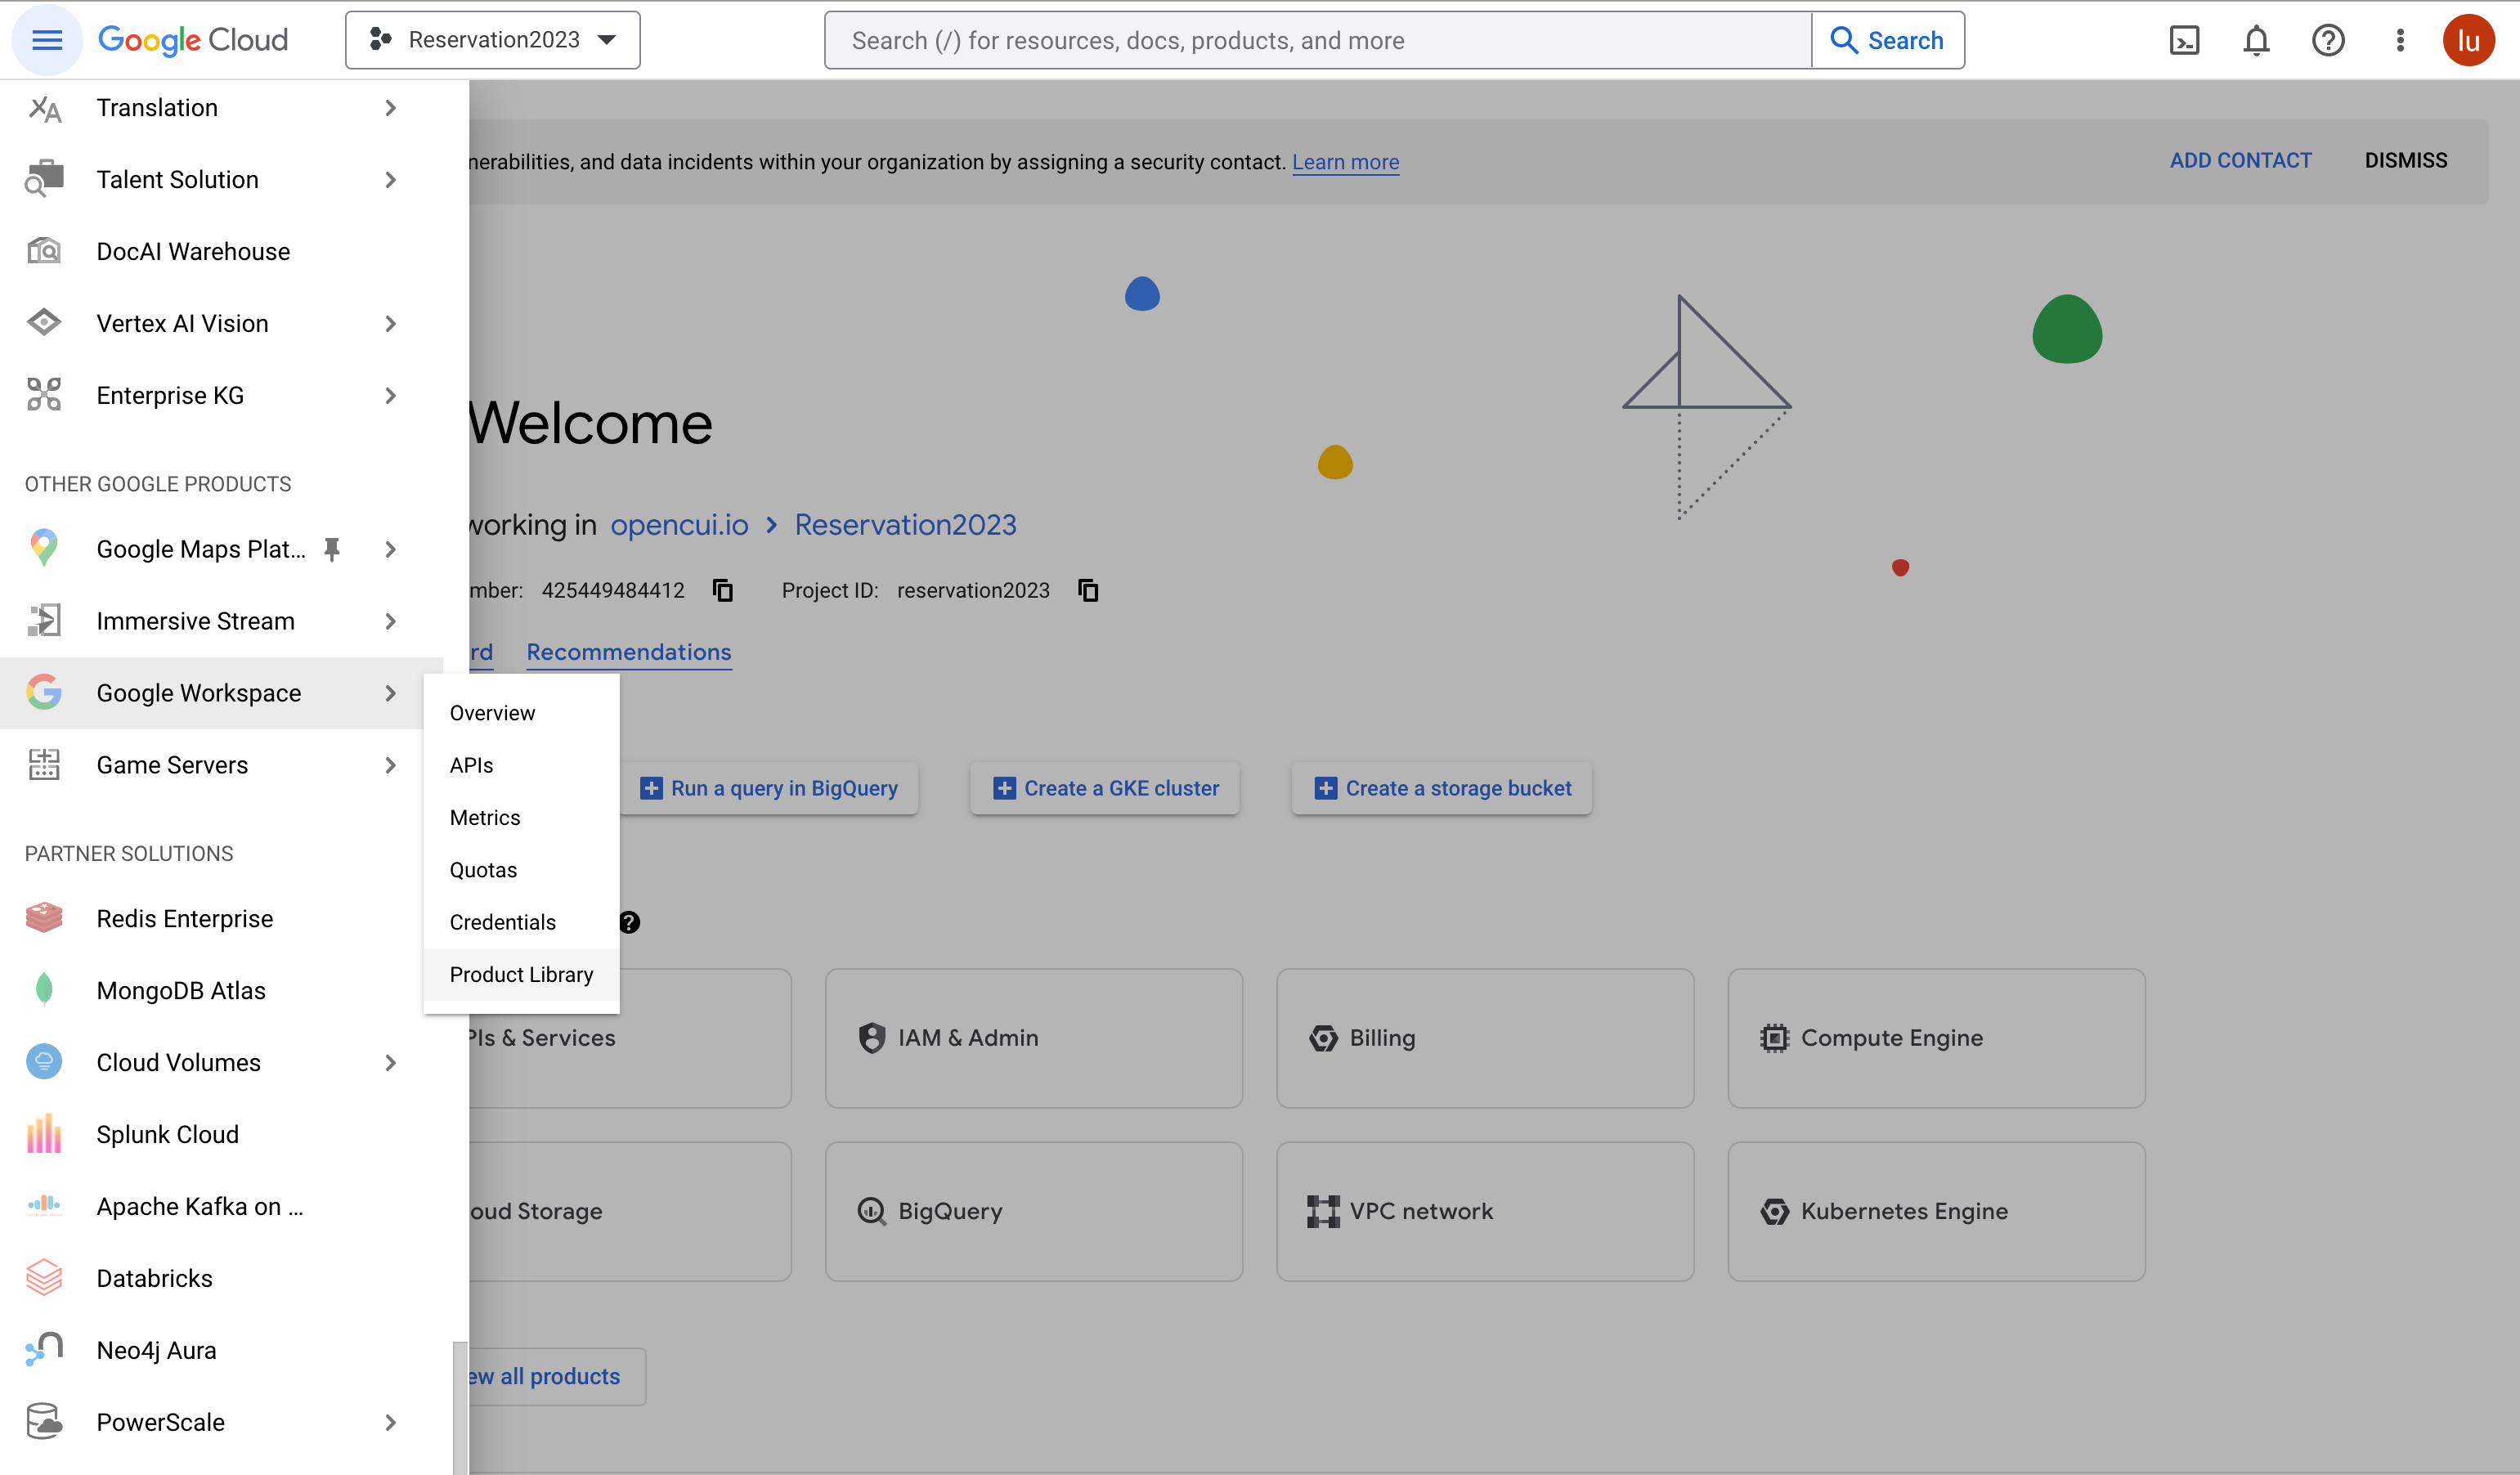
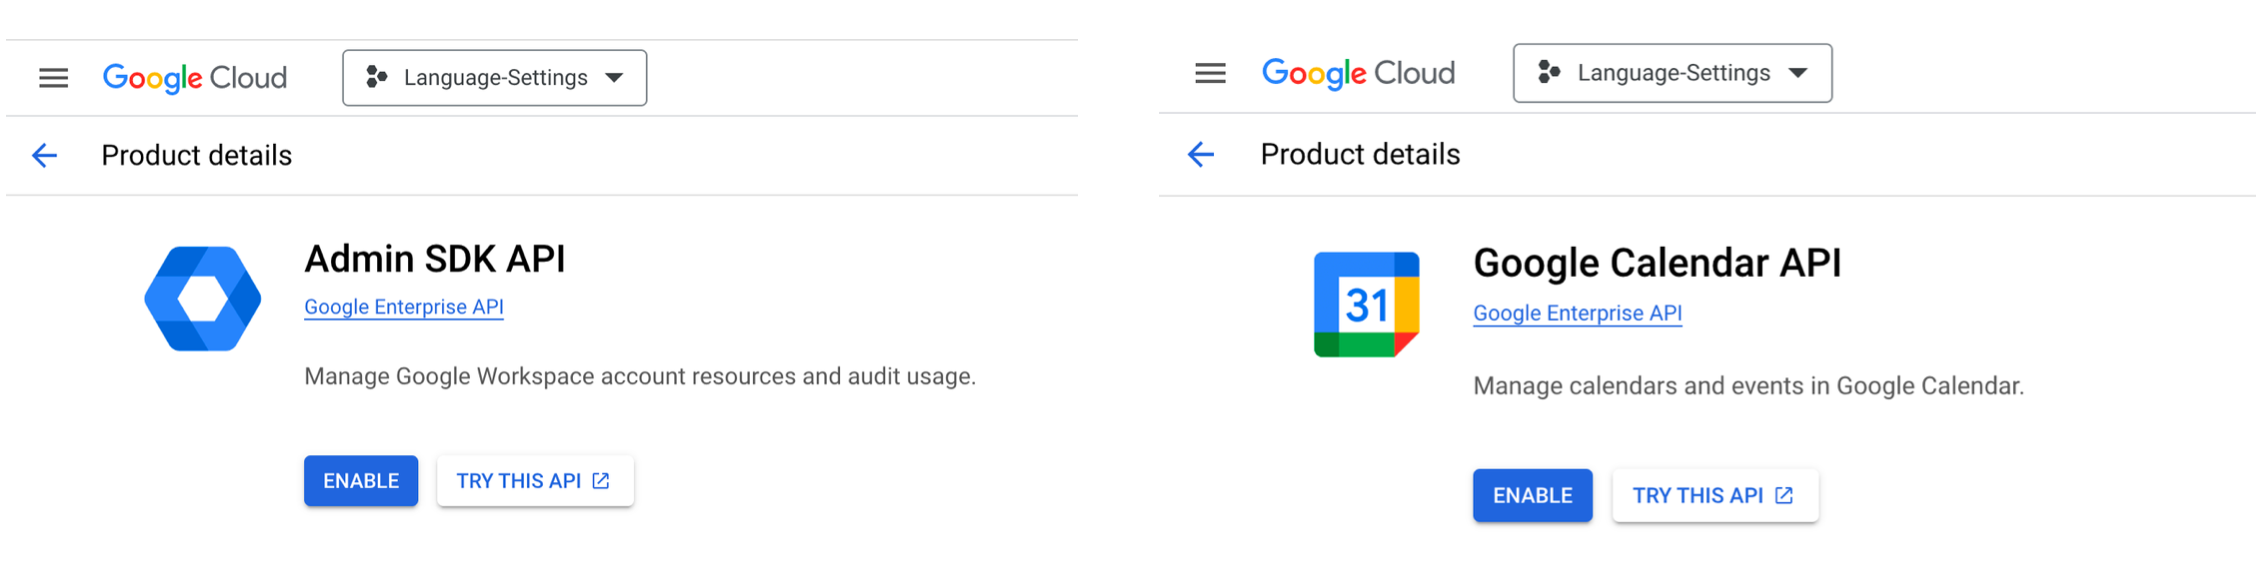
Enable Admin SDK API and Google Calendar API :
- Click the API that you want to turn on.
- On the detail page of this API, click Enable.
- Repeat these steps to enable another.
Set up service account
The Google OAuth 2.0 system supports server-to-server interactions such as those between a web application and a Google service. For this scenario you need a service account, which is an account that belongs to your application instead of to an individual end user. For more information, see Using OAuth 2.0 for Server to Server Applications.
To support server-to-server interactions, first create a service account for your project in the API Console, then delegate domain-wide access to the service account.
Create a service account
If your application runs on Google App Engine, a service account is set up automatically when you create your project.
If your application runs on Google Compute Engine, a service account is also set up automatically when you create your project, but you must specify the scopes that your application needs access to when you create a Google Compute Engine instance. For more information, see Preparing an instance to use service accounts.
If your application doesn't run on Google App Engine or Google Compute Engine, you must obtain these credentials in the Google API Console. To generate service-account credentials, or to view the public credentials that you've already generated, do the following:
1. Create a service account
- Open the Service accounts page.
- If prompted, select a project, or create a new one.
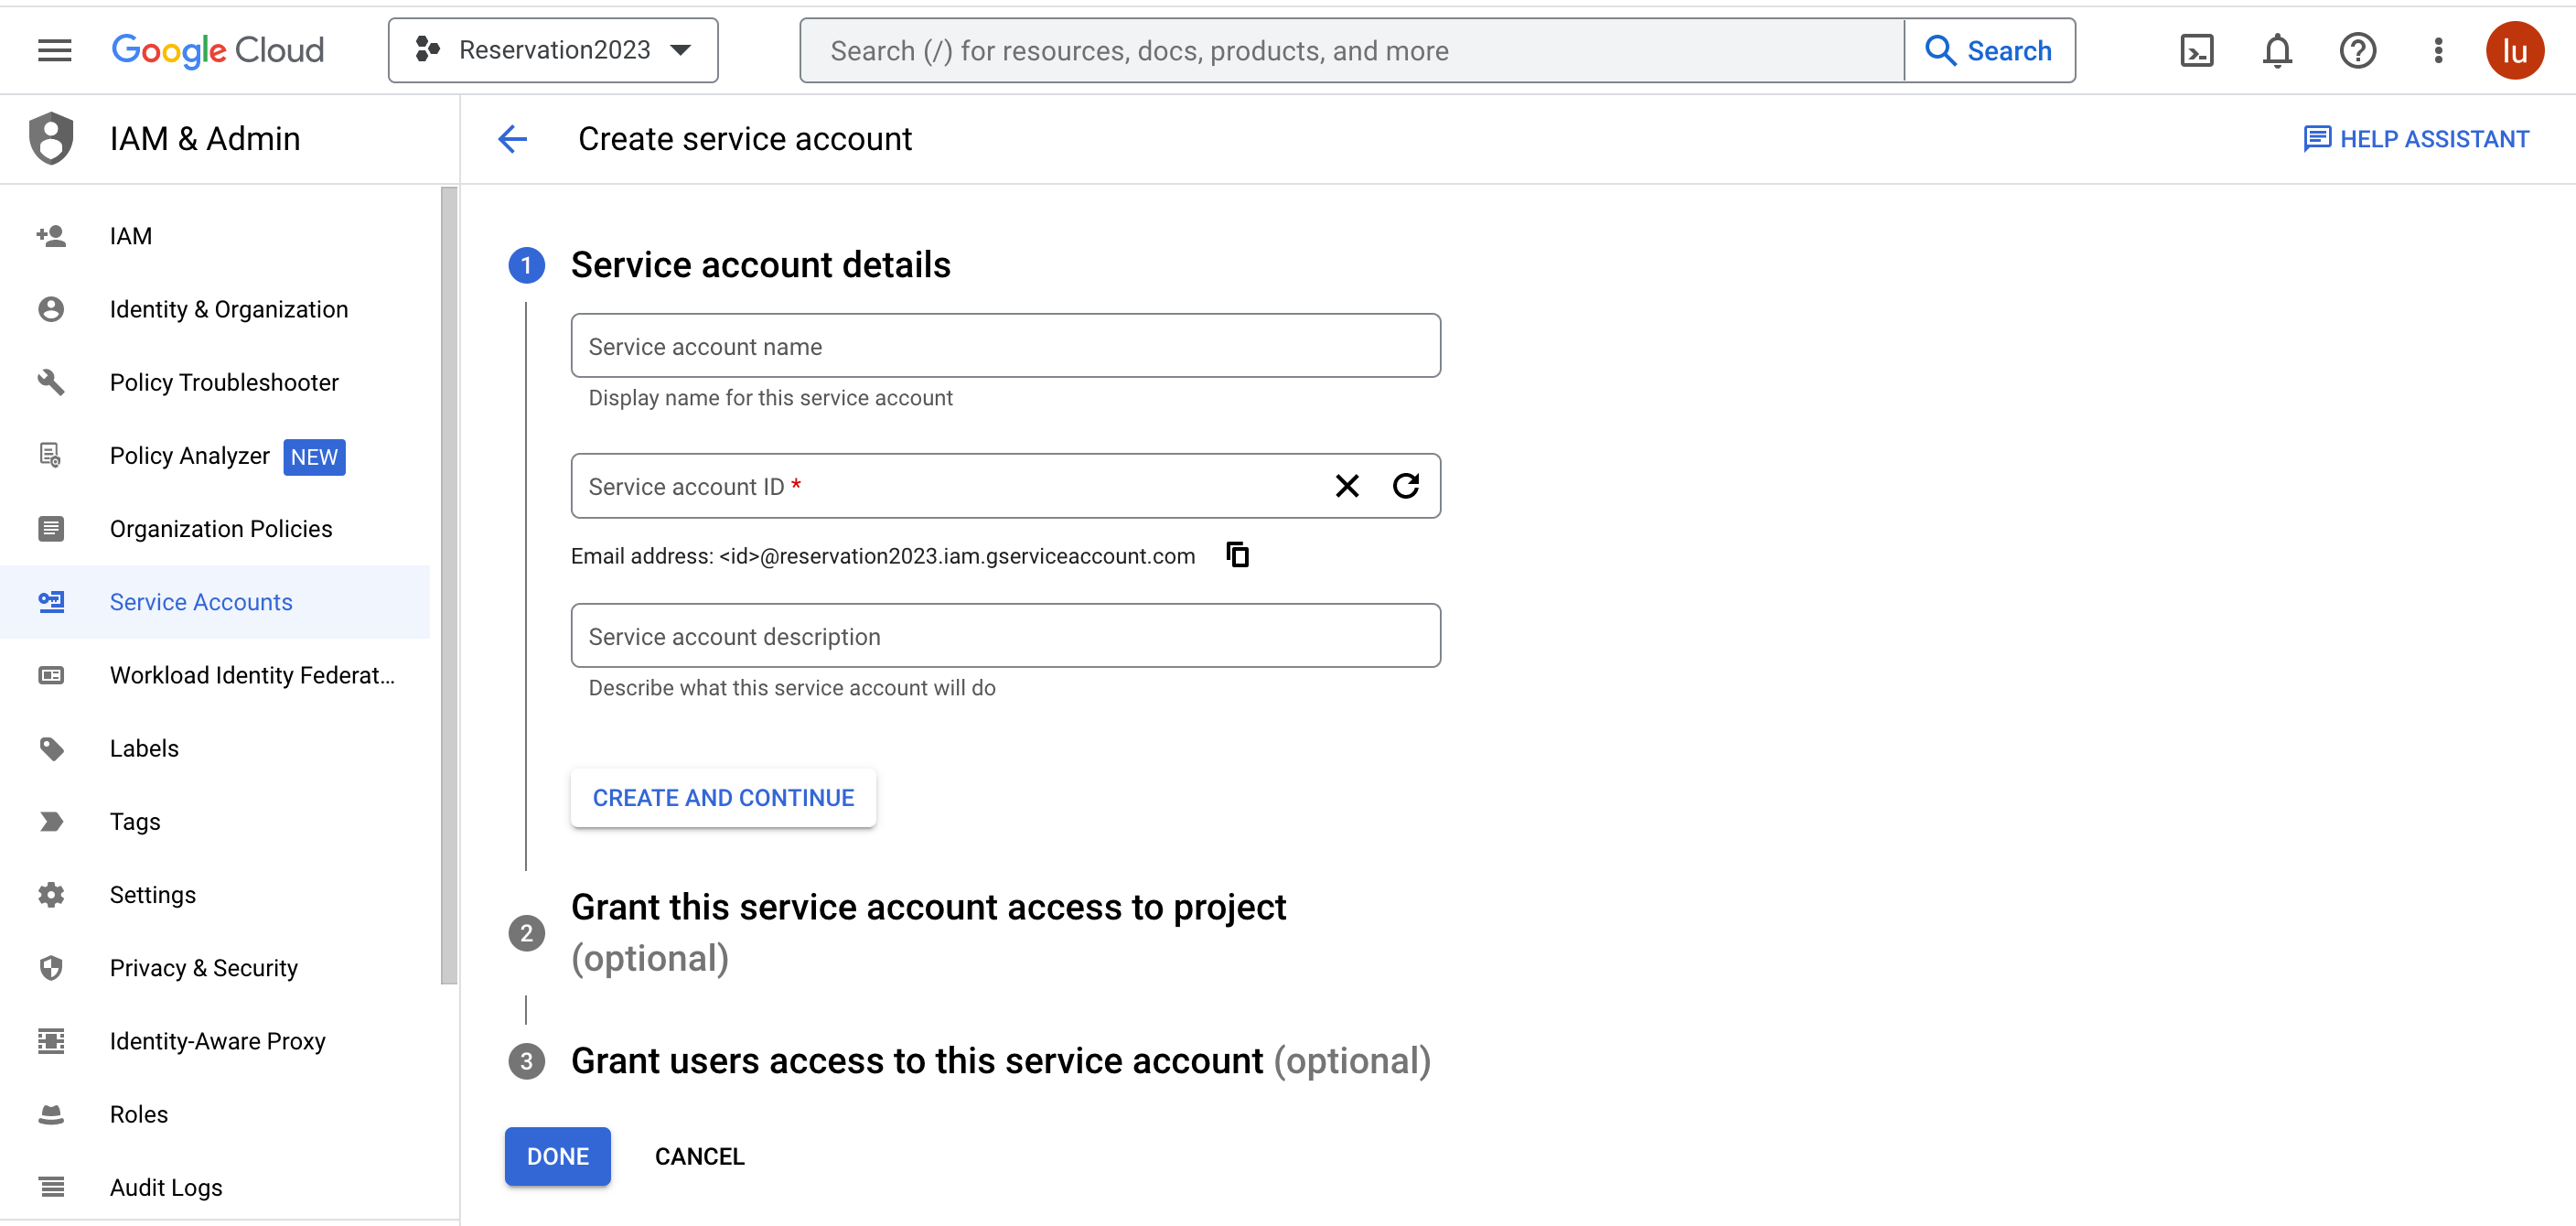
- Click add Create service account.
- Under Service account details, type a name, ID, and description for the service account, then click Create and continue.
- Optional: Under Grant this service account access to project, select the IAM roles to grant to the service account. Click Continue.
- Optional: Under Grant users access to this service account, add the users or groups that are allowed to use and manage the service account.
- Click Done.
2. Create a service account key
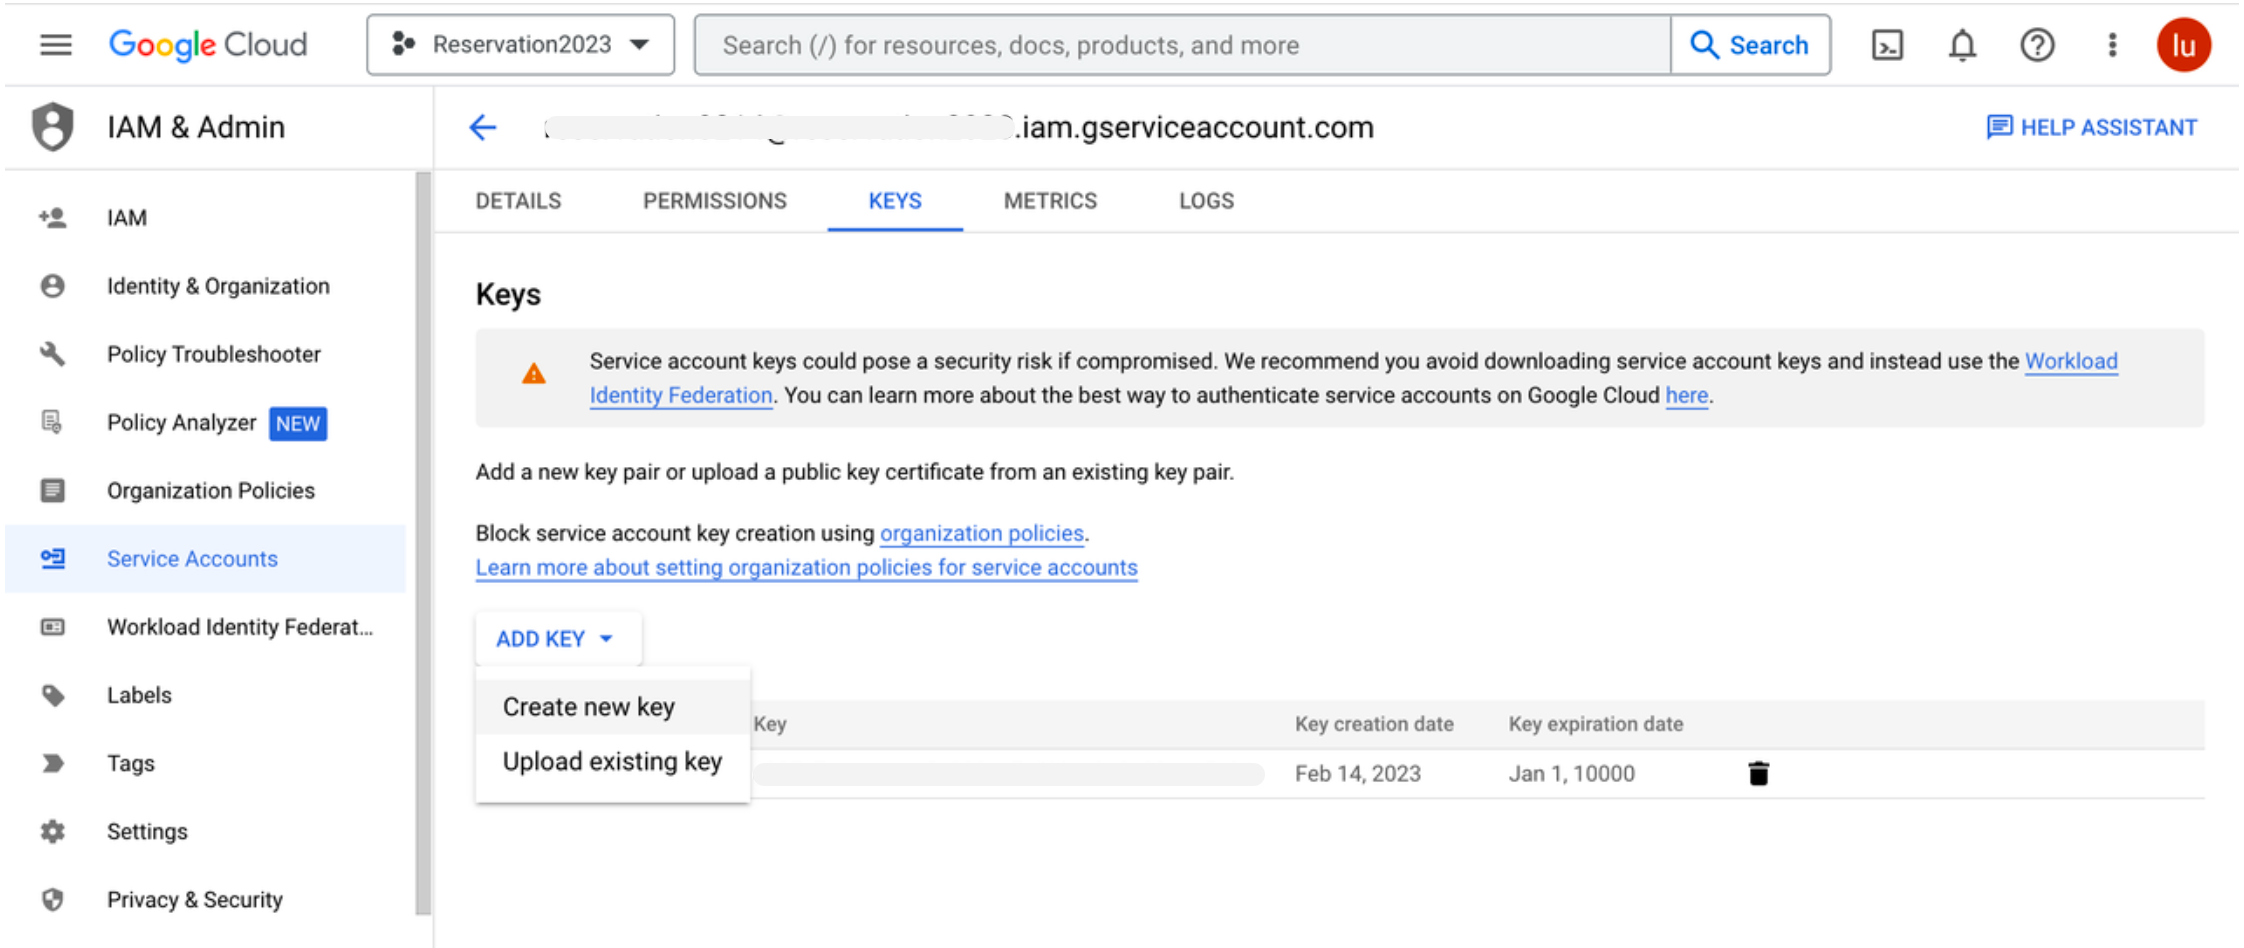
- Click the email address for the service account you created.
- Click the Keys tab.
- In the Add key drop-down list, select Create new key.
- Select JSON key type and click Create. Your new public/private key pair is generated and downloaded to your machine; it serves as the only copy of the private key. You are responsible for storing it securely. If you lose this key pair, you will need to generate a new one.
You can return to the API Console at any time to view the email address, public key fingerprints, and other information, or to generate additional public/private key pairs.
Delegate domain-wide authority to service account
To delegate domain-wide authority to a service account, a super administrator of the Google Workspace domain must complete the following steps:
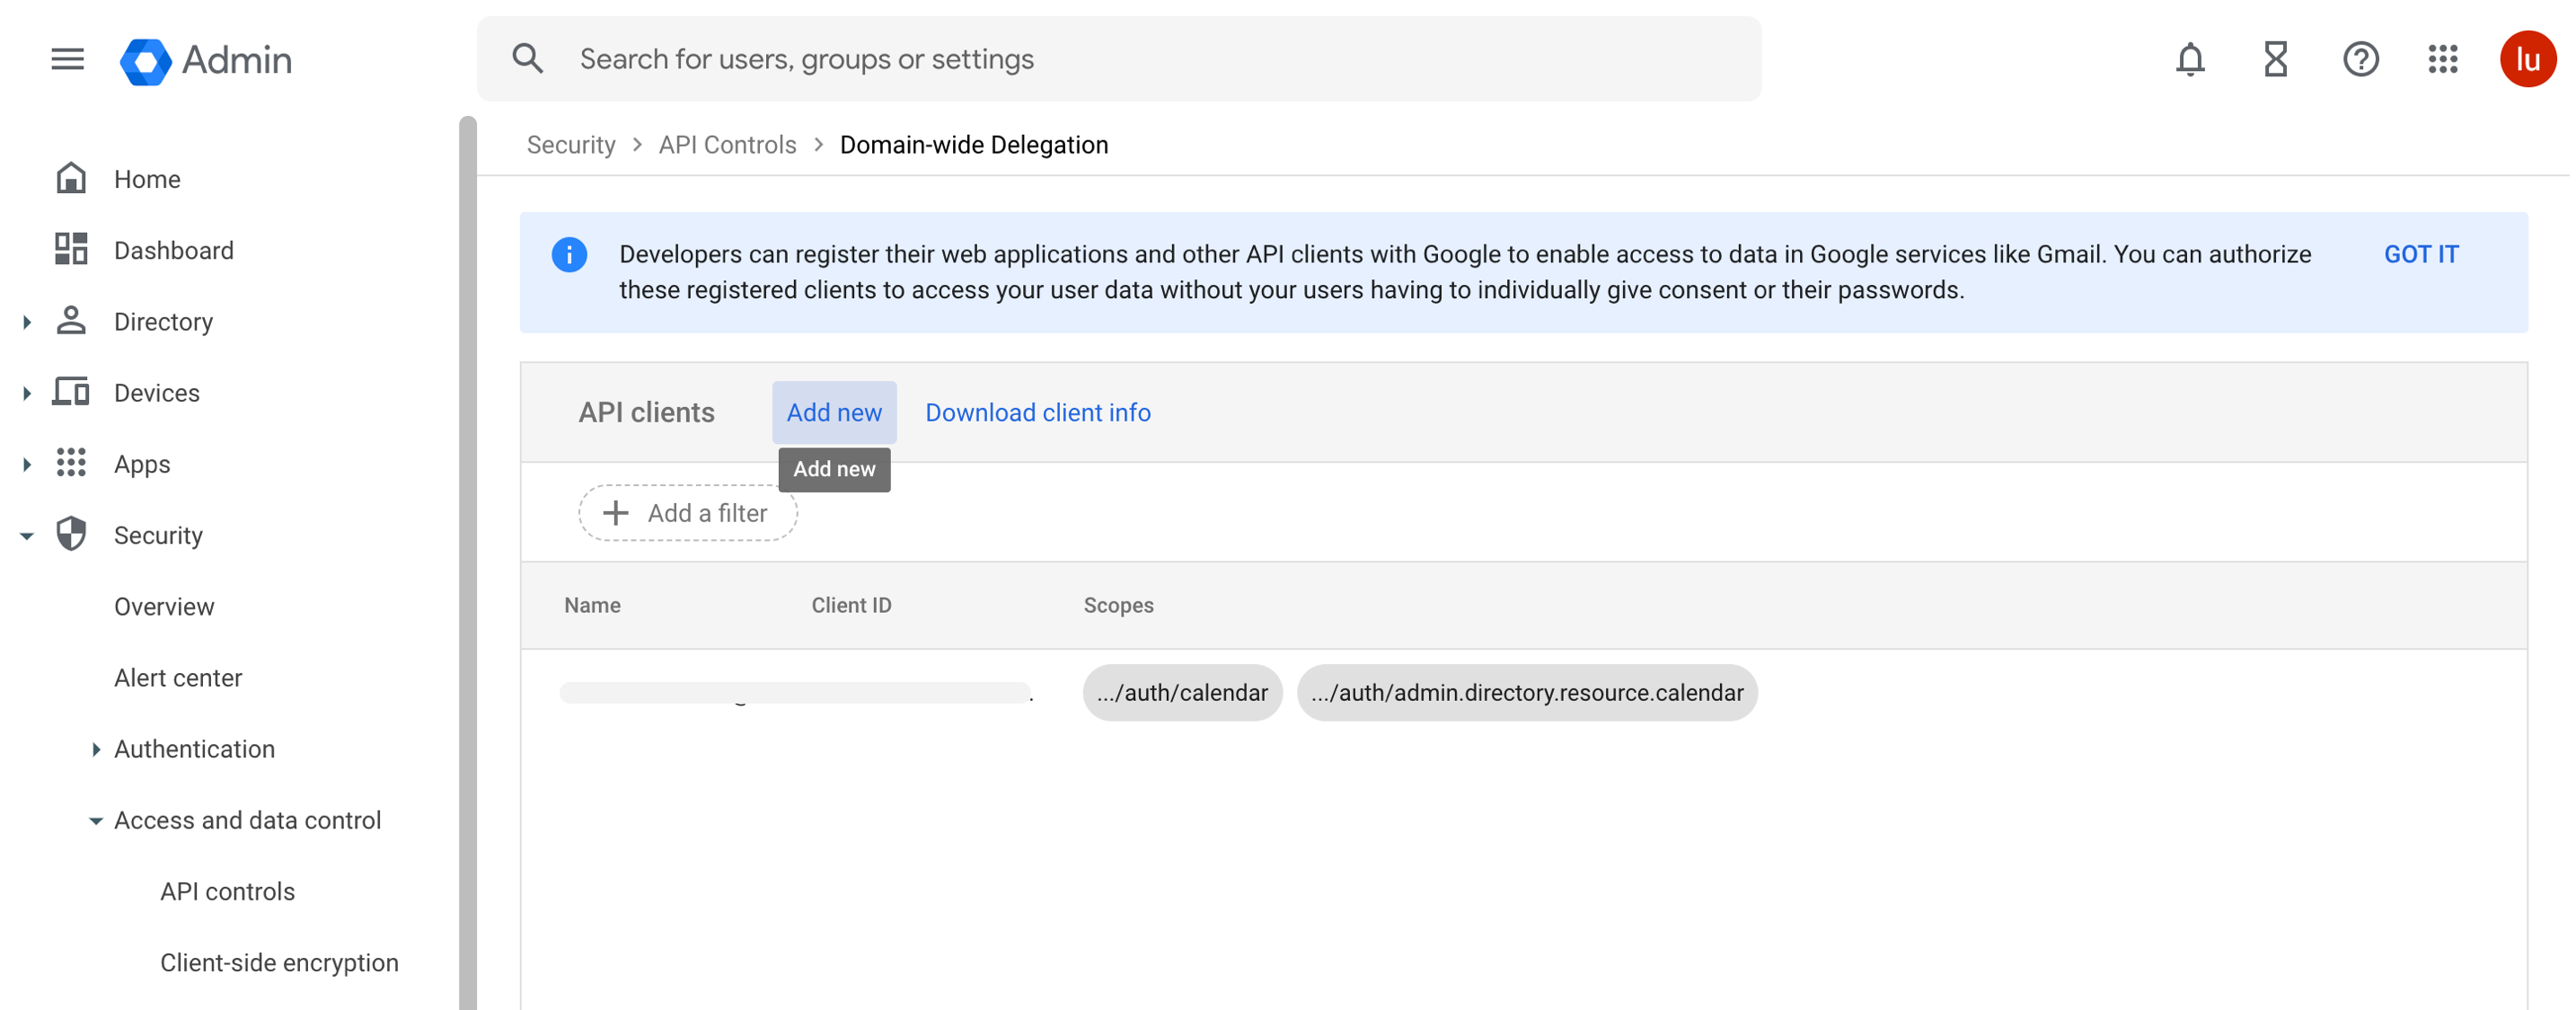
From your Google Workspace domain's Admin console, go to Menu > Security > Access and data control > API Controls.
In the Domain wide delegation pane, select Manage Domain Wide Delegation.

Click Add new.
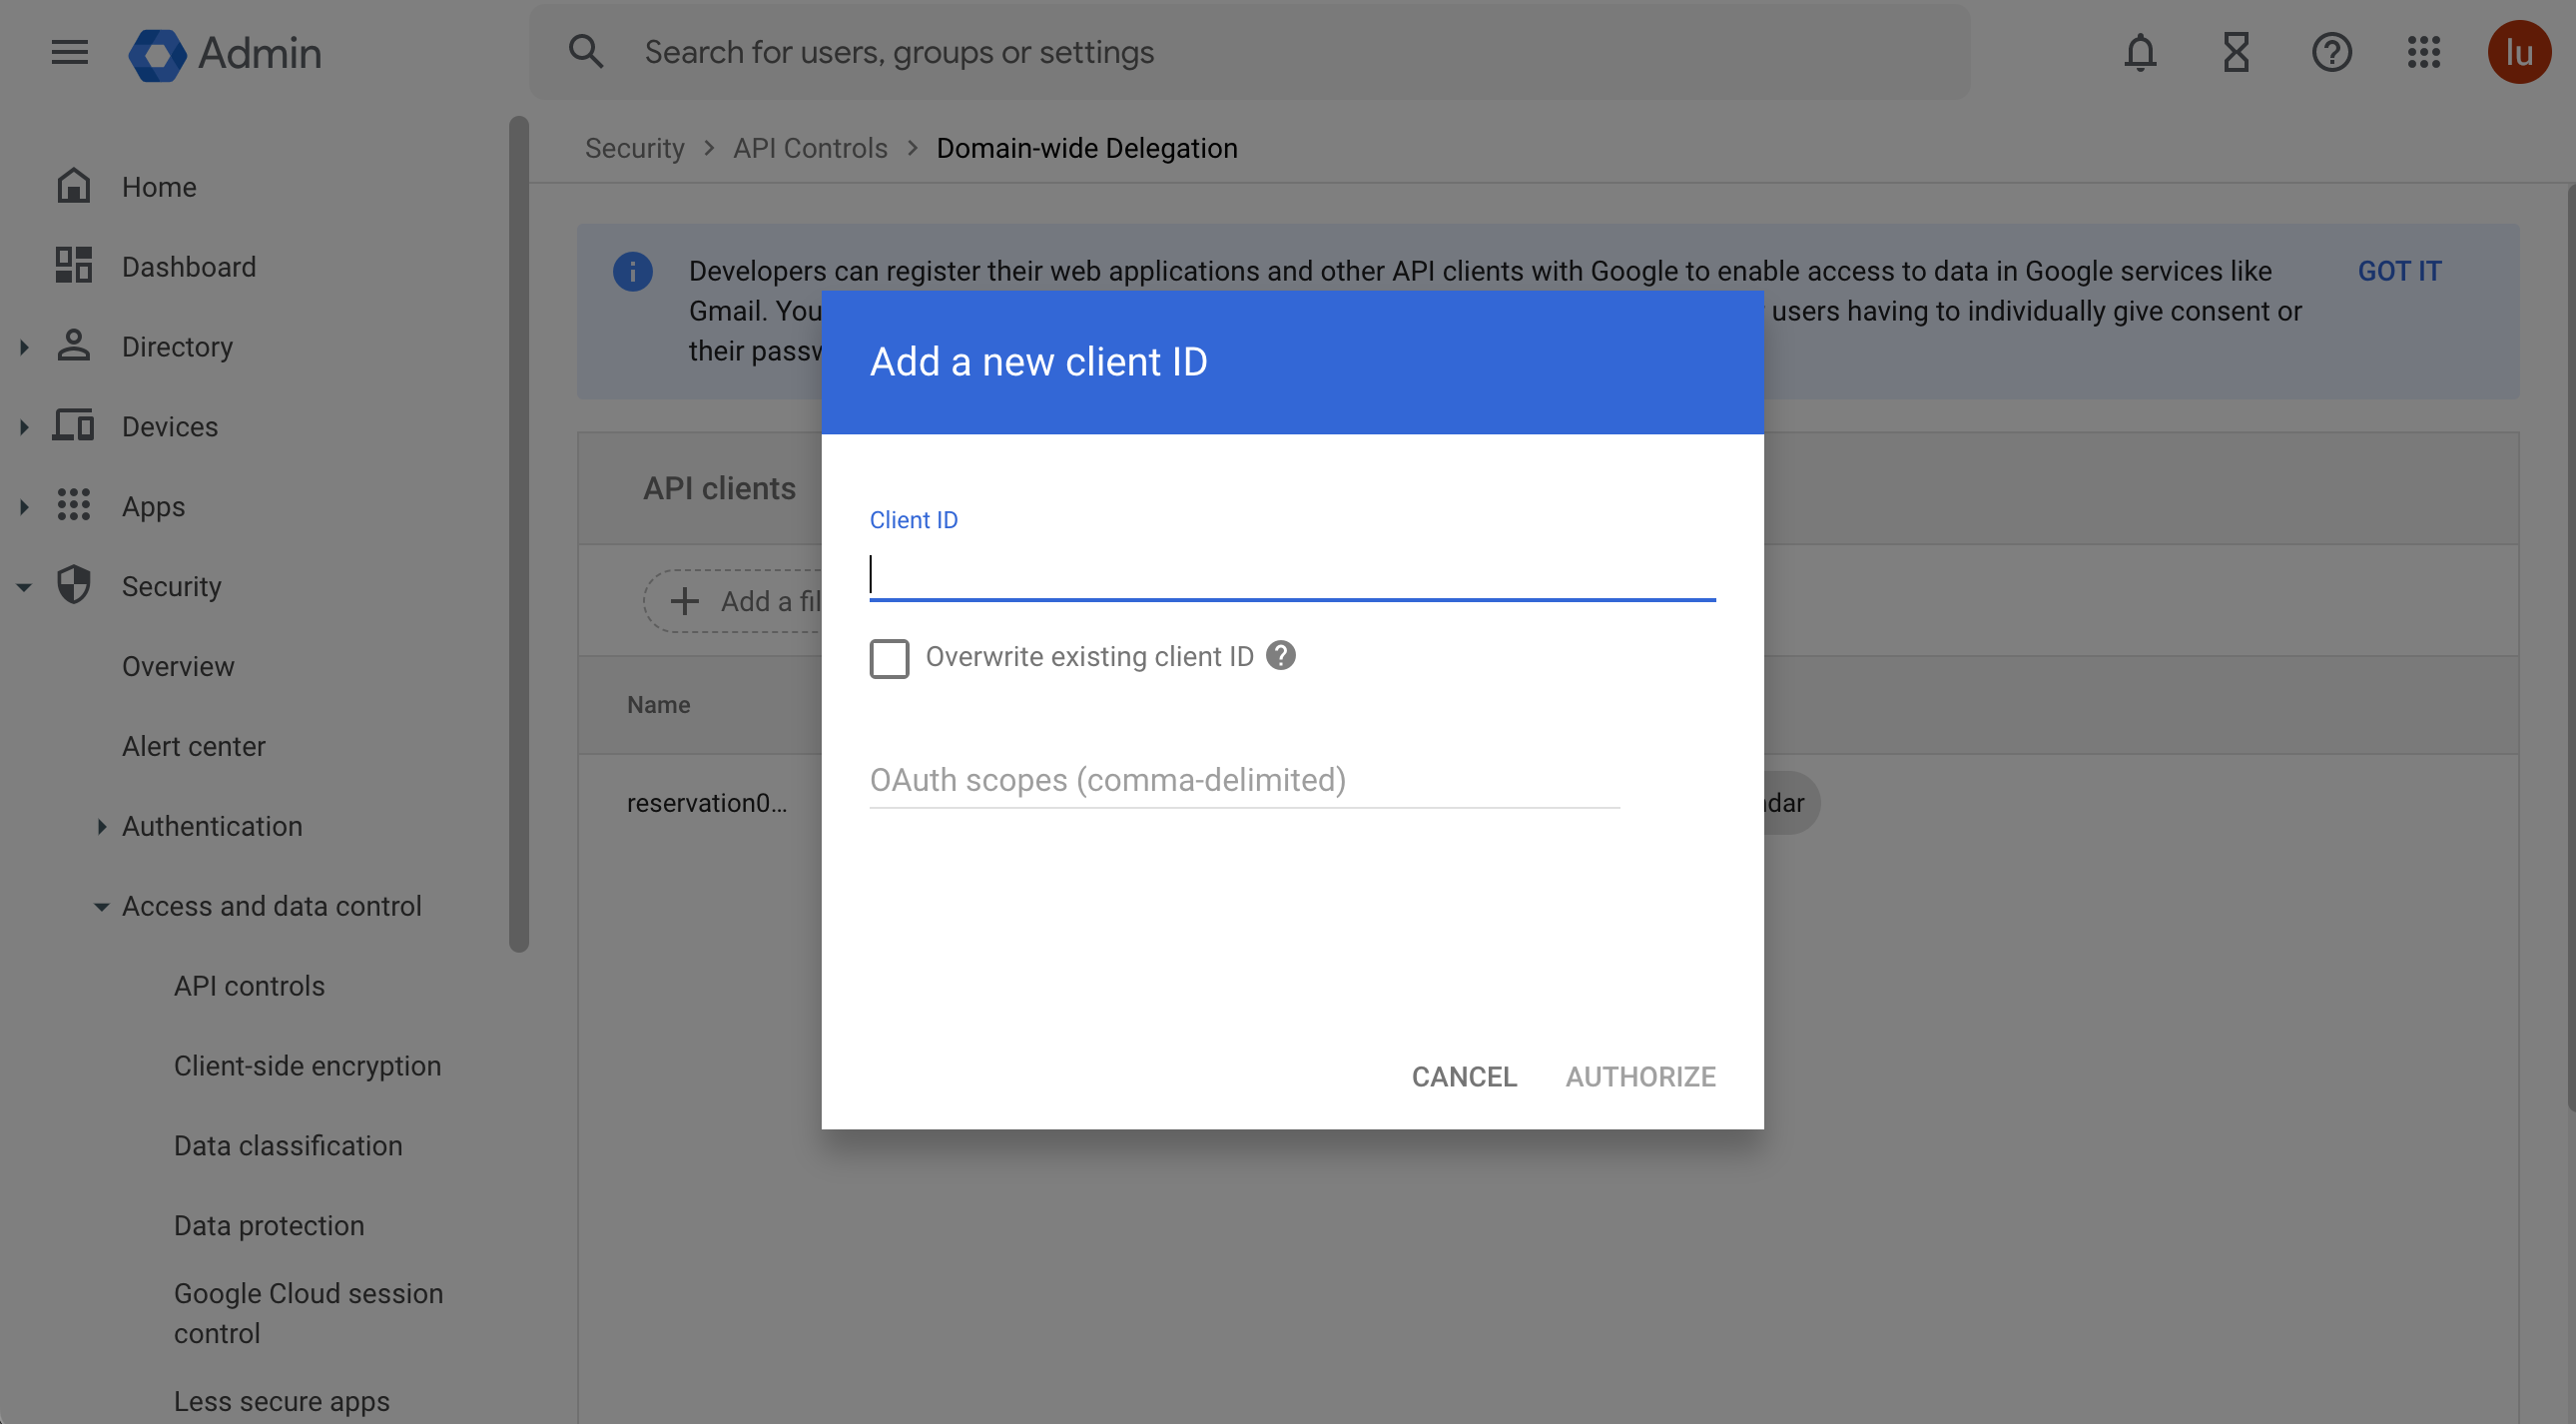
In the Add a new client ID popup window:
- In the Client ID field, enter the service account's Client ID. You can find your service account's client ID (OAuth 2 Client ID) in the Service accounts page.
- In the OAuth scopes (comma-delimited) field, enter the list of scopes:
https://www.googleapis.com/auth/calendar https://www.googleapis.com/auth/admin.directory.resource.calendar - Click Authorize.
The app should be available for use within an hour, but might take up to 24 hours.
Set up Google Calendar reservation provider
To use Google Calendar Reservation Provider, you can follow steps in Wire and Configure to accomplish the following:
- Declare service interface services.opencui.reservation into your chatbot.
- Wire Google Calendar Reservation Provider (services.opencui.googlCalendarReservation) to this service interface.
- Configuration the integration.
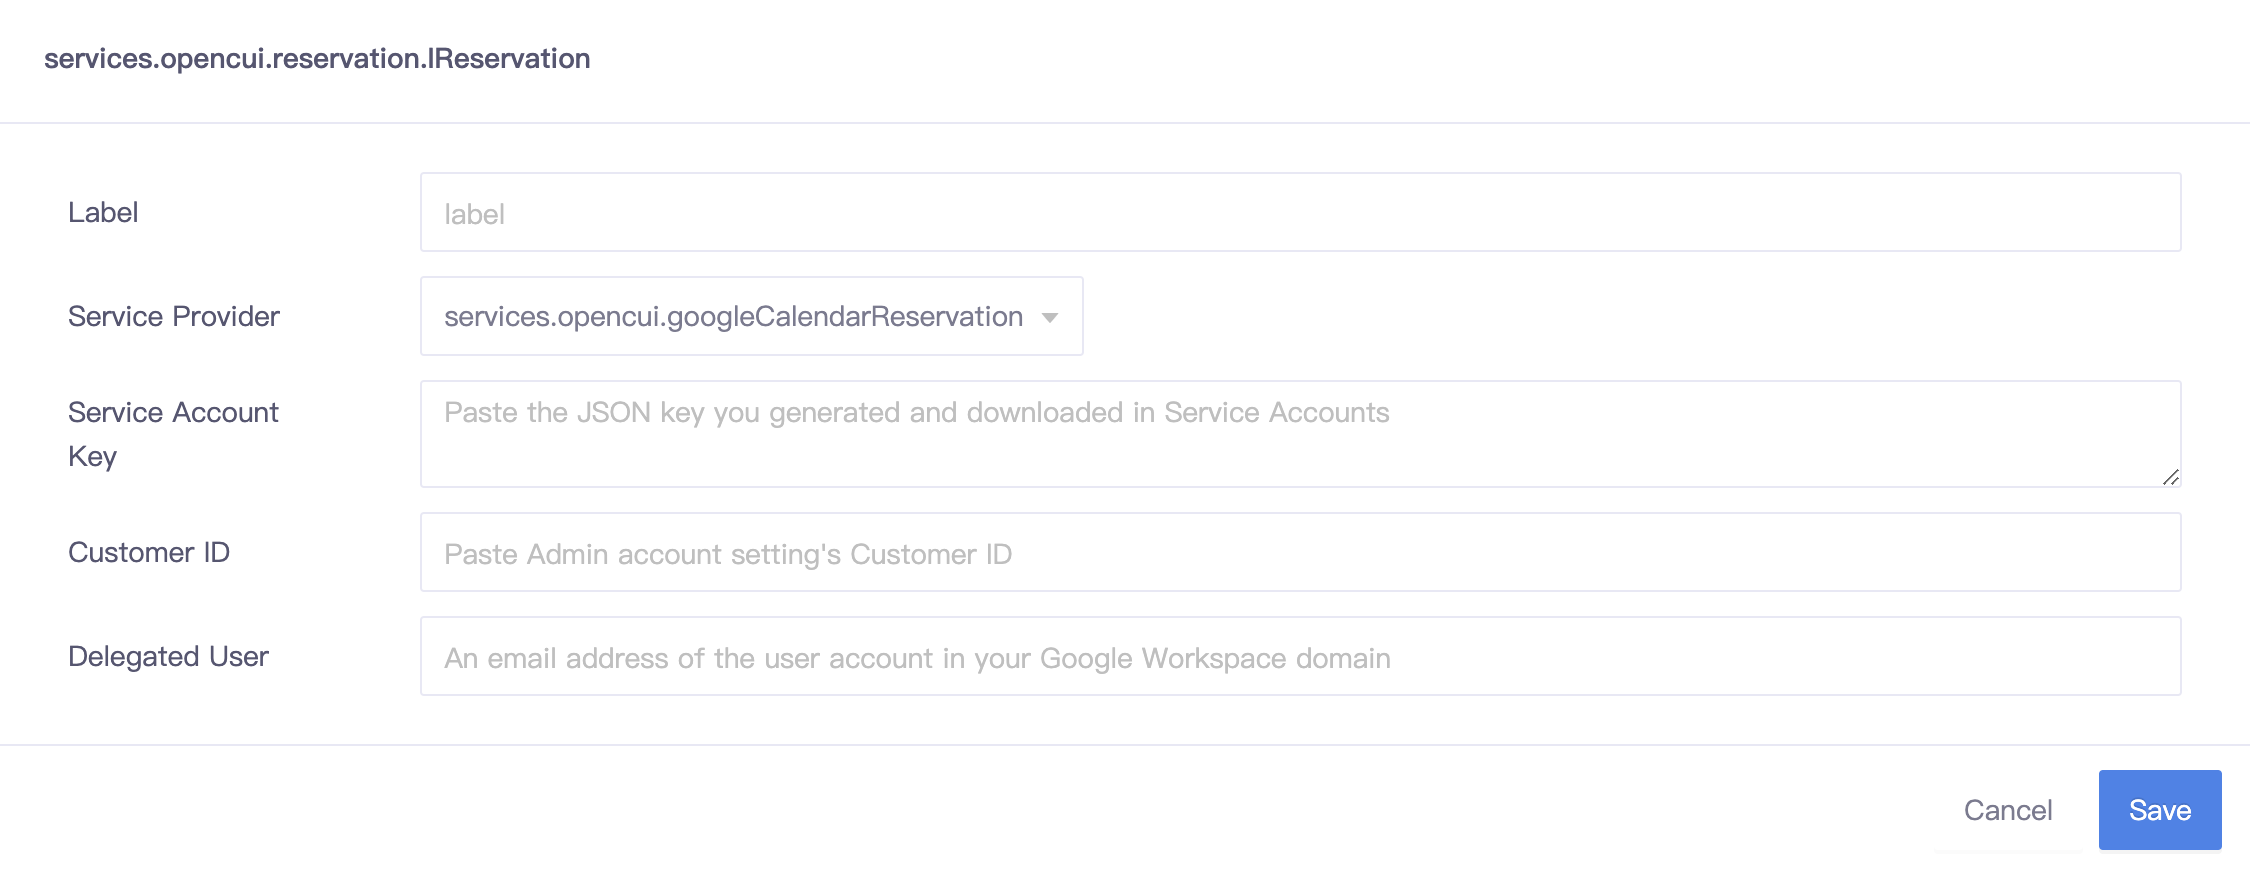
To set up the configuration information:
Label: the integration label.
Service Provider: must be services.opencui.googleCalendarReservation.
Service Account Key: the JSON key you generated and downloaded to your machine in step Create a service account key.
Customer ID: Admin account setting's Customer ID.
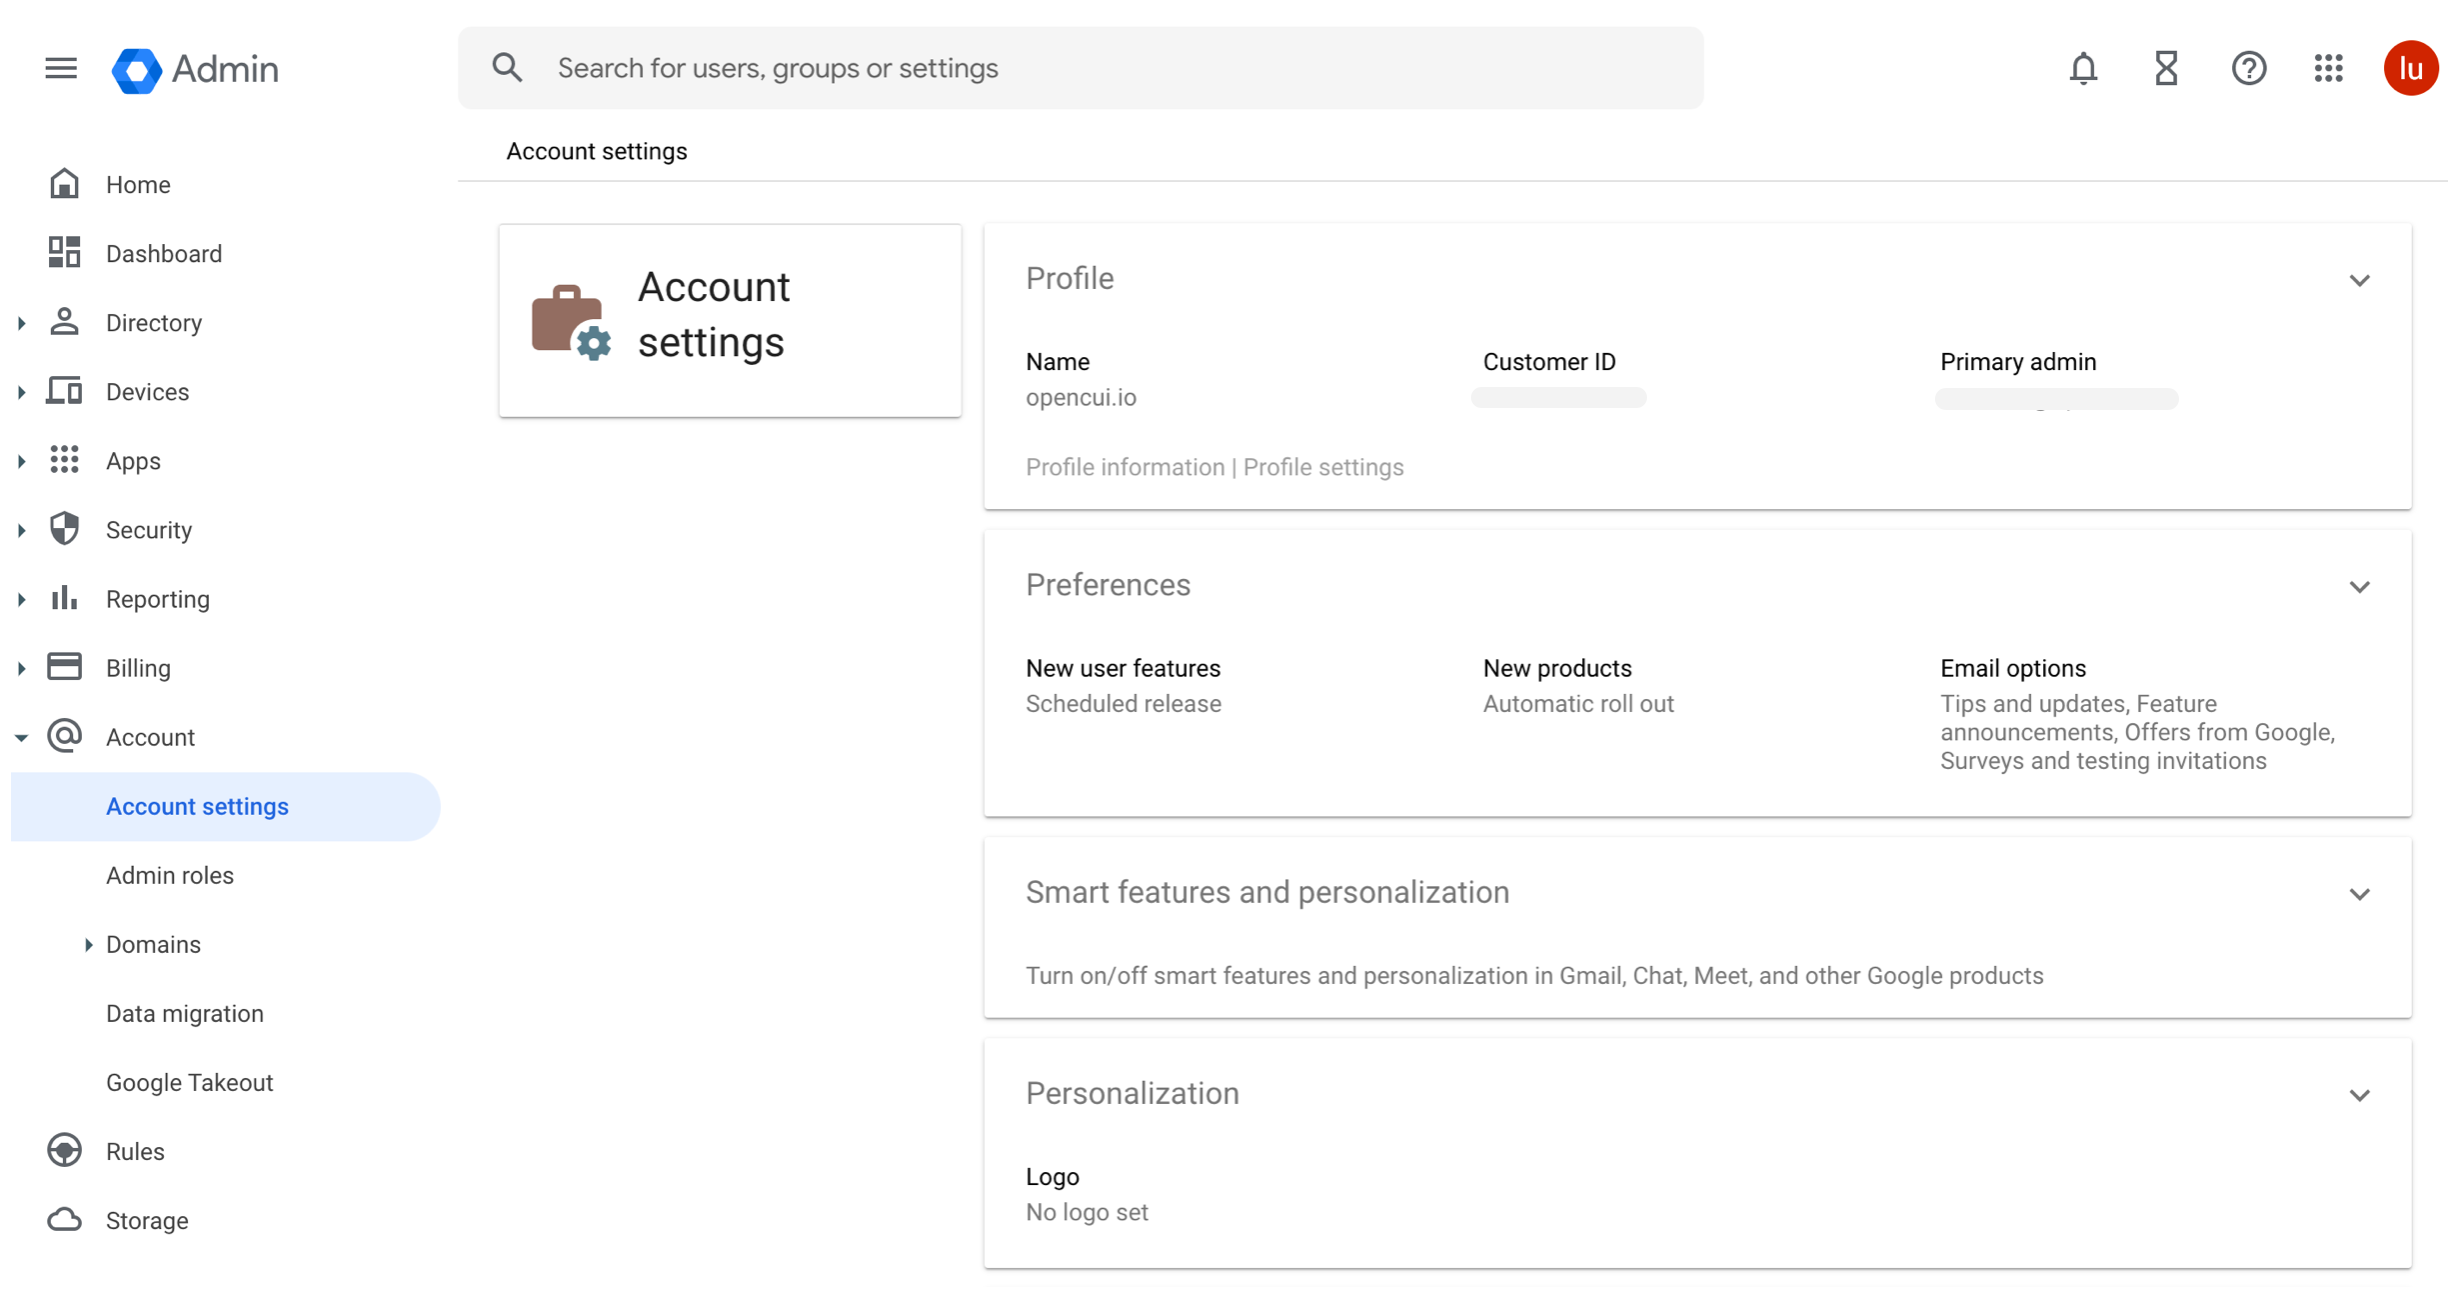
- From your Google Workspace domain's Admin console, go to Menu > Account > Account settings.
- In the Profile pane, copy Customer ID.
Delegated User: specify an email address of the user account in your Google Workspace domain that the service account will impersonate. For example: user@example.com.
Resources management
Resources in Google Calendar
Set up Calendar so your customers can book your domin shared resources, such as conference rooms, tables in restaurant, doctors in hospital, hairdressers, or whatever your company provides for customers. Start by listing all the buildings in your company. Google Calendar uses buildings as the foundation for all your resources. For more information about calendar resources, see Create buildings, features & Calendar resources.
Now sign in to your Google Admin console, do the following:
1. Add buildings
In the Admin console, go to Menu > Directory > Buildings and resources, click Manage resources.
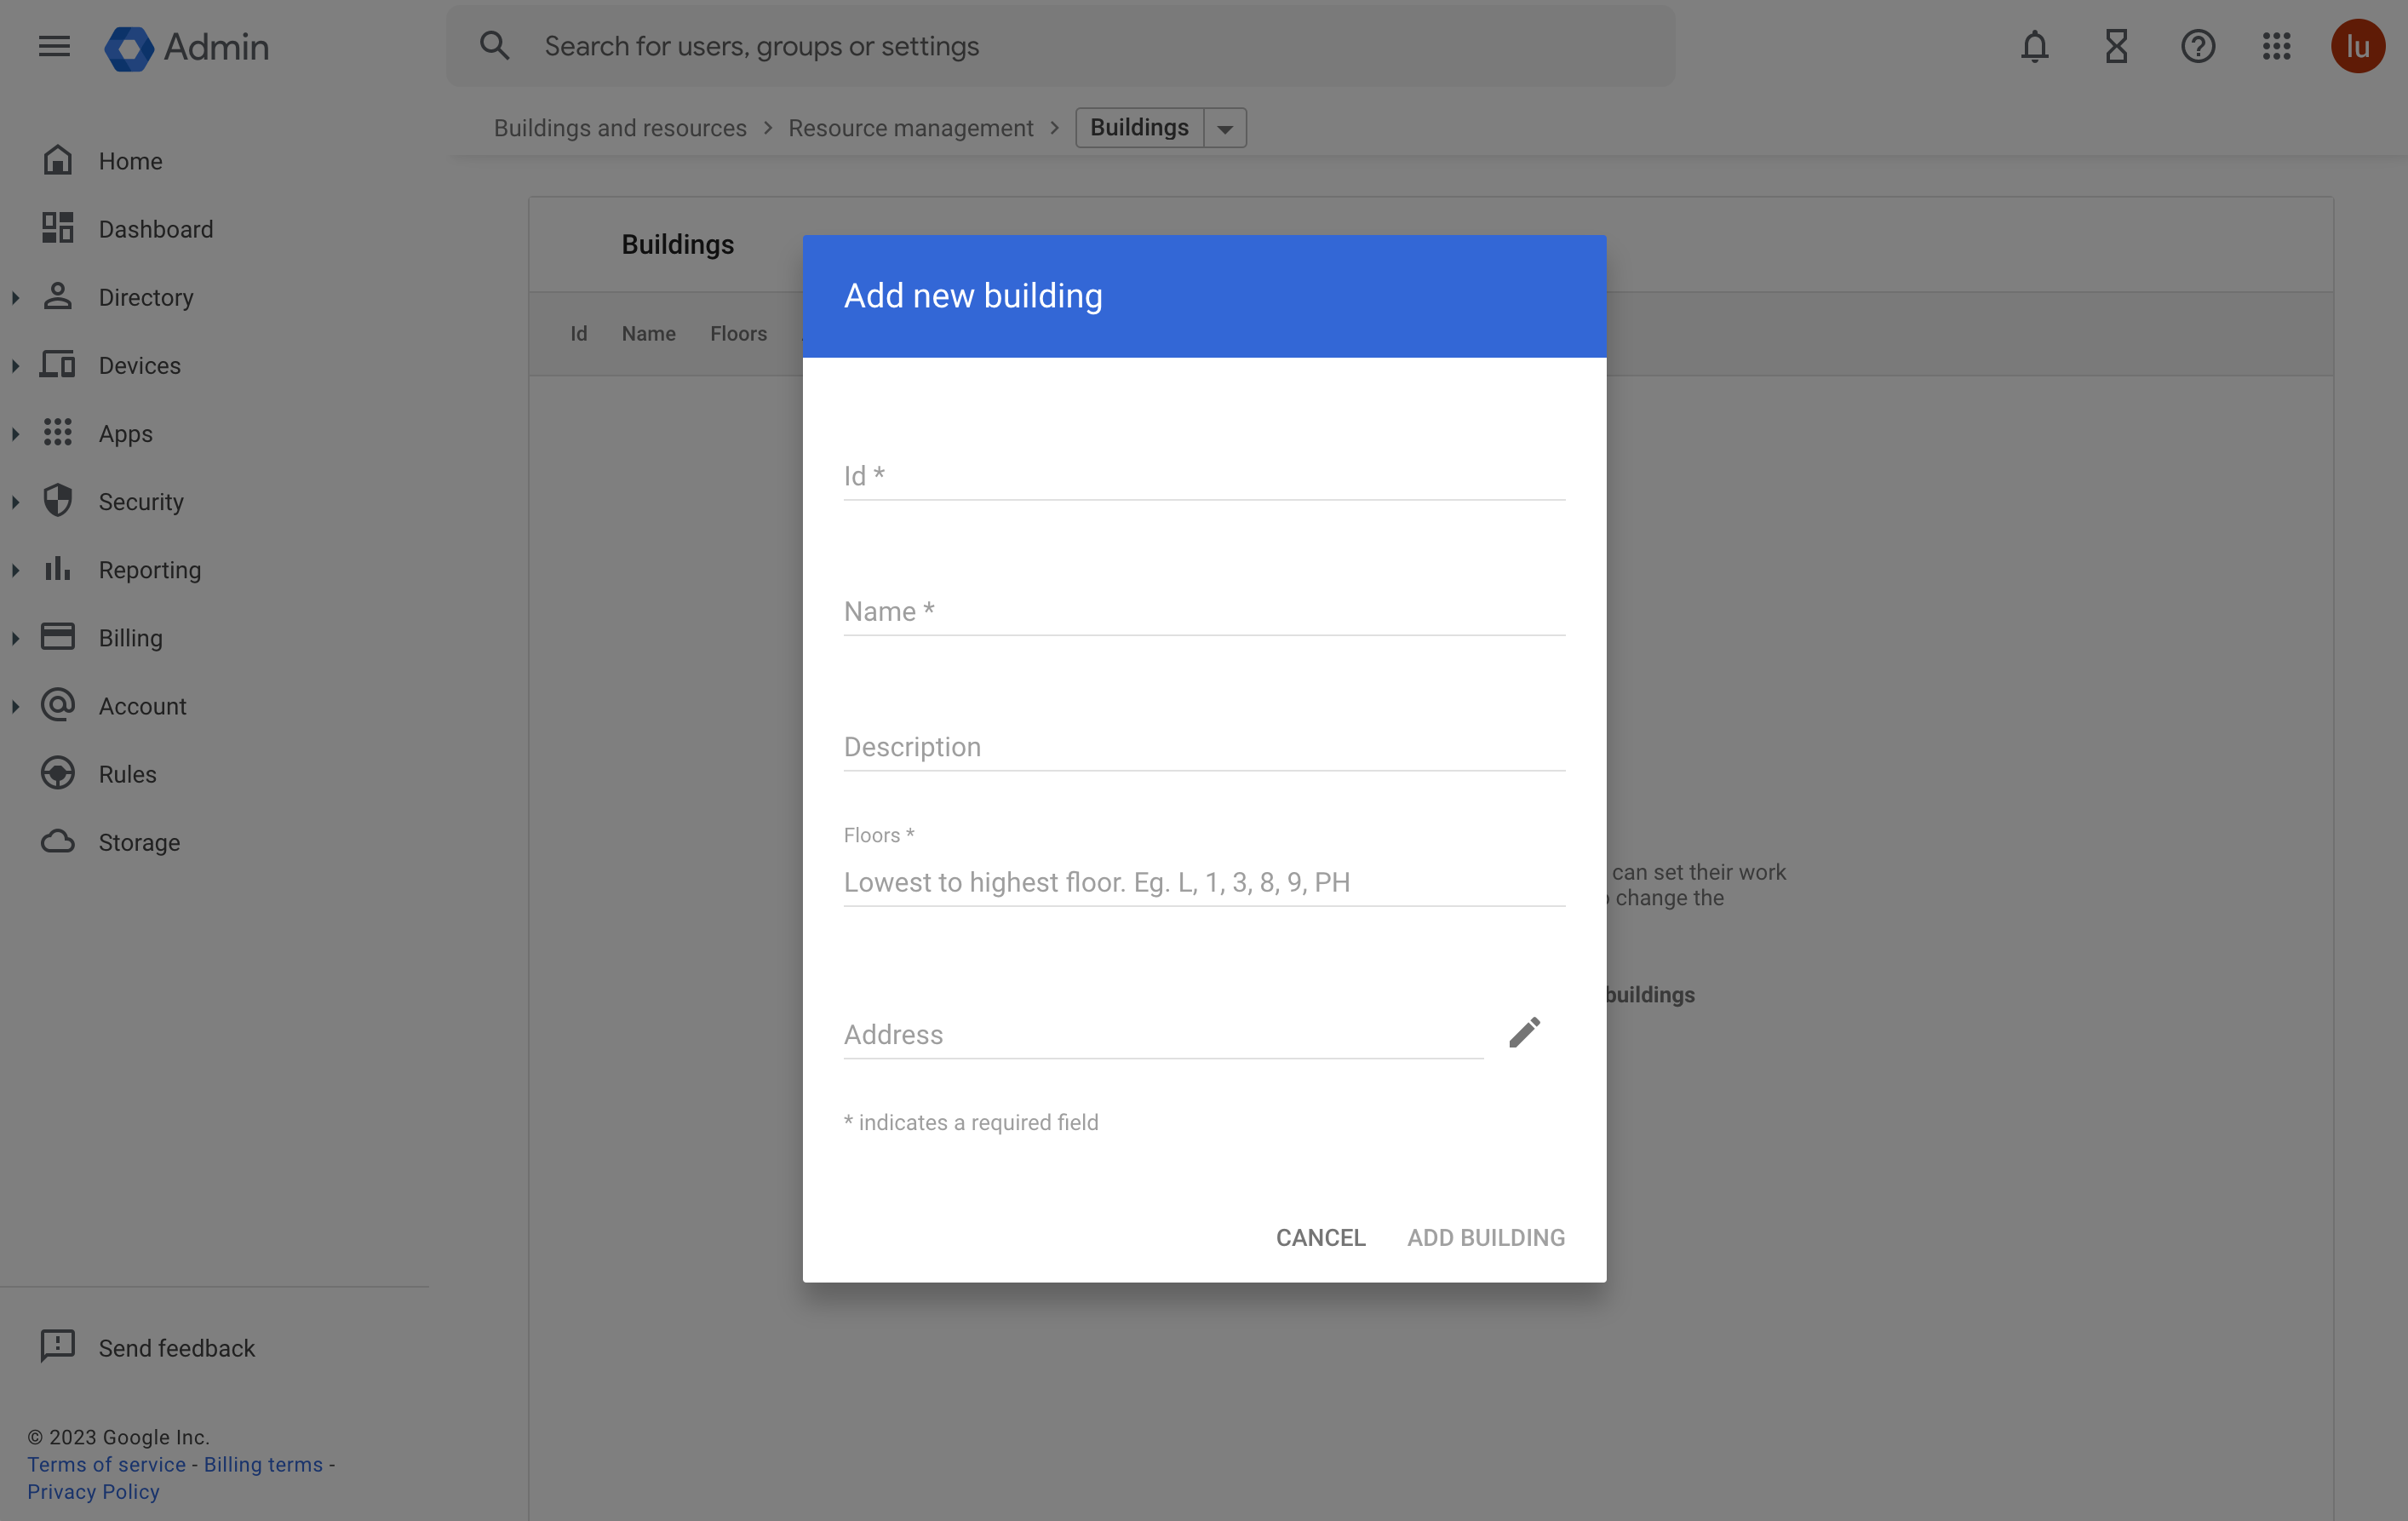
In the Manage resources section, click Add building.
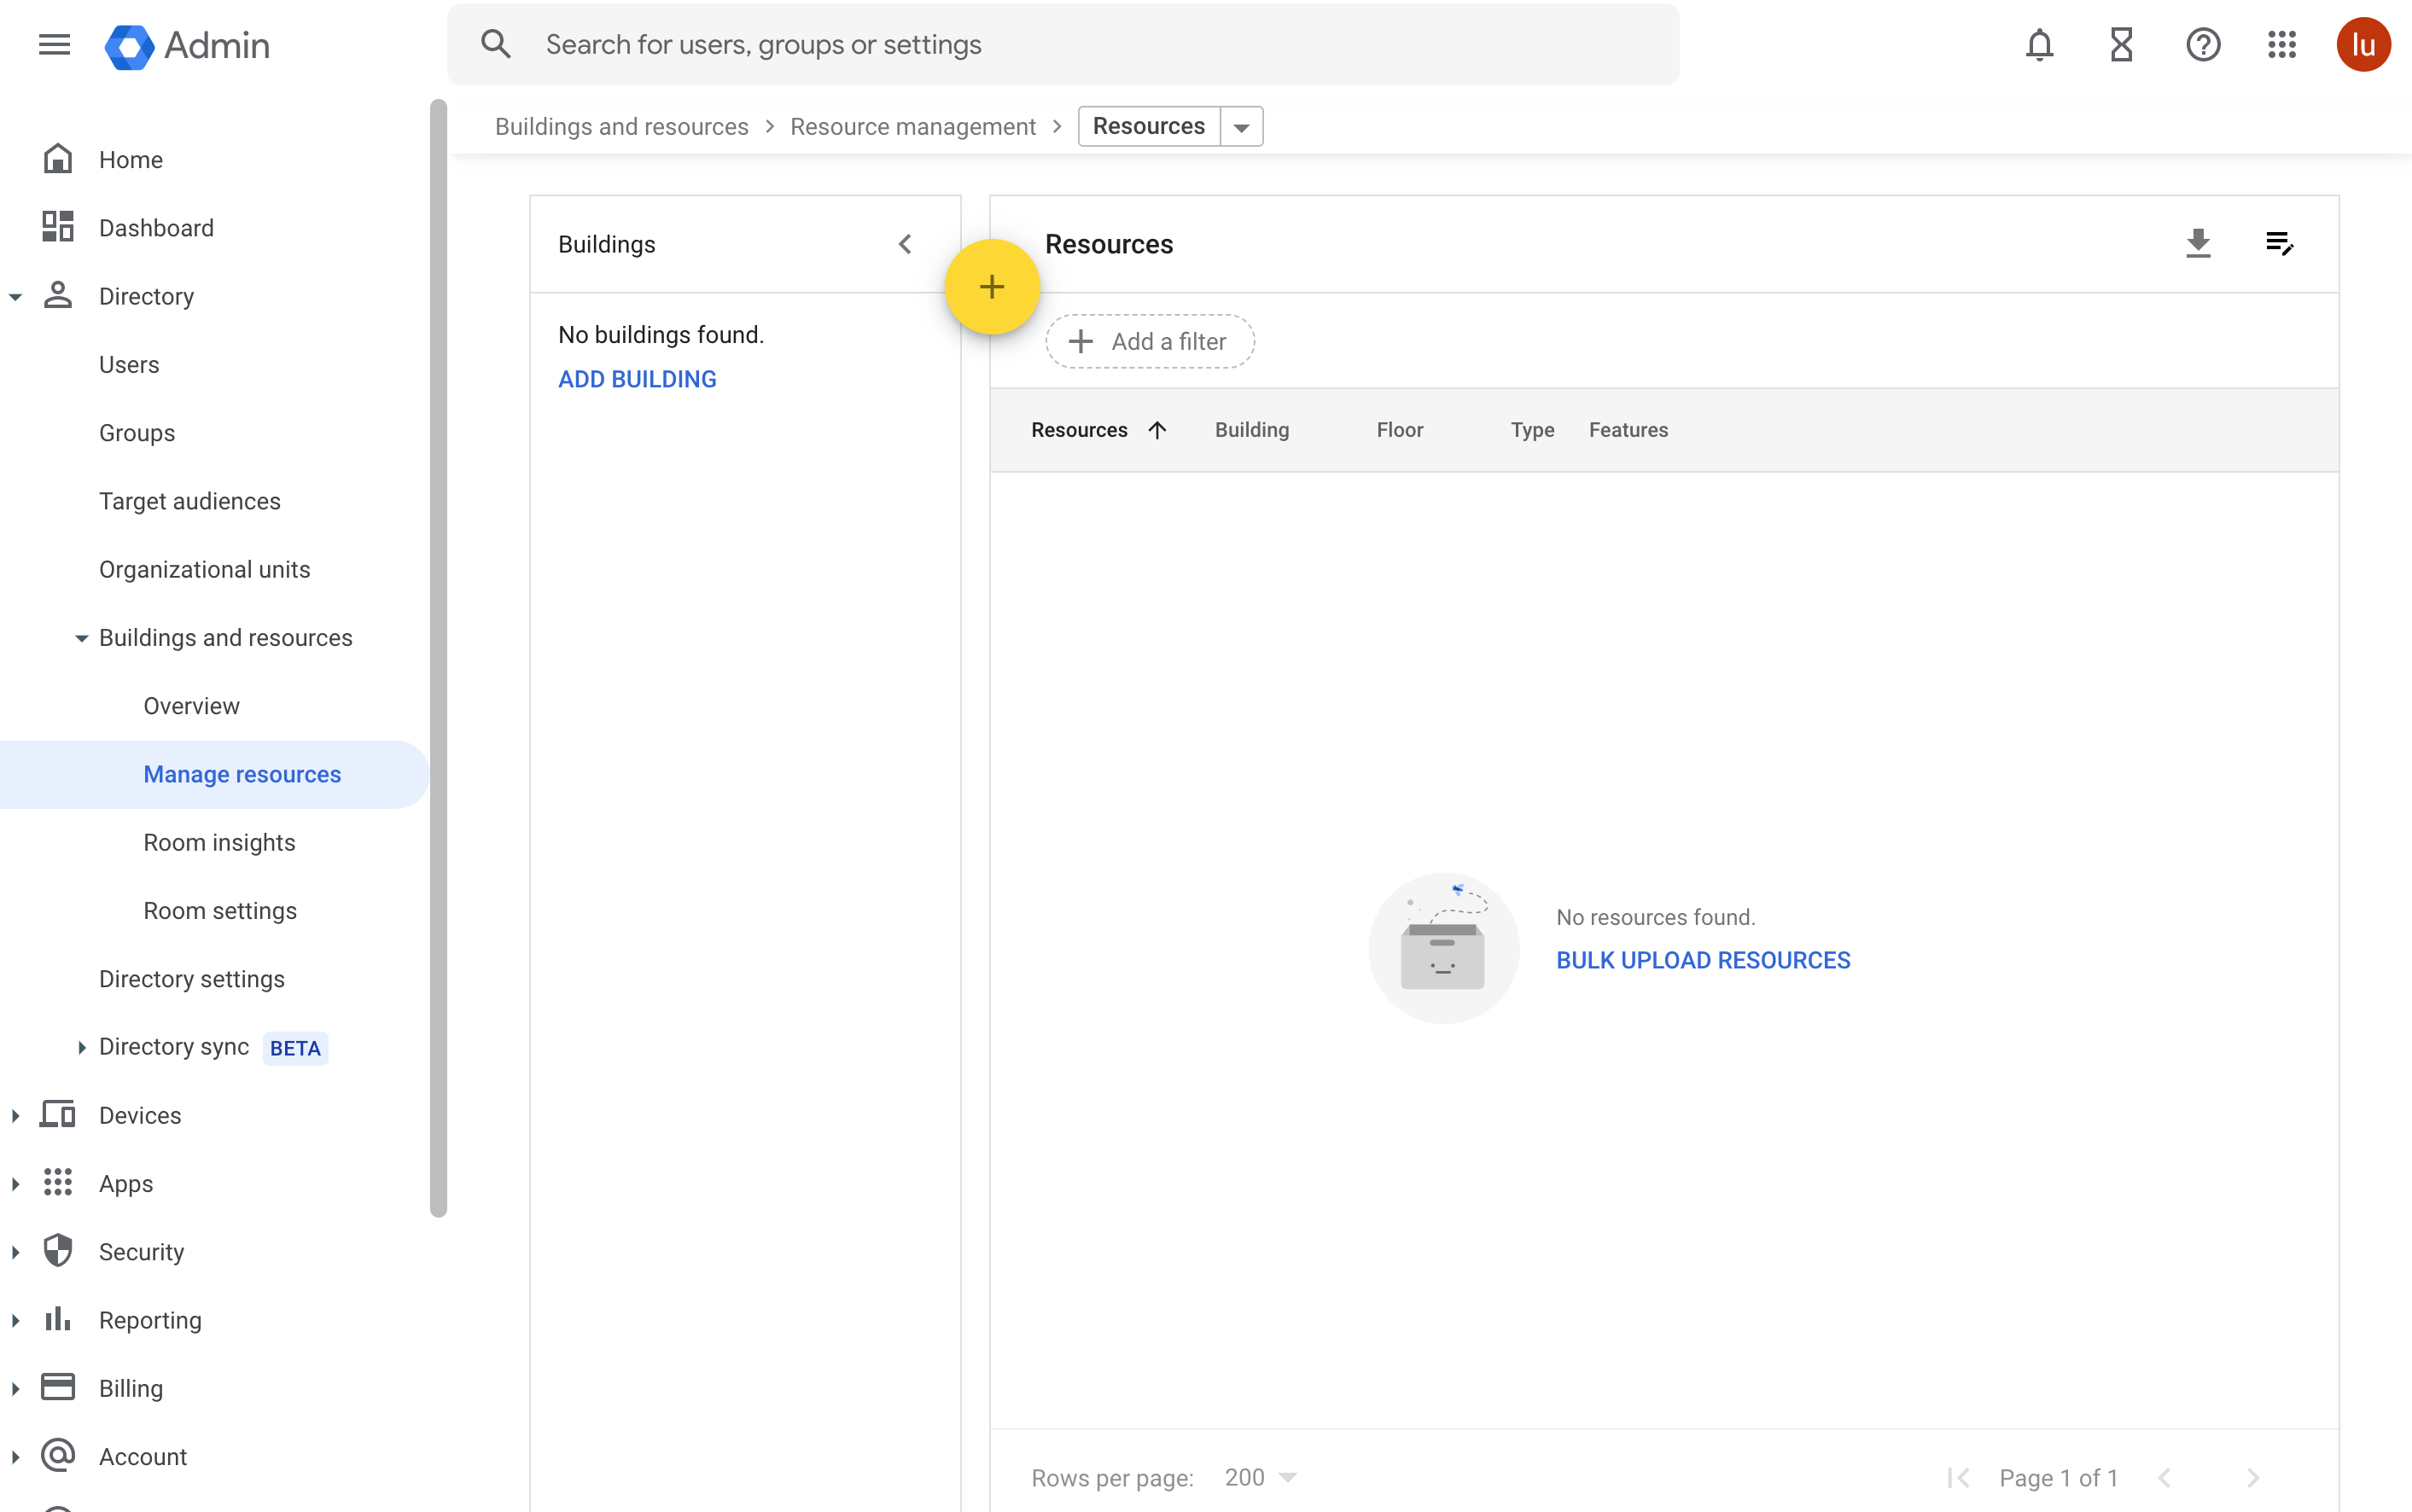
In the Buildings section, click Add building. Enter the building information in the popup window and click Add building.
2. Add resources
In the Admin console, go to Menu > Directory > Buildings and resources, click Manage resources.
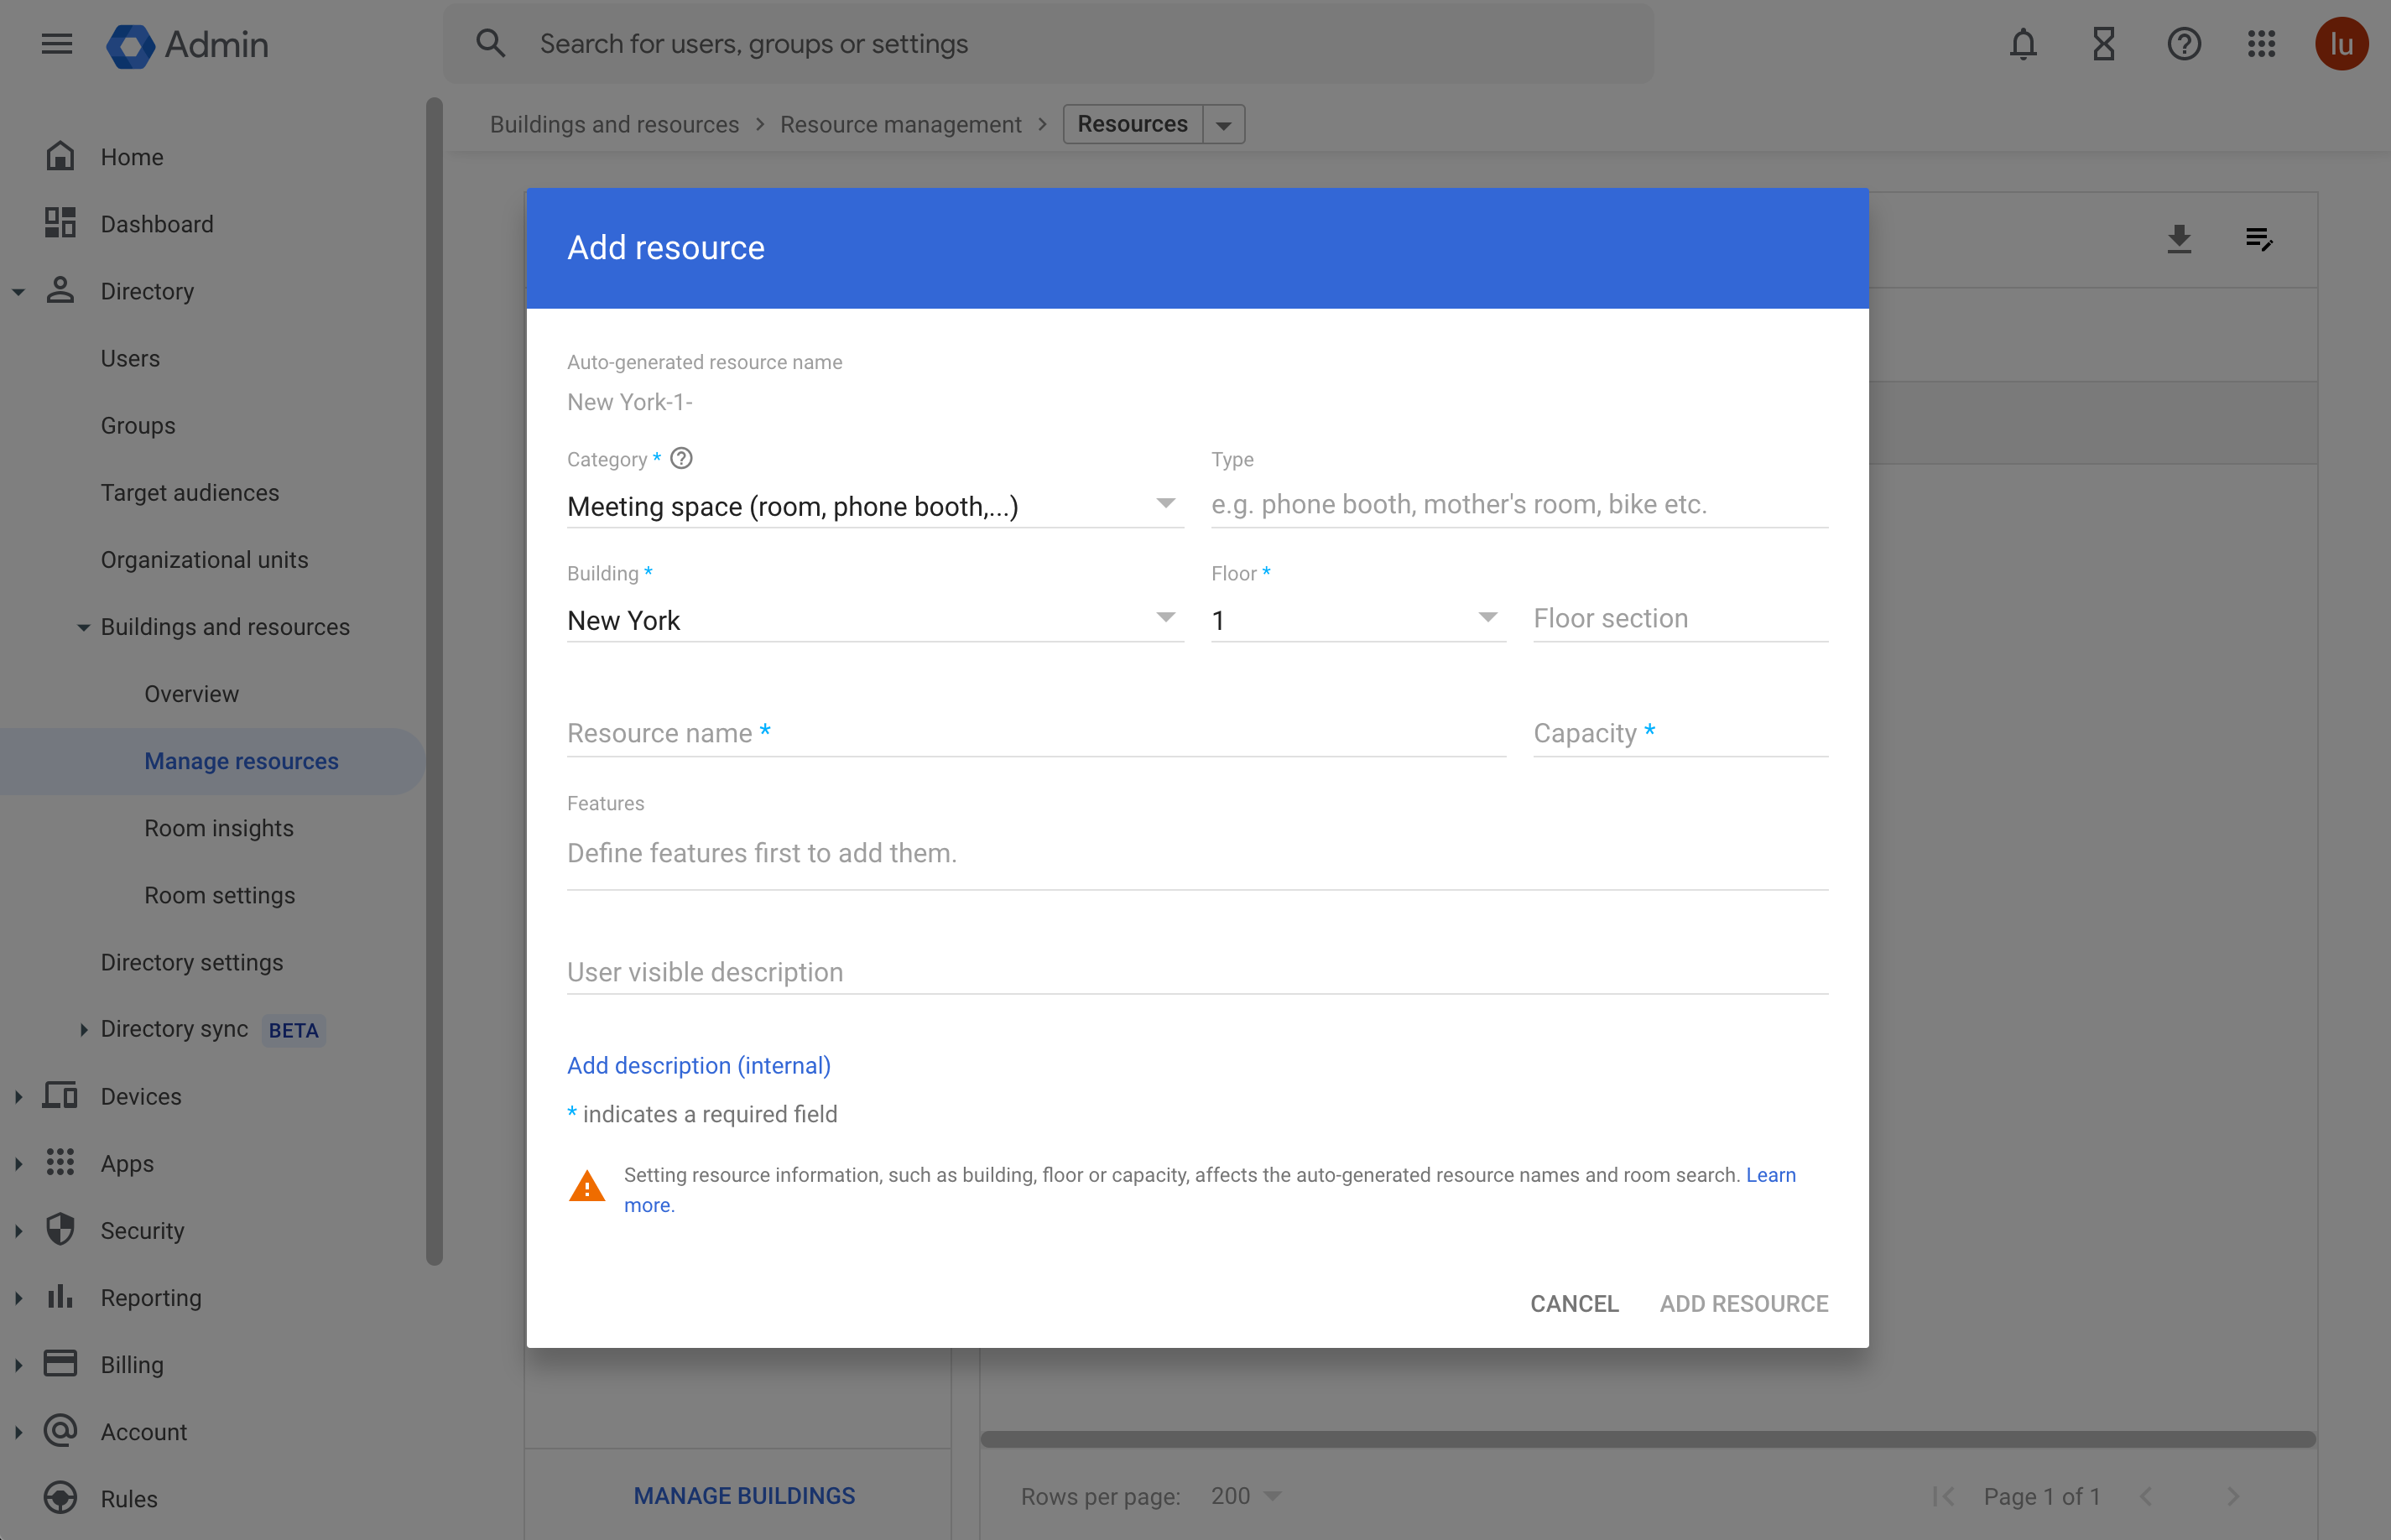
In the Manage resources section, click Add new resource.
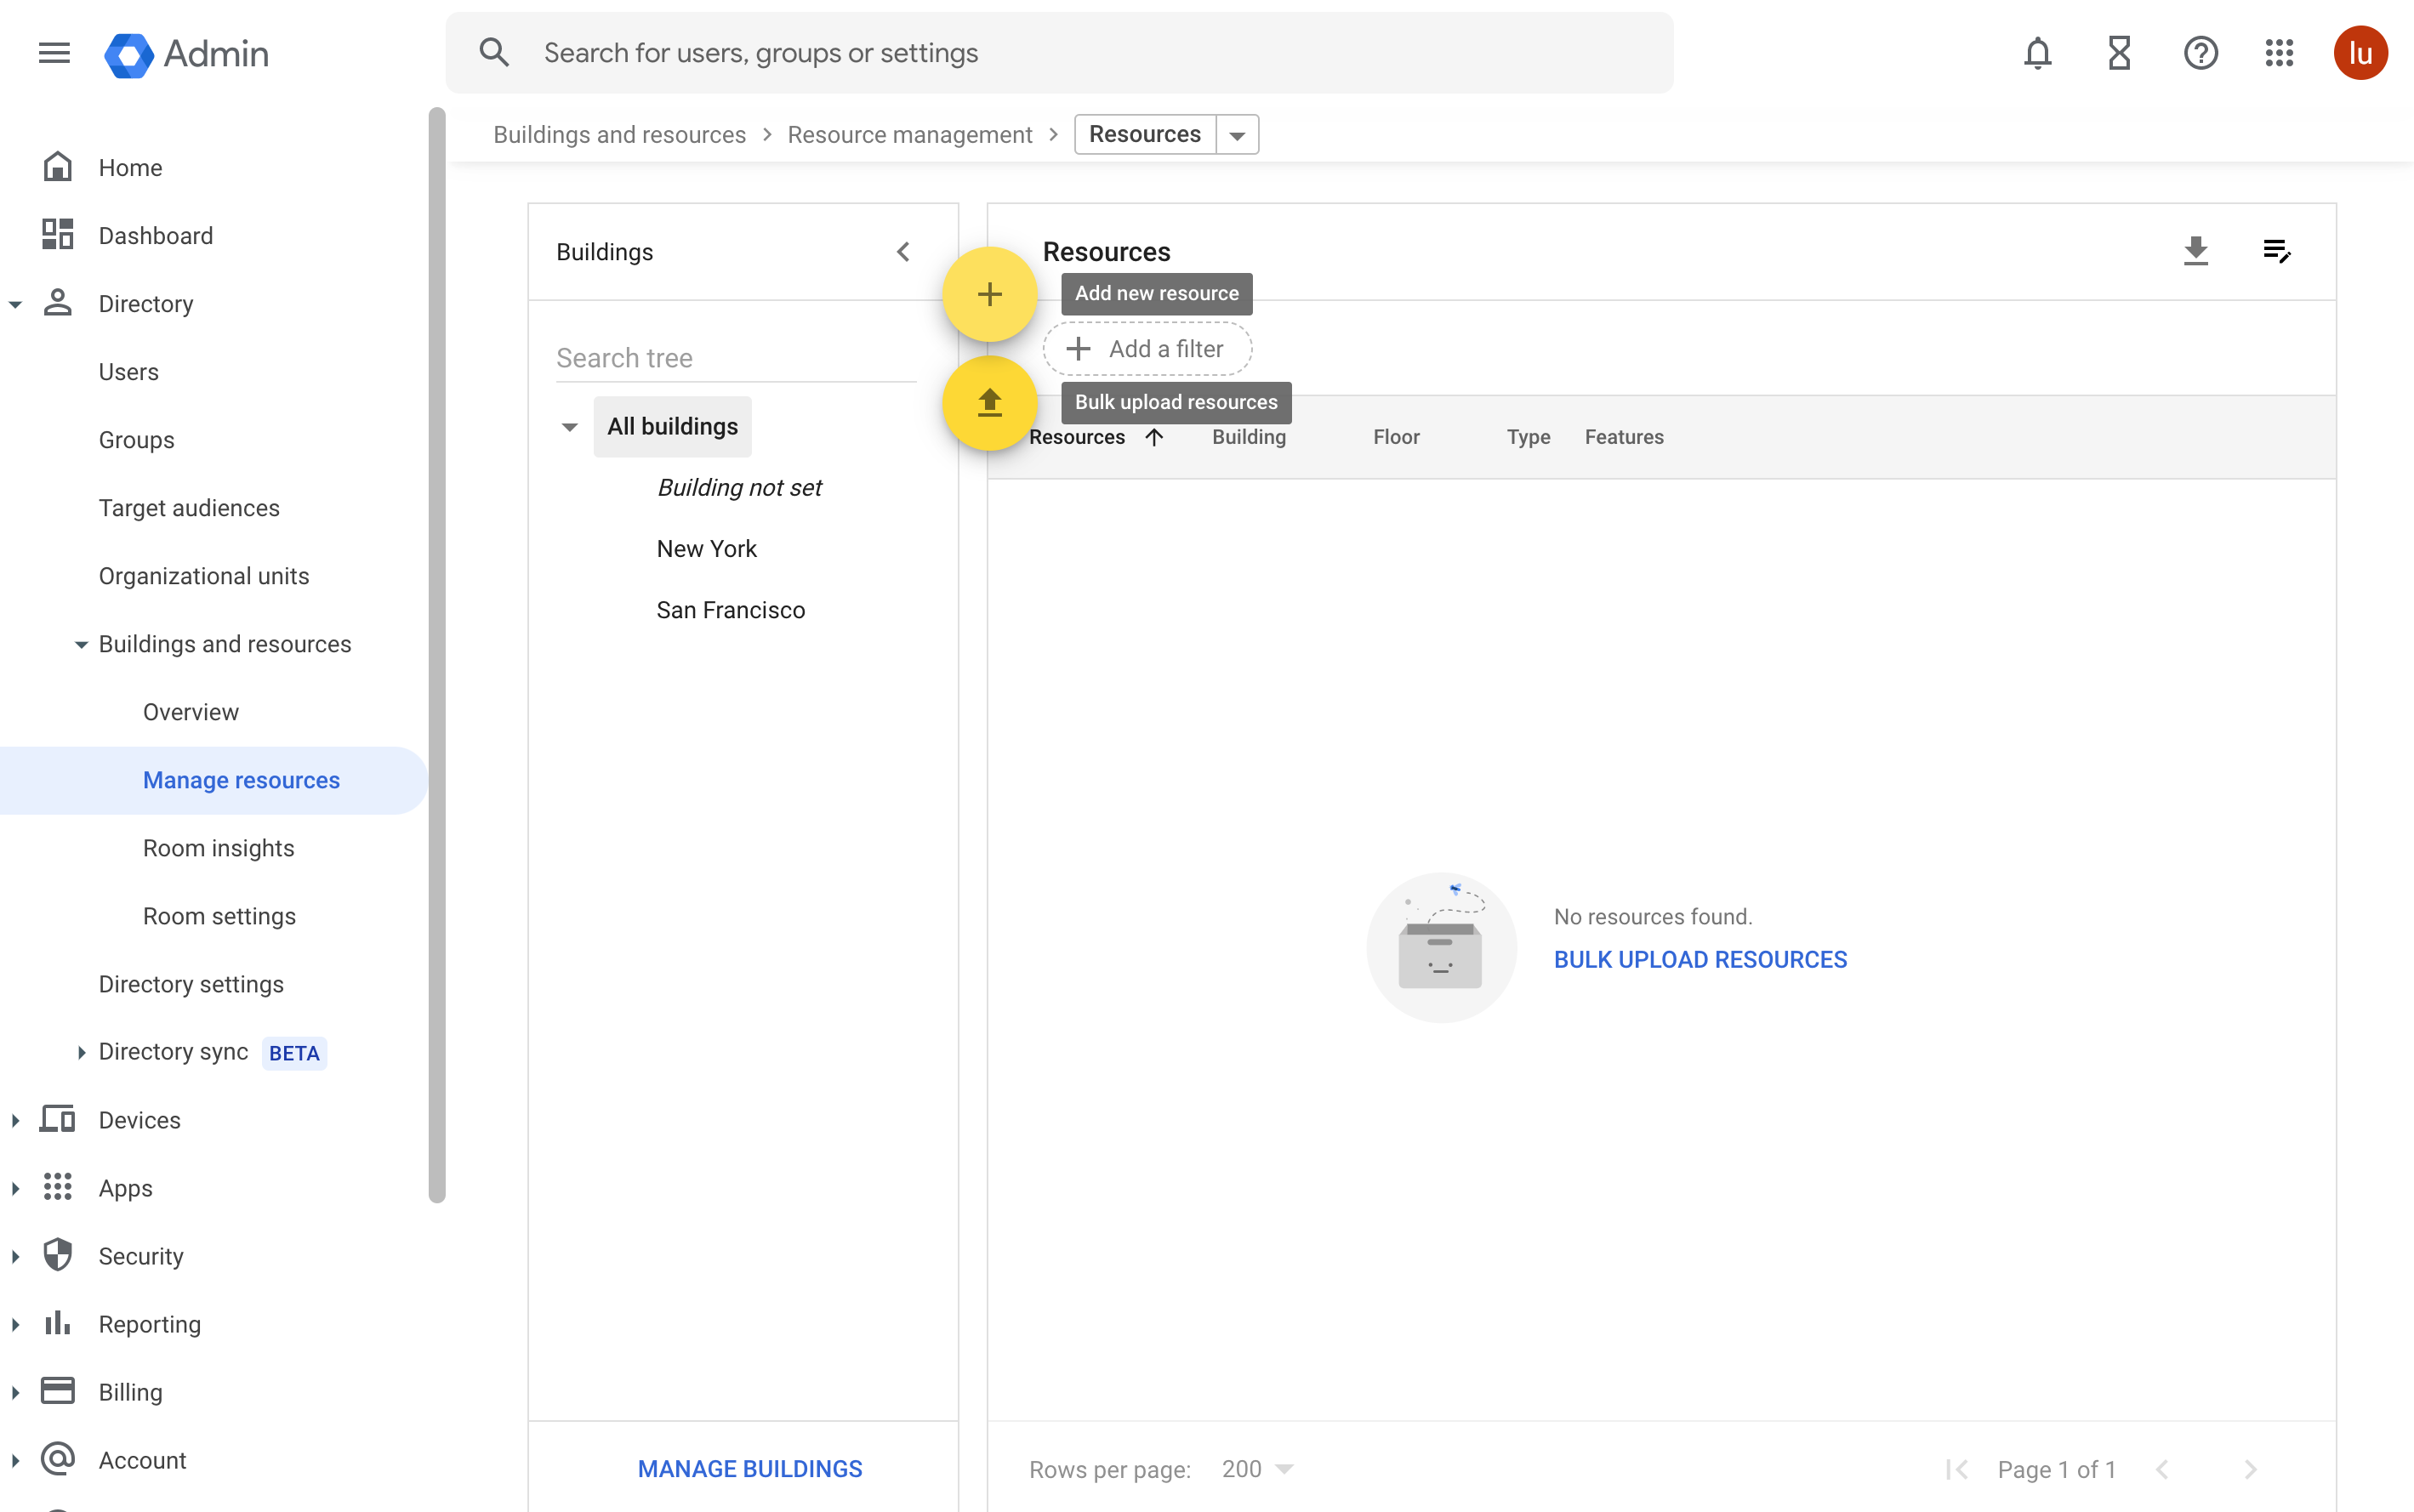
Enter the resource information in the popup window. And click Add Resources.
Resources in OpenCUI
As reservation service interface declares abstract Resource, you need to specify your concrete resources in your Module or Chatbot by declaring subclasses of Resource abstract frame. If you want to add any features to your resource, such as table size, nickname, service items, etc., which can be used to interact with customers and filter on the business side, you need to add them as slots for your concrete resources.
Now sign in to OpenCUI project, do the following:
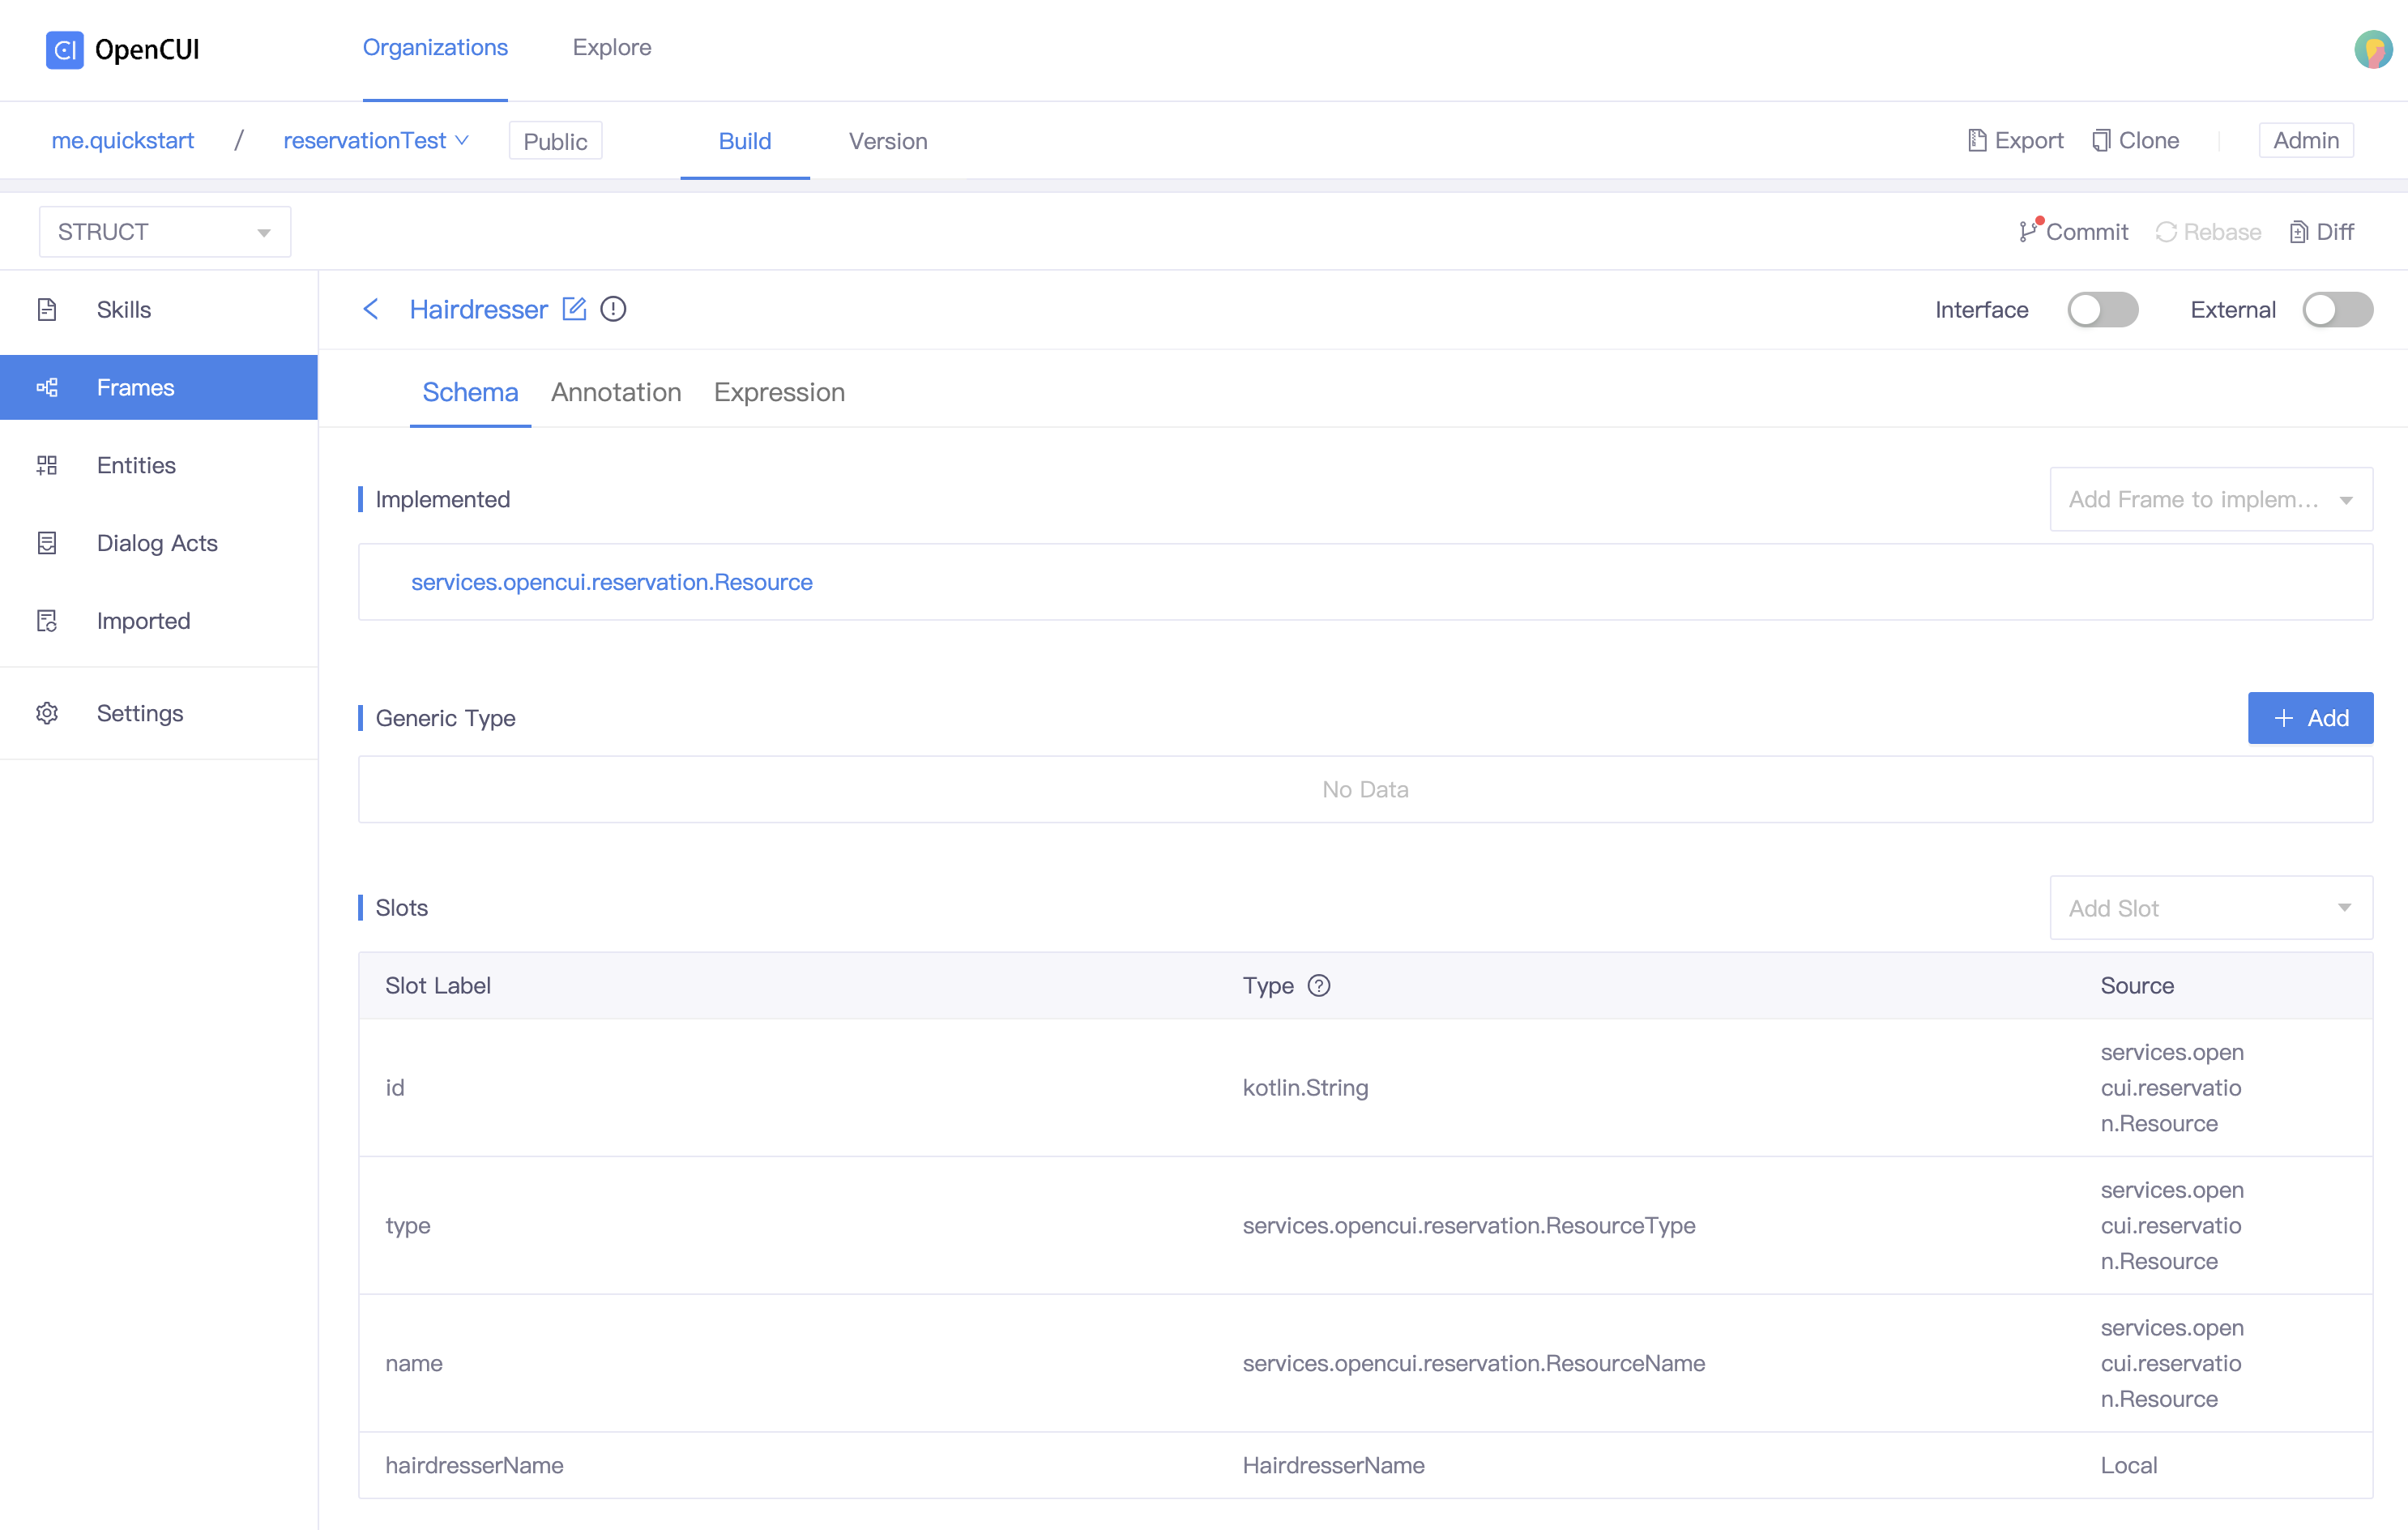
1. Declare subclass of Resource
- Create a concrete frame. Go to Frames page, click Create, type the frame Label and press the ENTER/RETURN key.
- Implement Resource. In the Implemented section, select services.opencui.reservation.Resource.
2. Declare features of Resource
To add features as slots for your concrete resource:
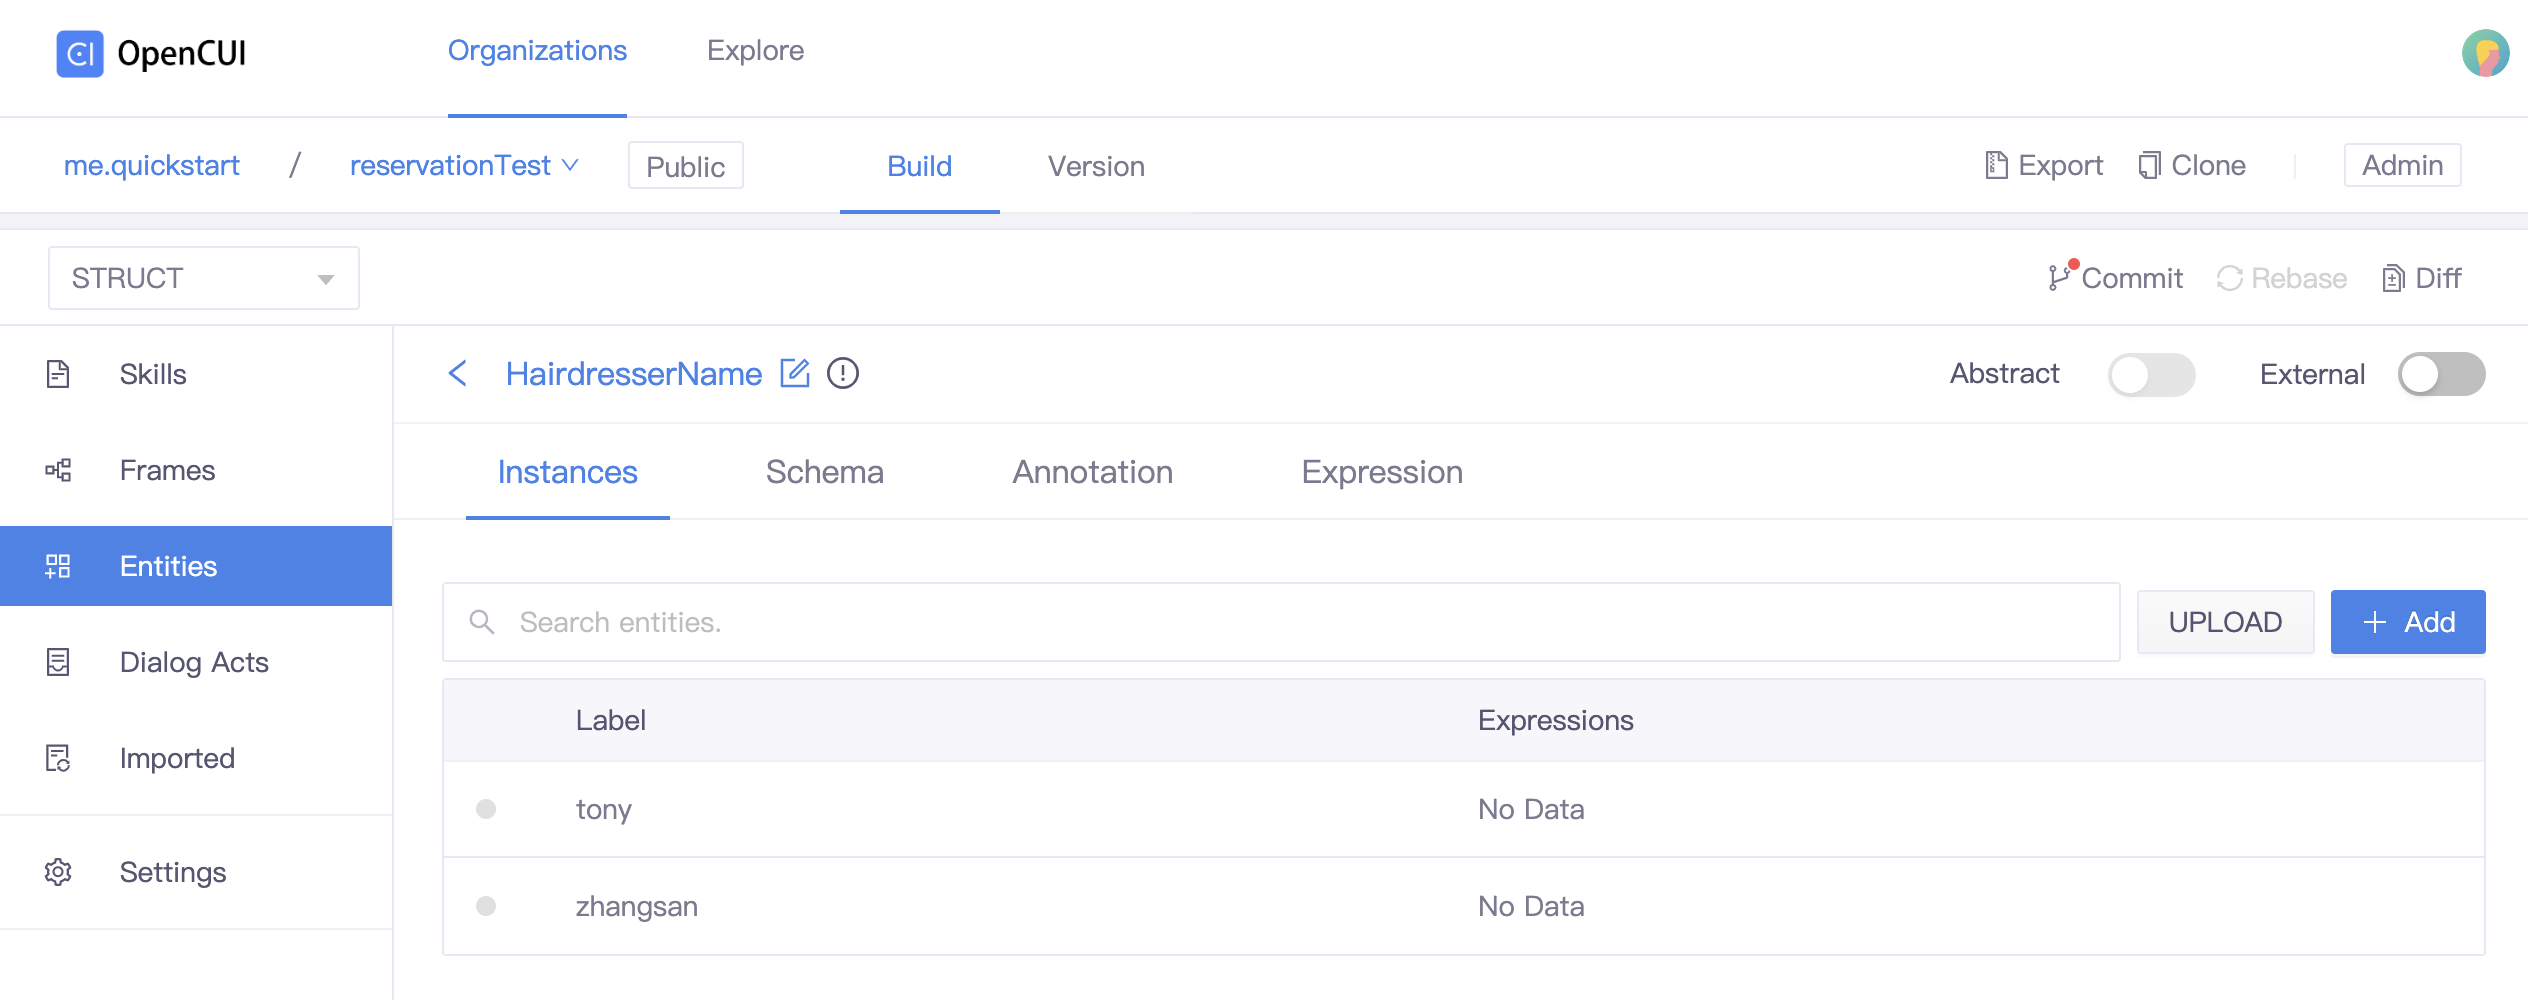
Create entity types for your features.
- Go to Entities page, click Create, type the entity Label and press the ENTER/RETURN key. (e.g. HairdresserName).
- Add entity instances you need. (e.g. tony, zhangsan) Don't forget to configure the expression at the language level.
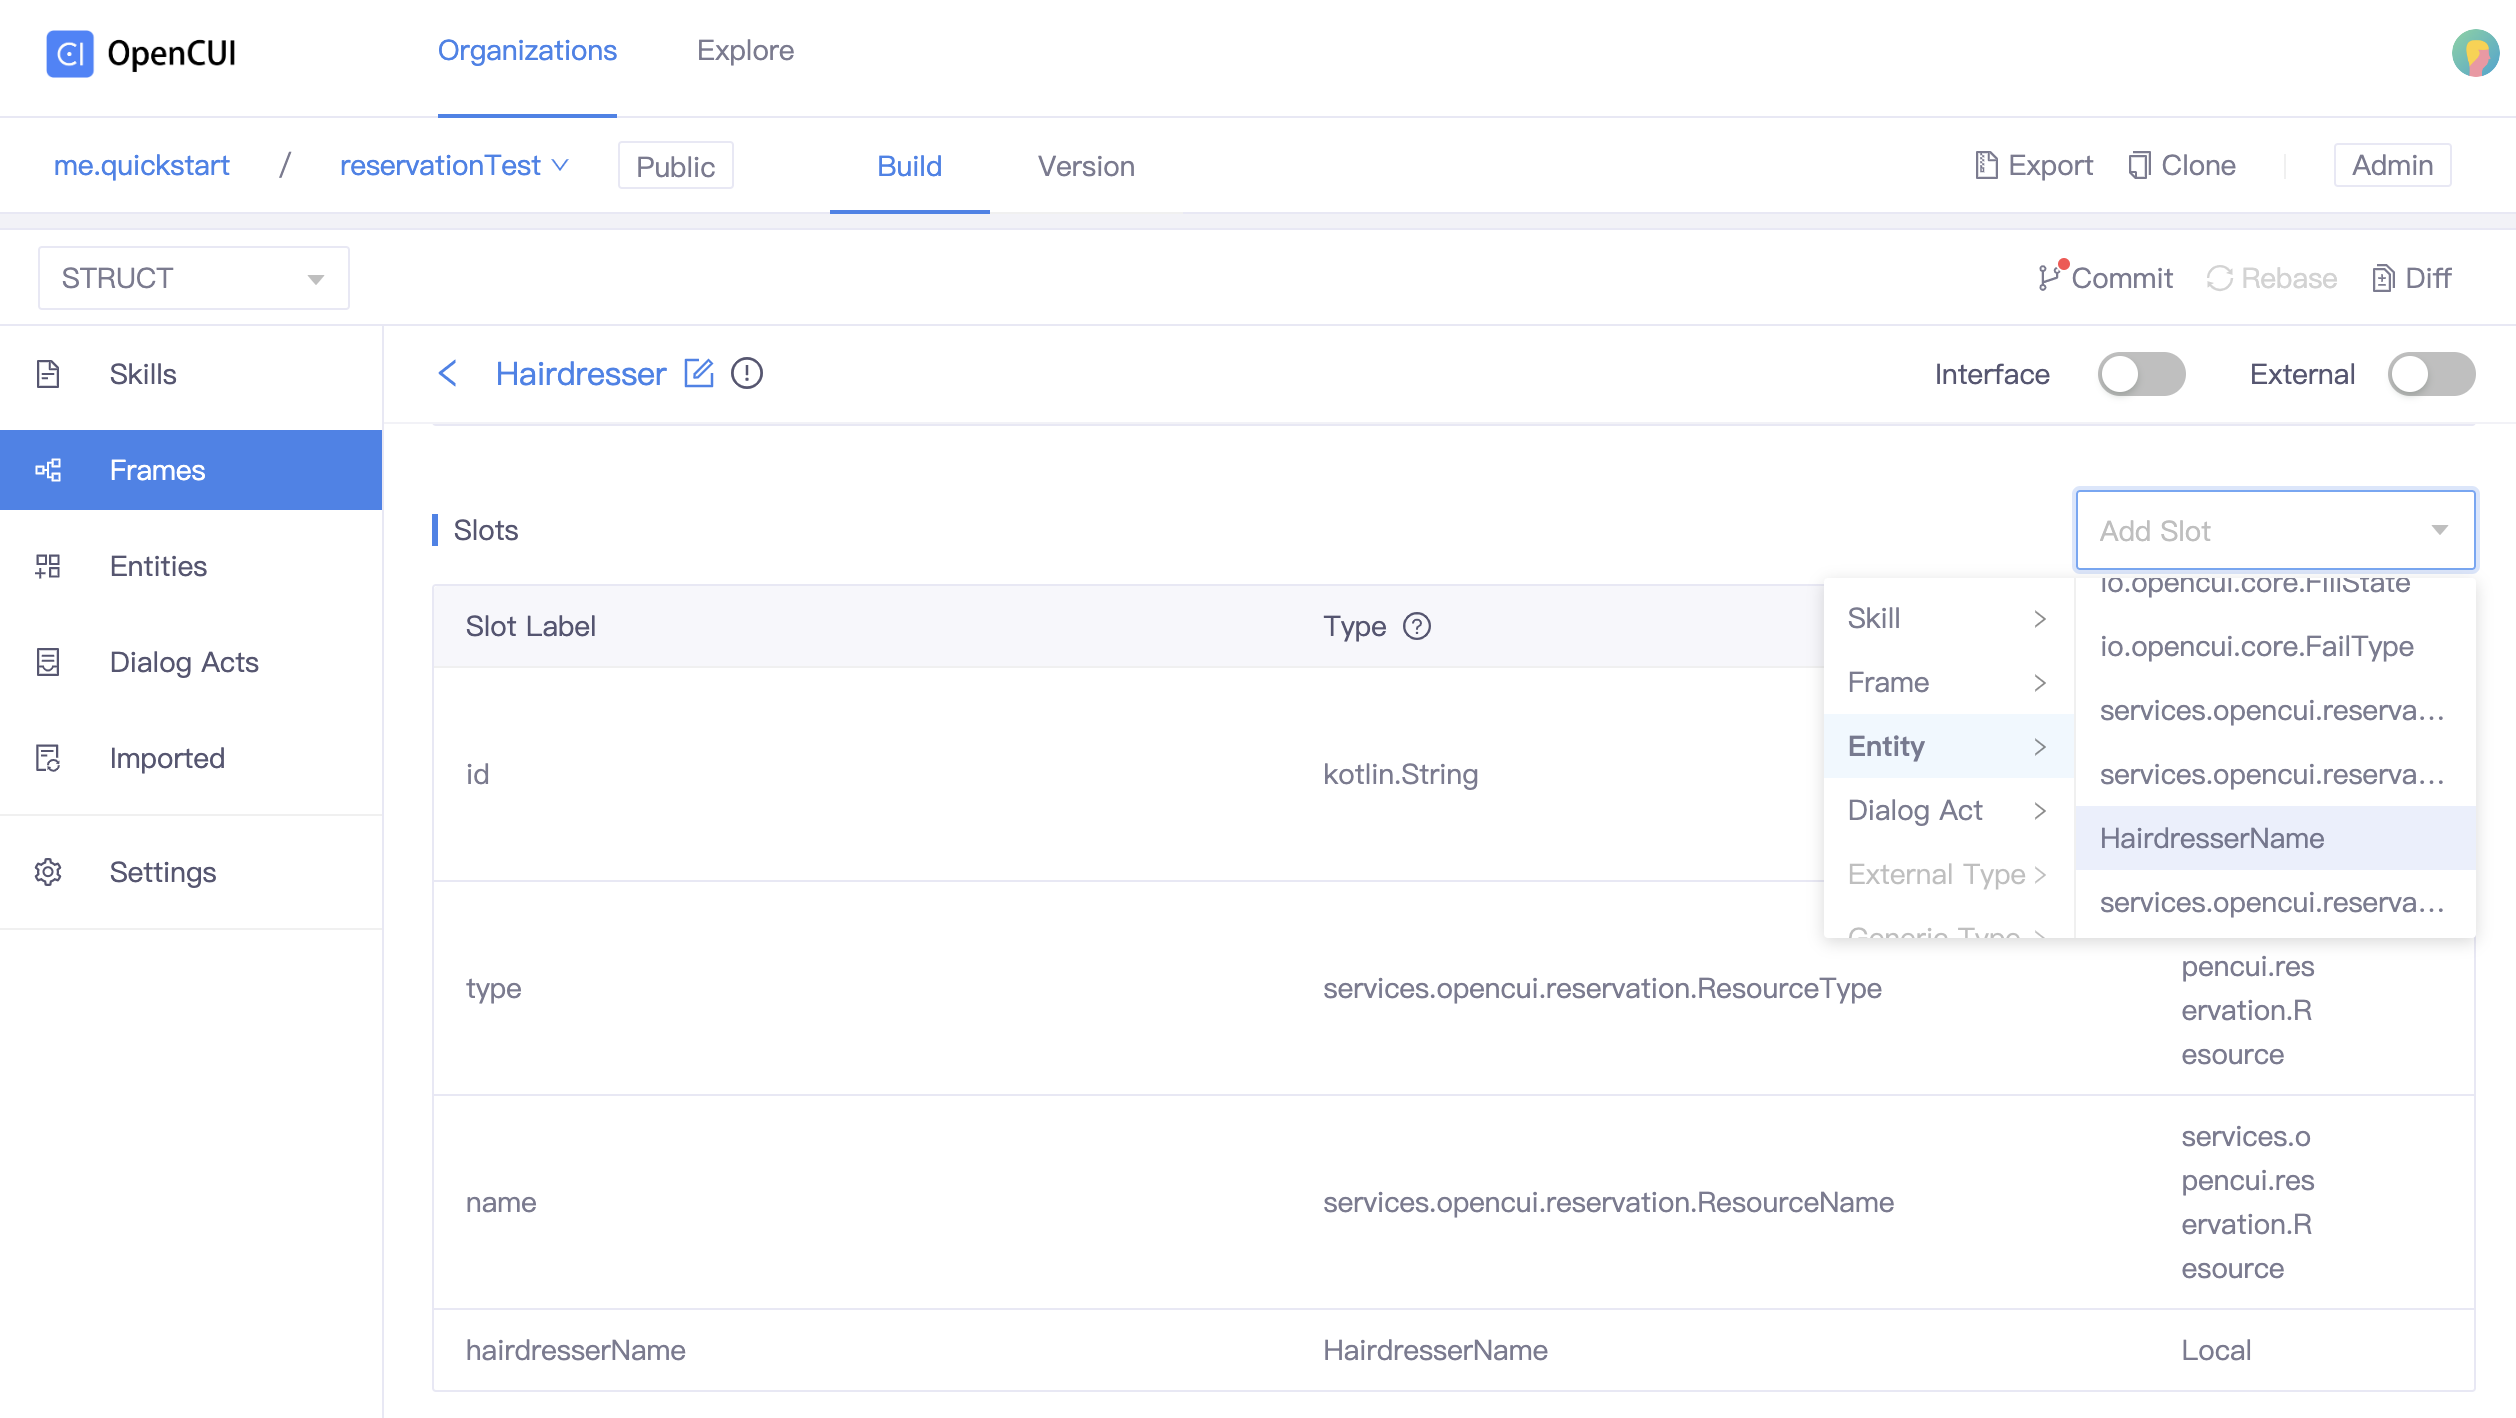
Add entity types as slots.
- Back to your concrete frame page.
- In the Slots section, click Add Slots selector and select the entity type you want to add.
Specify required properties
When you are done with setting up resources in both Calendar and OpenCUI, you need to specify the required properties of them in Google Admin console.
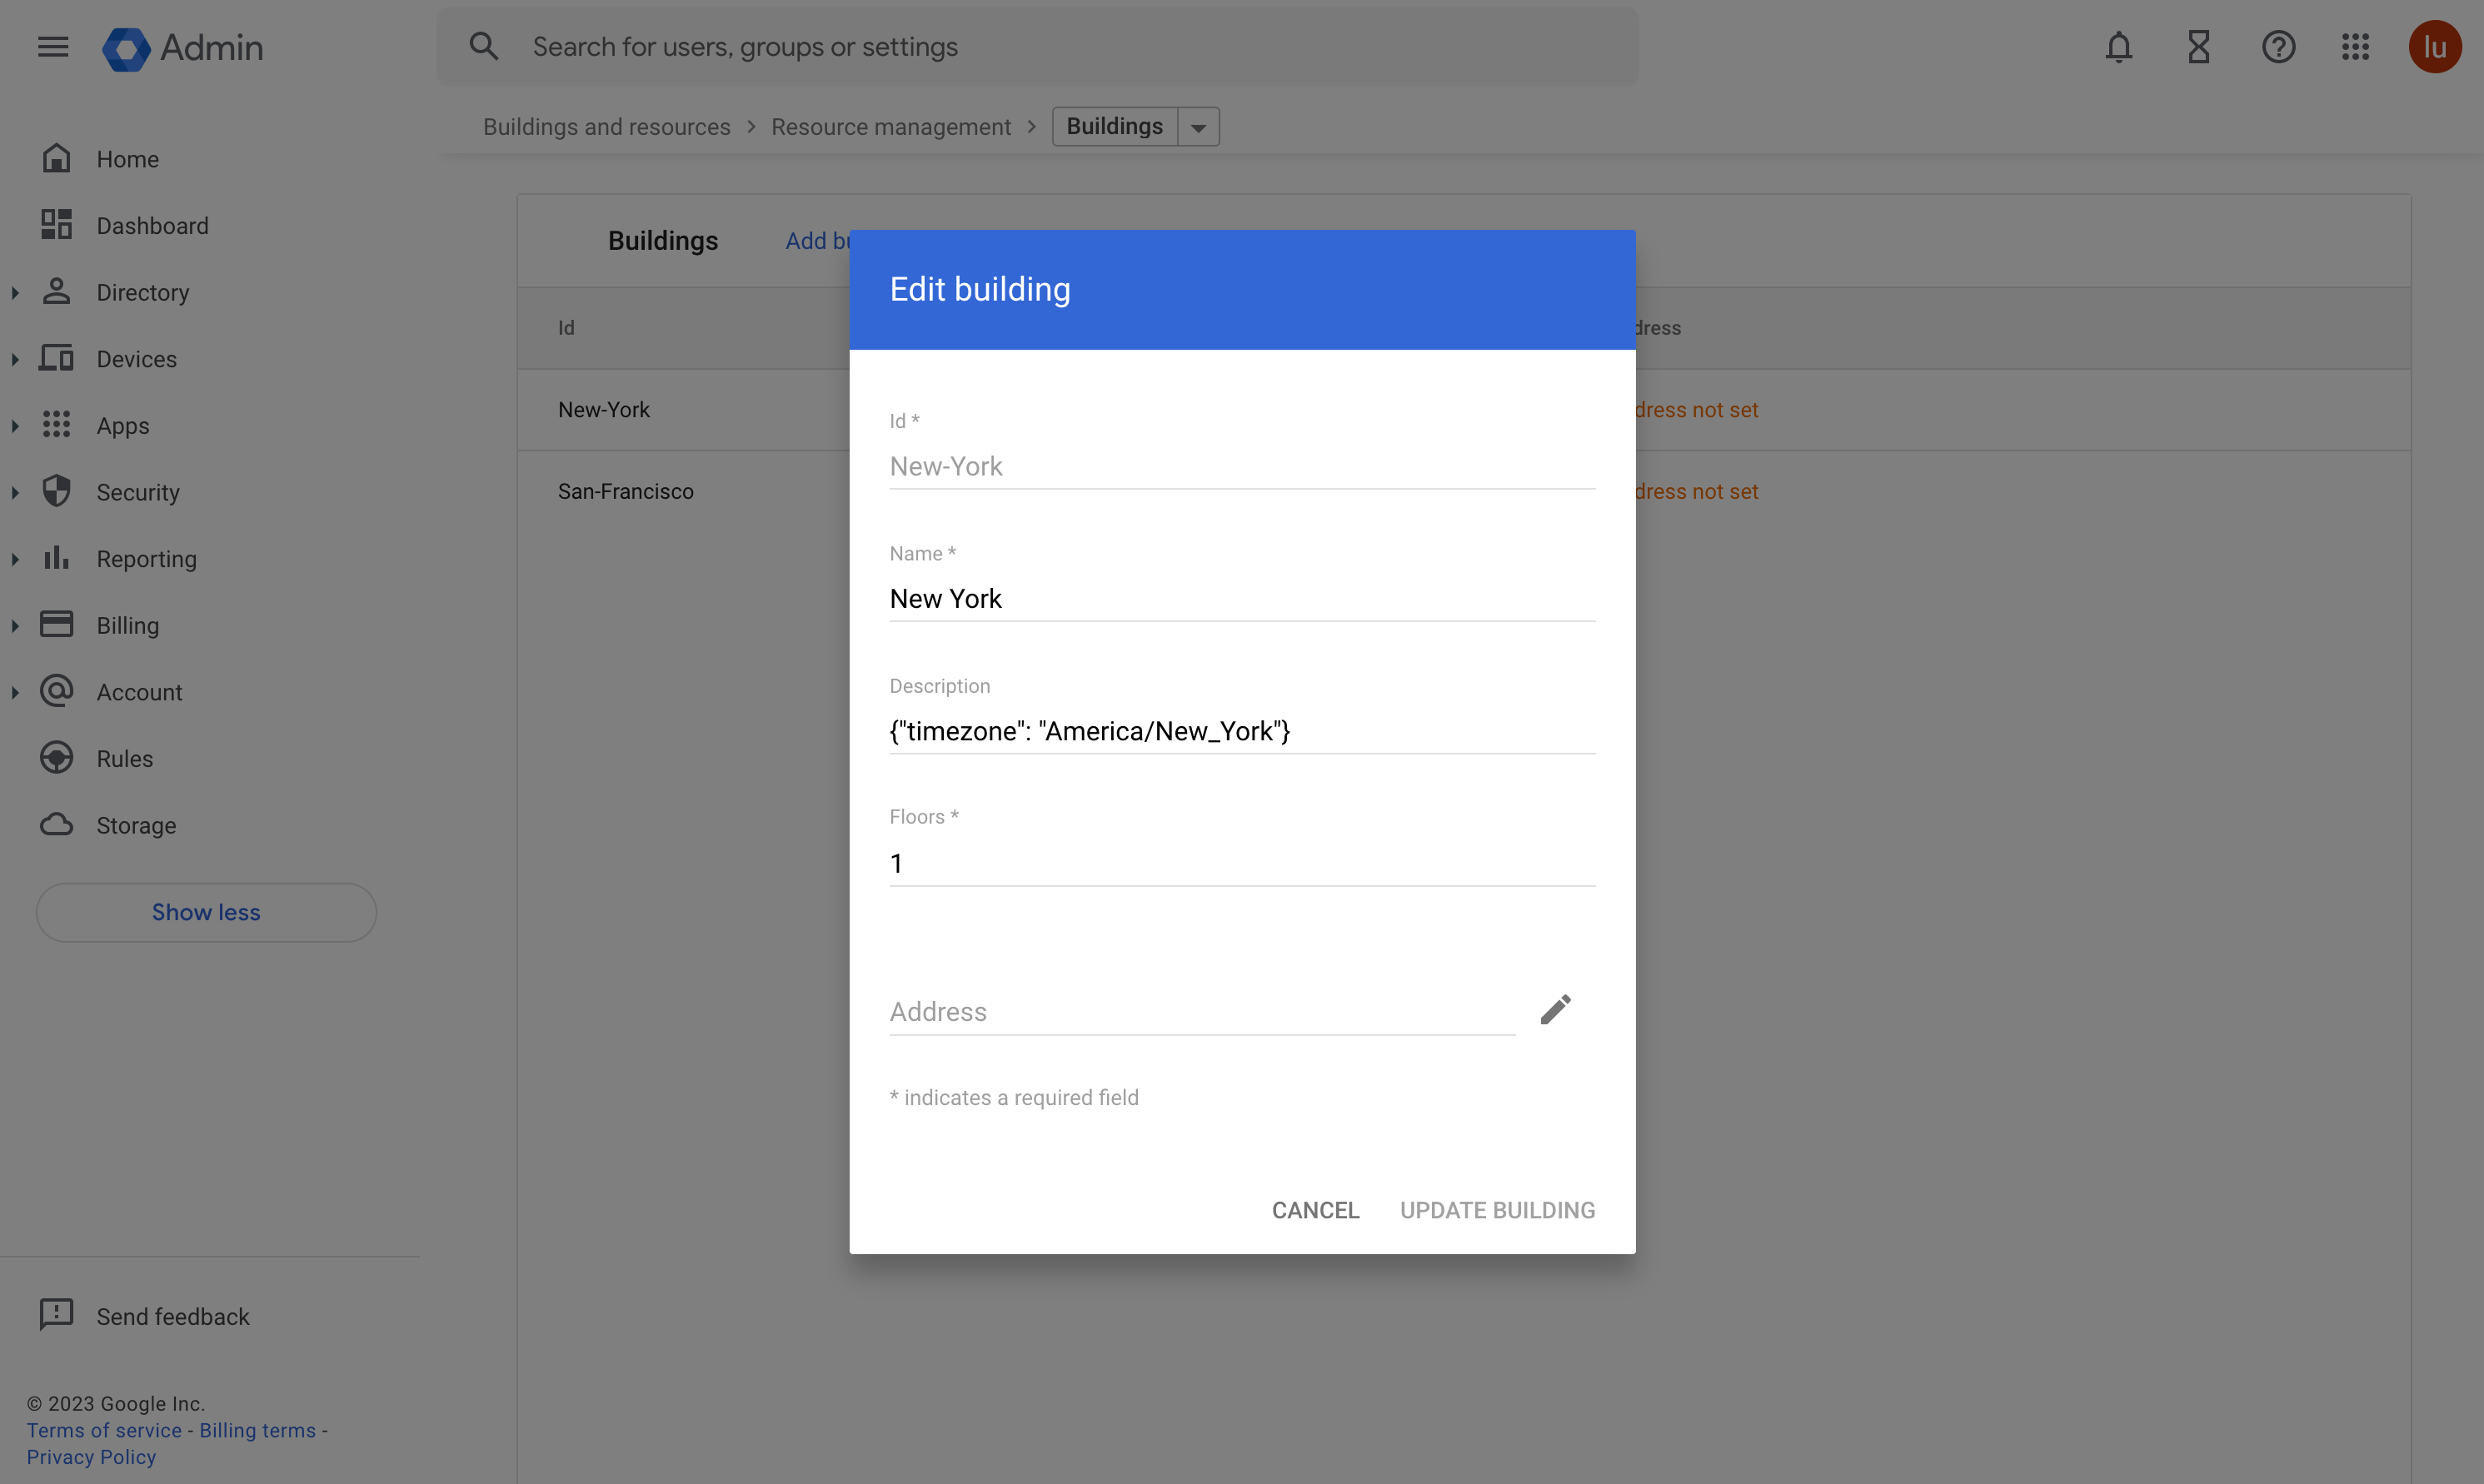
1. Associate timezone with buildings
Each building configured in calendar needs to set a timezone in building's Description.
JSON Representation
{
  "timezone": "America/New_York"
}| Property | Type | Description | Example |
|---|---|---|---|
timezone | String | Required. The time zone of this building, also represents the timezone of each resource. (Formatted as an IANA Time Zone Database name) | America/New_York |
2. Associate features with resources
Each resource configured in calendar needs to be associated with a JSON format in resource Description(internal), which will deserialize to OpenCUI concrete frame object (the subclass of resource frame type). At the same time, you can set the corresponding features for each resource through key-value pairs, which can be used for filtering.
- If resource is Identifiable: for example, users know which resource they are getting, like hairdresser. You should set
slotLabelandslotTypeInstancesLabelas key-value pairs, like"hairdresserName": "tony". - If resource is Anonymous: for example, users do not know the identity of the resource, like tables, as long as the table meets their requirement, they do not care which table it is. You can set the corresponding key-value pairs you need to retrieve the resource.
JSON Representation
{
  "@class": "FrameLabel", // fully-qualified name
  "durations": [
    3600,
    7200
  ],
  "key": "value"
}| Property | Type | Description |
|---|---|---|
@class | String | Required. The concrete frame label you defined in your Module or Chatbot, which implements services.opencui.reservation.Resource. Label should be the fully-qualified name. |
durations[] | Int[] | Required. How long should each appointment last. The time interval, in seconds. |
For example:
{"@class": "me.quickstart.reservationTest.Hairdresser", "defaultDuration": [3600,7200], "hairdresserName": "tony"}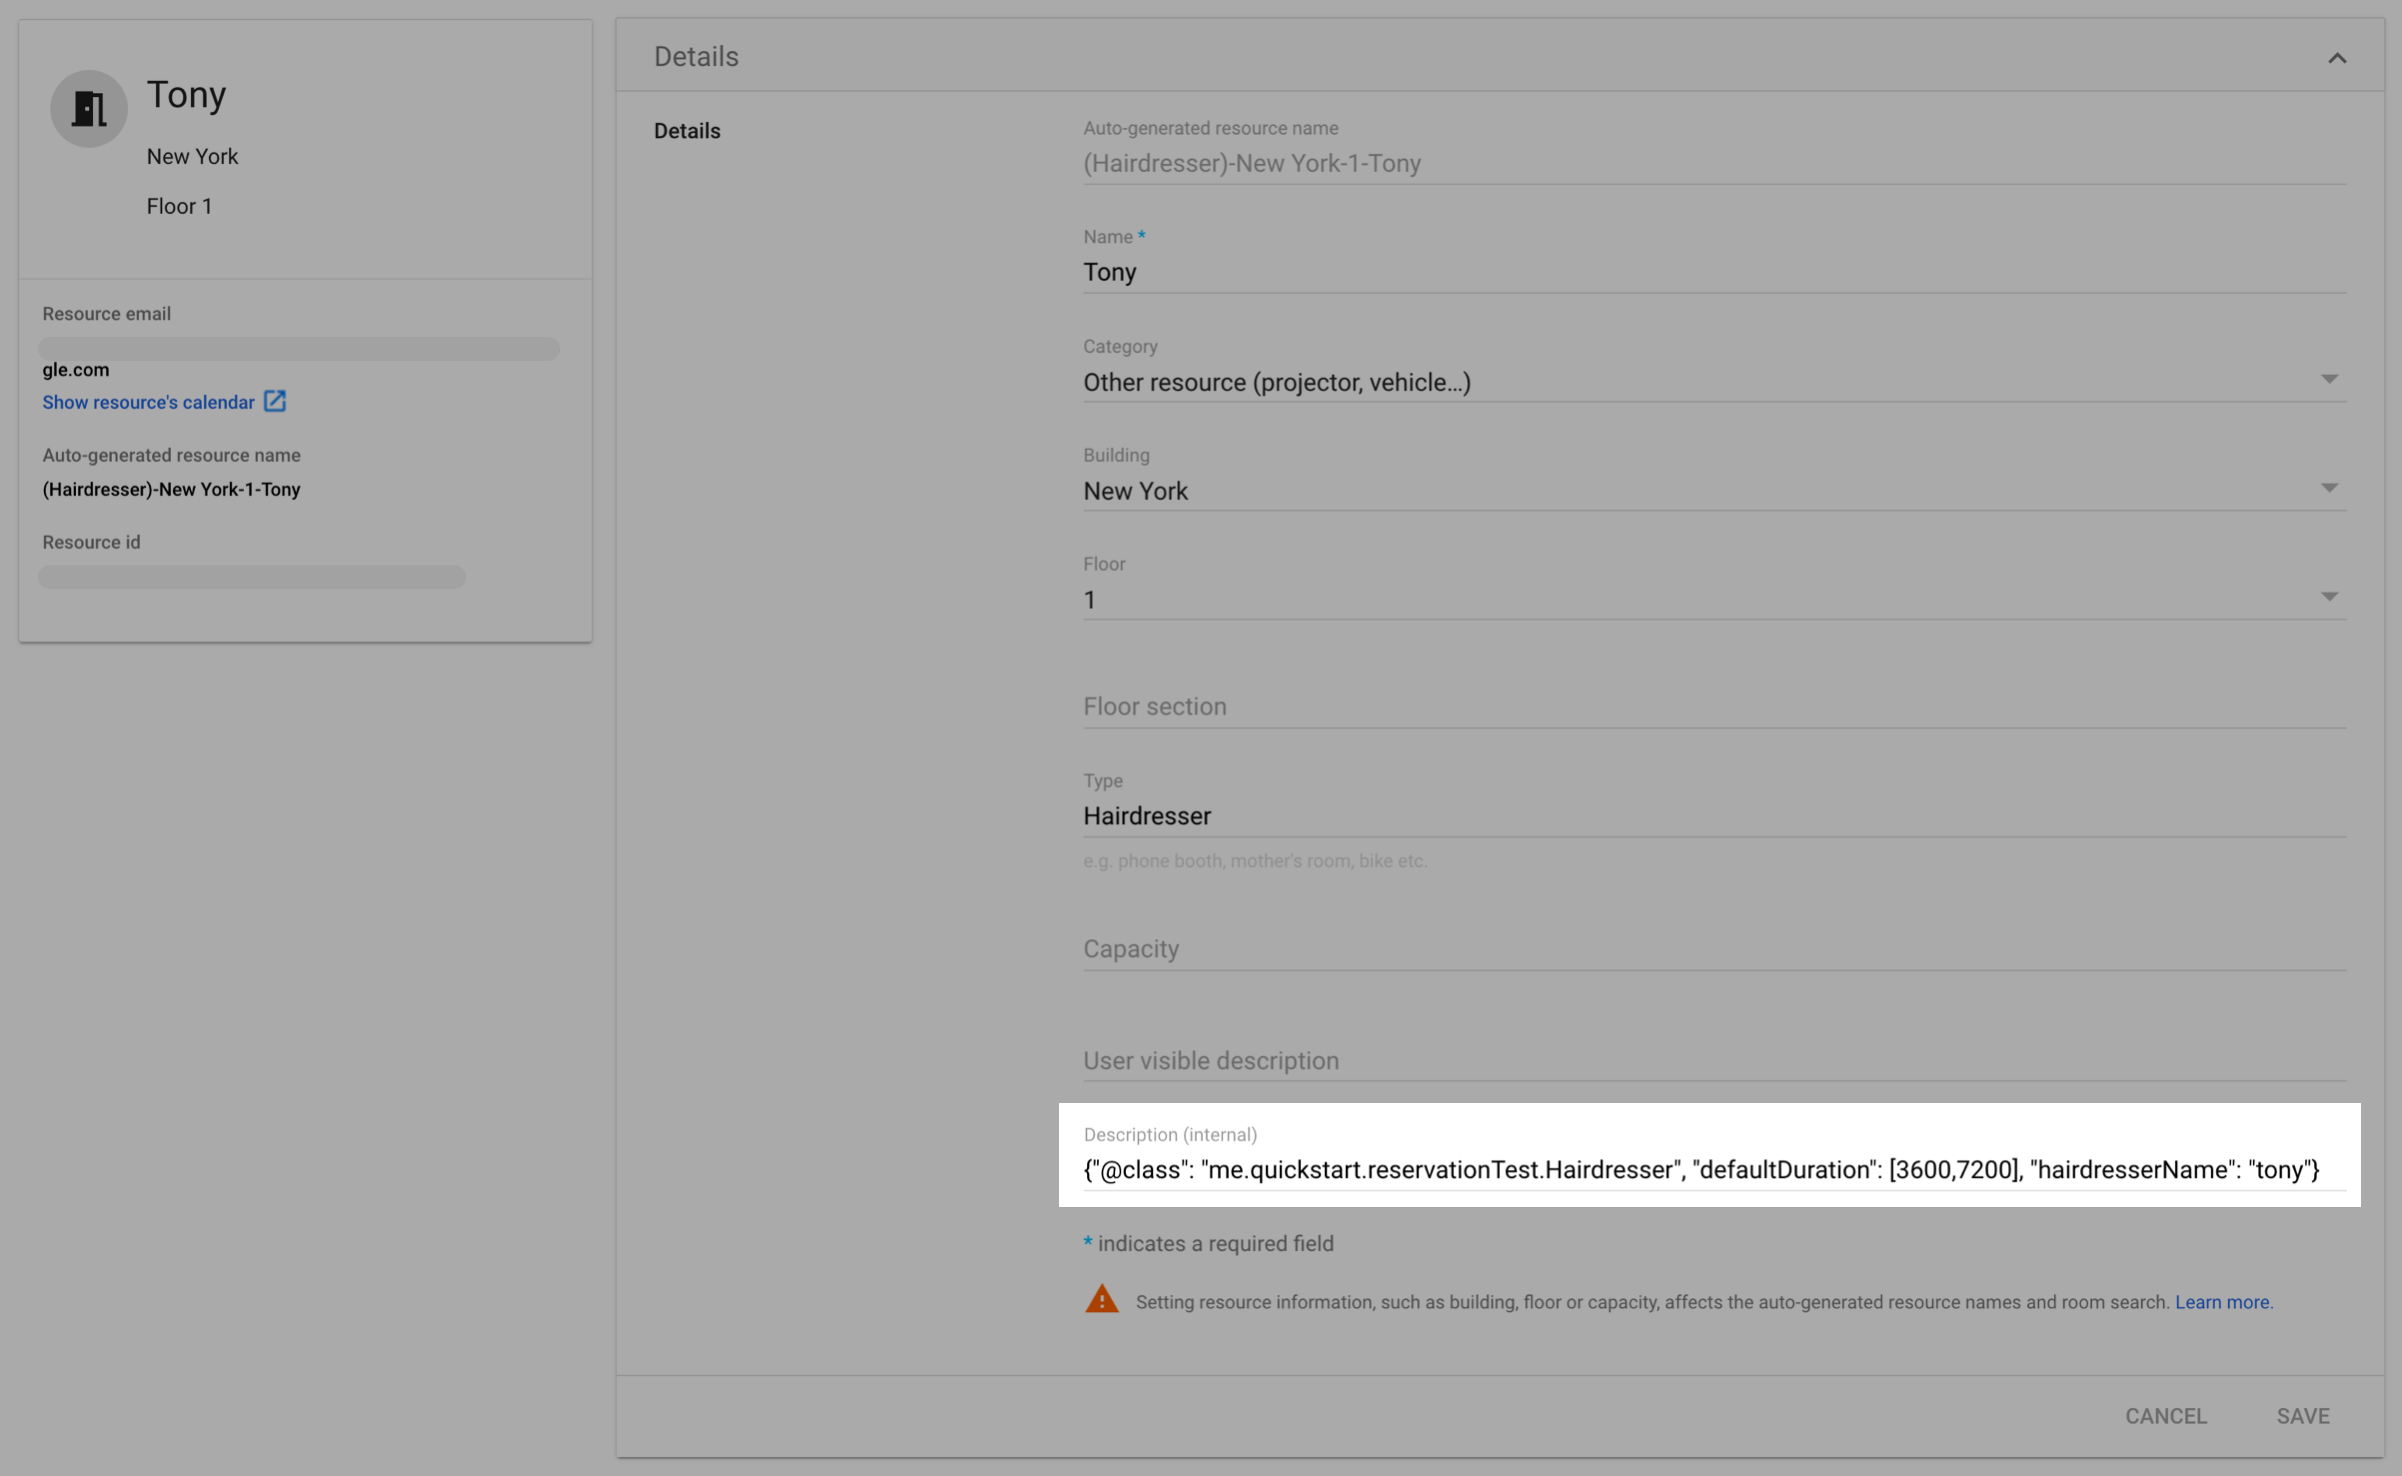
Testing
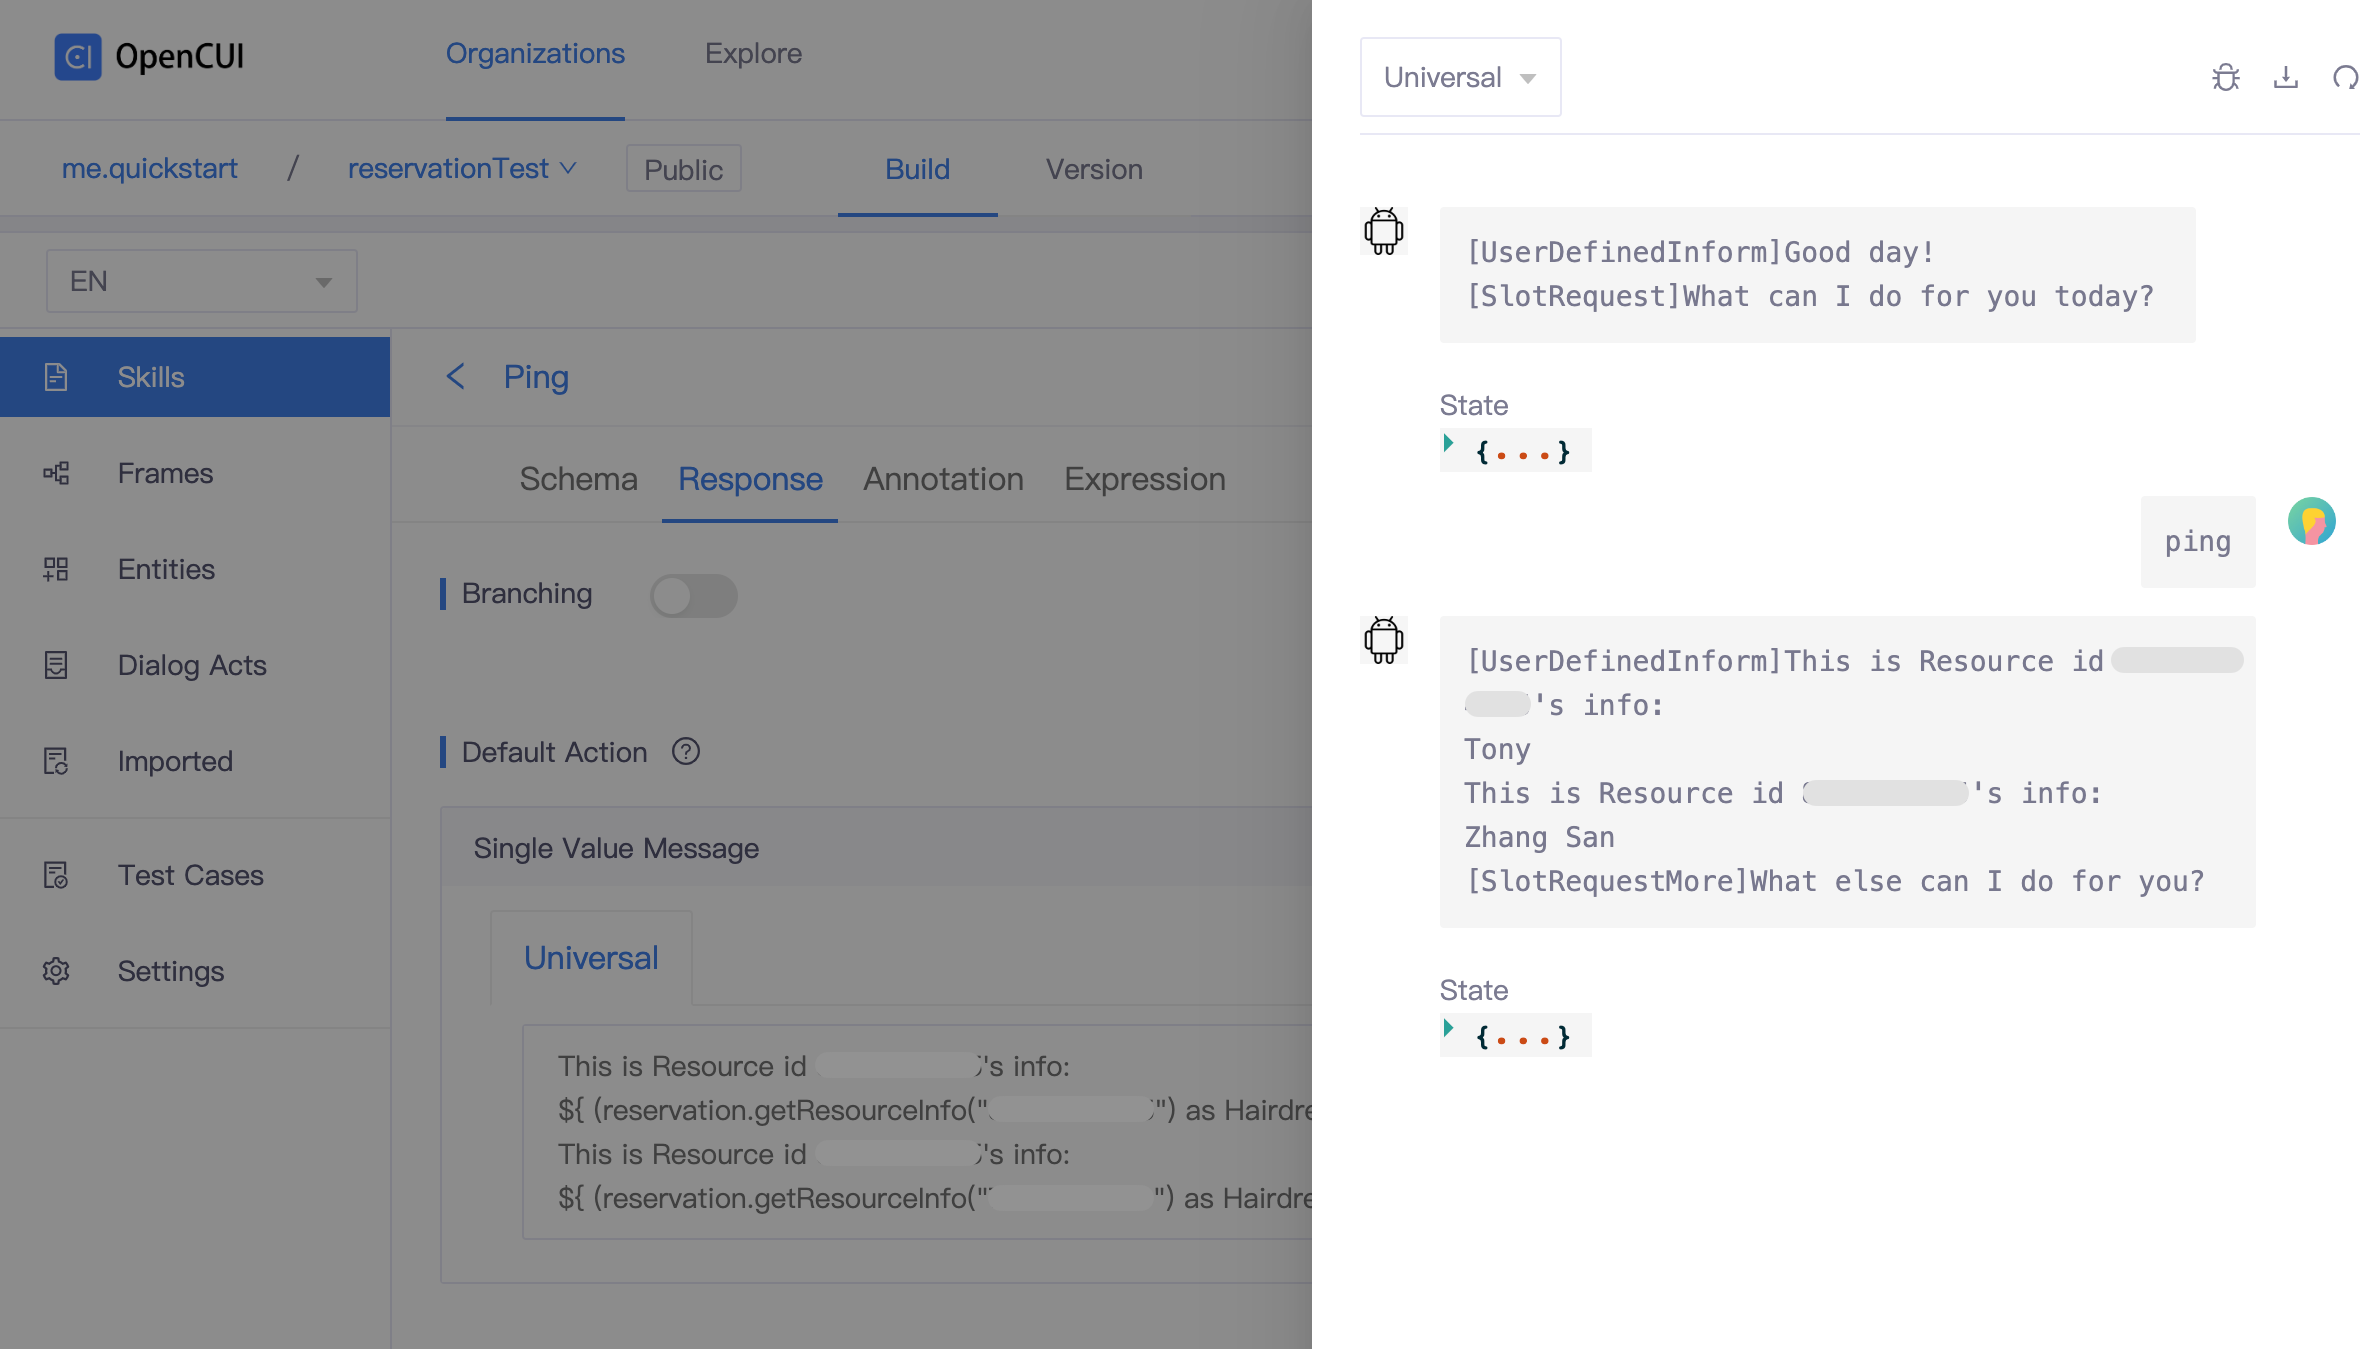
When you're done with the setup above, before defining the full interactions, you can run a simple test to make sure you have setup successfully. To run a simple test, you can create a PingPong skill and call these functions in response or input these request parameters dynamically through slots.
Need To Know
The testing acts on real data, so use caution when trying methods that create, modify, or delete data.
Now let's use getResourceInfo as an example.
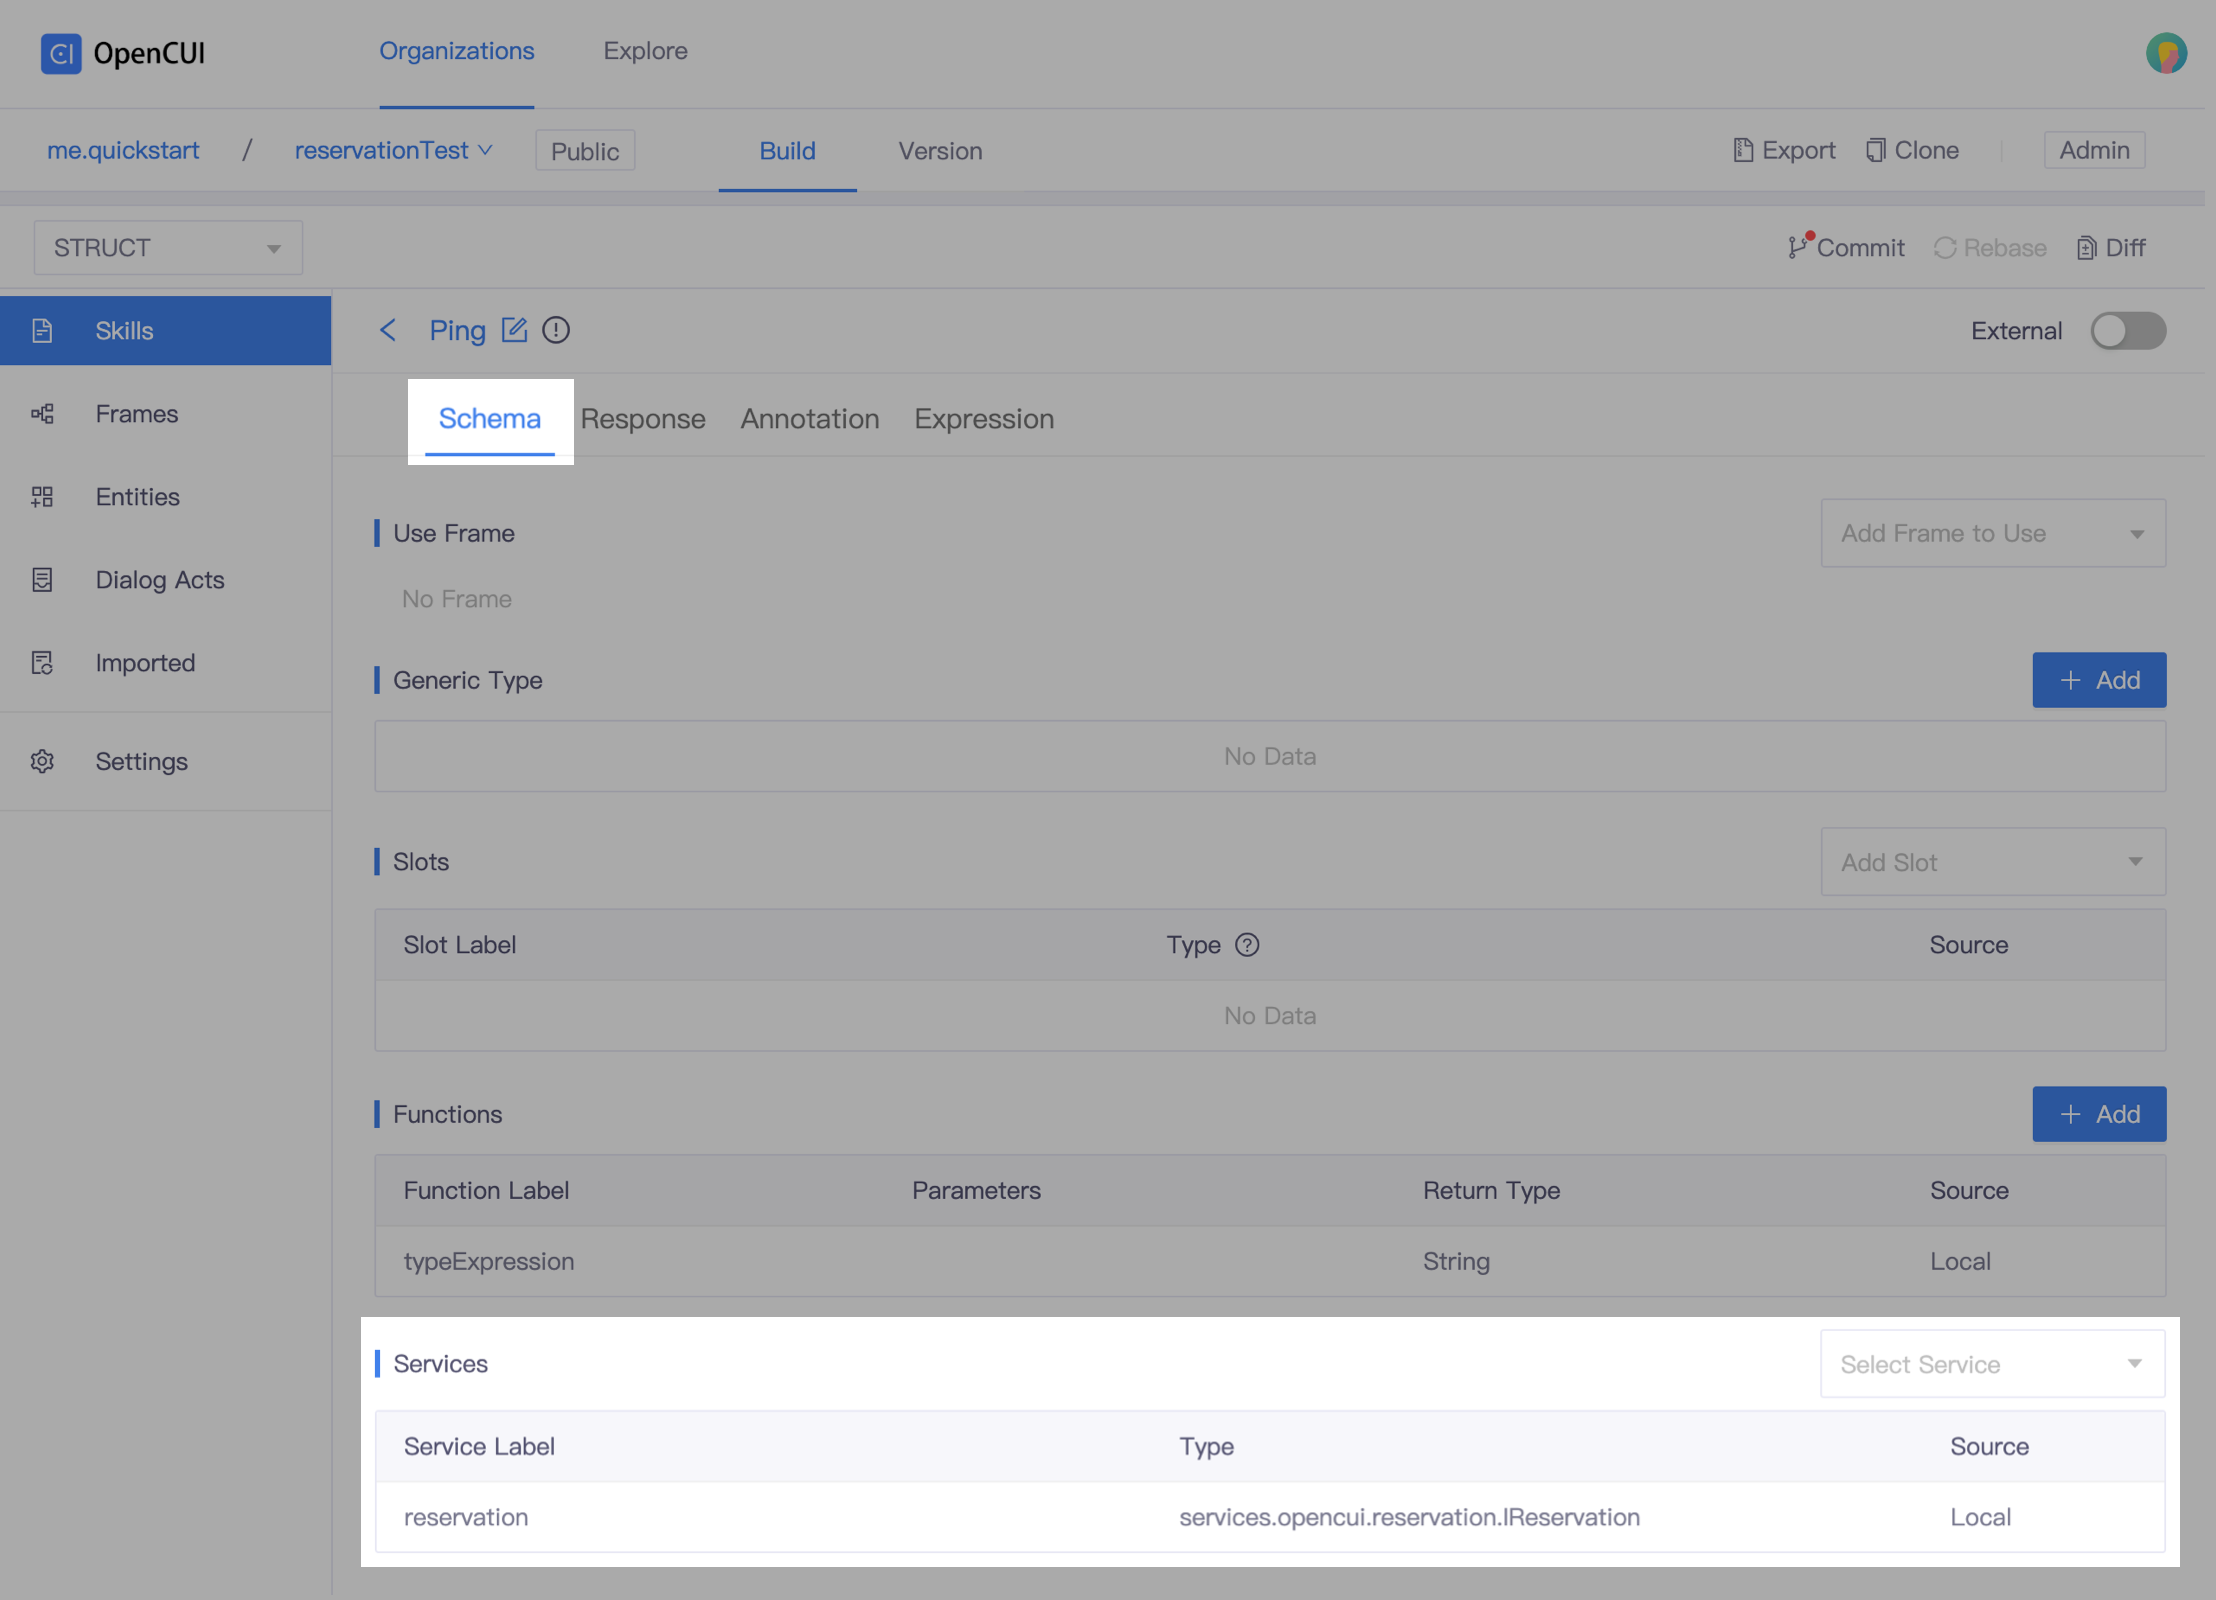
In your chatbot, create a testing skill, for example, Ping.
Use services. Go to Schema tab, in the Services section, select services.opencui.reservation, click Save.
Add actions. Go to Response tab, in the Default Action section, add the actions you need. In this case, we add Single Value Message.
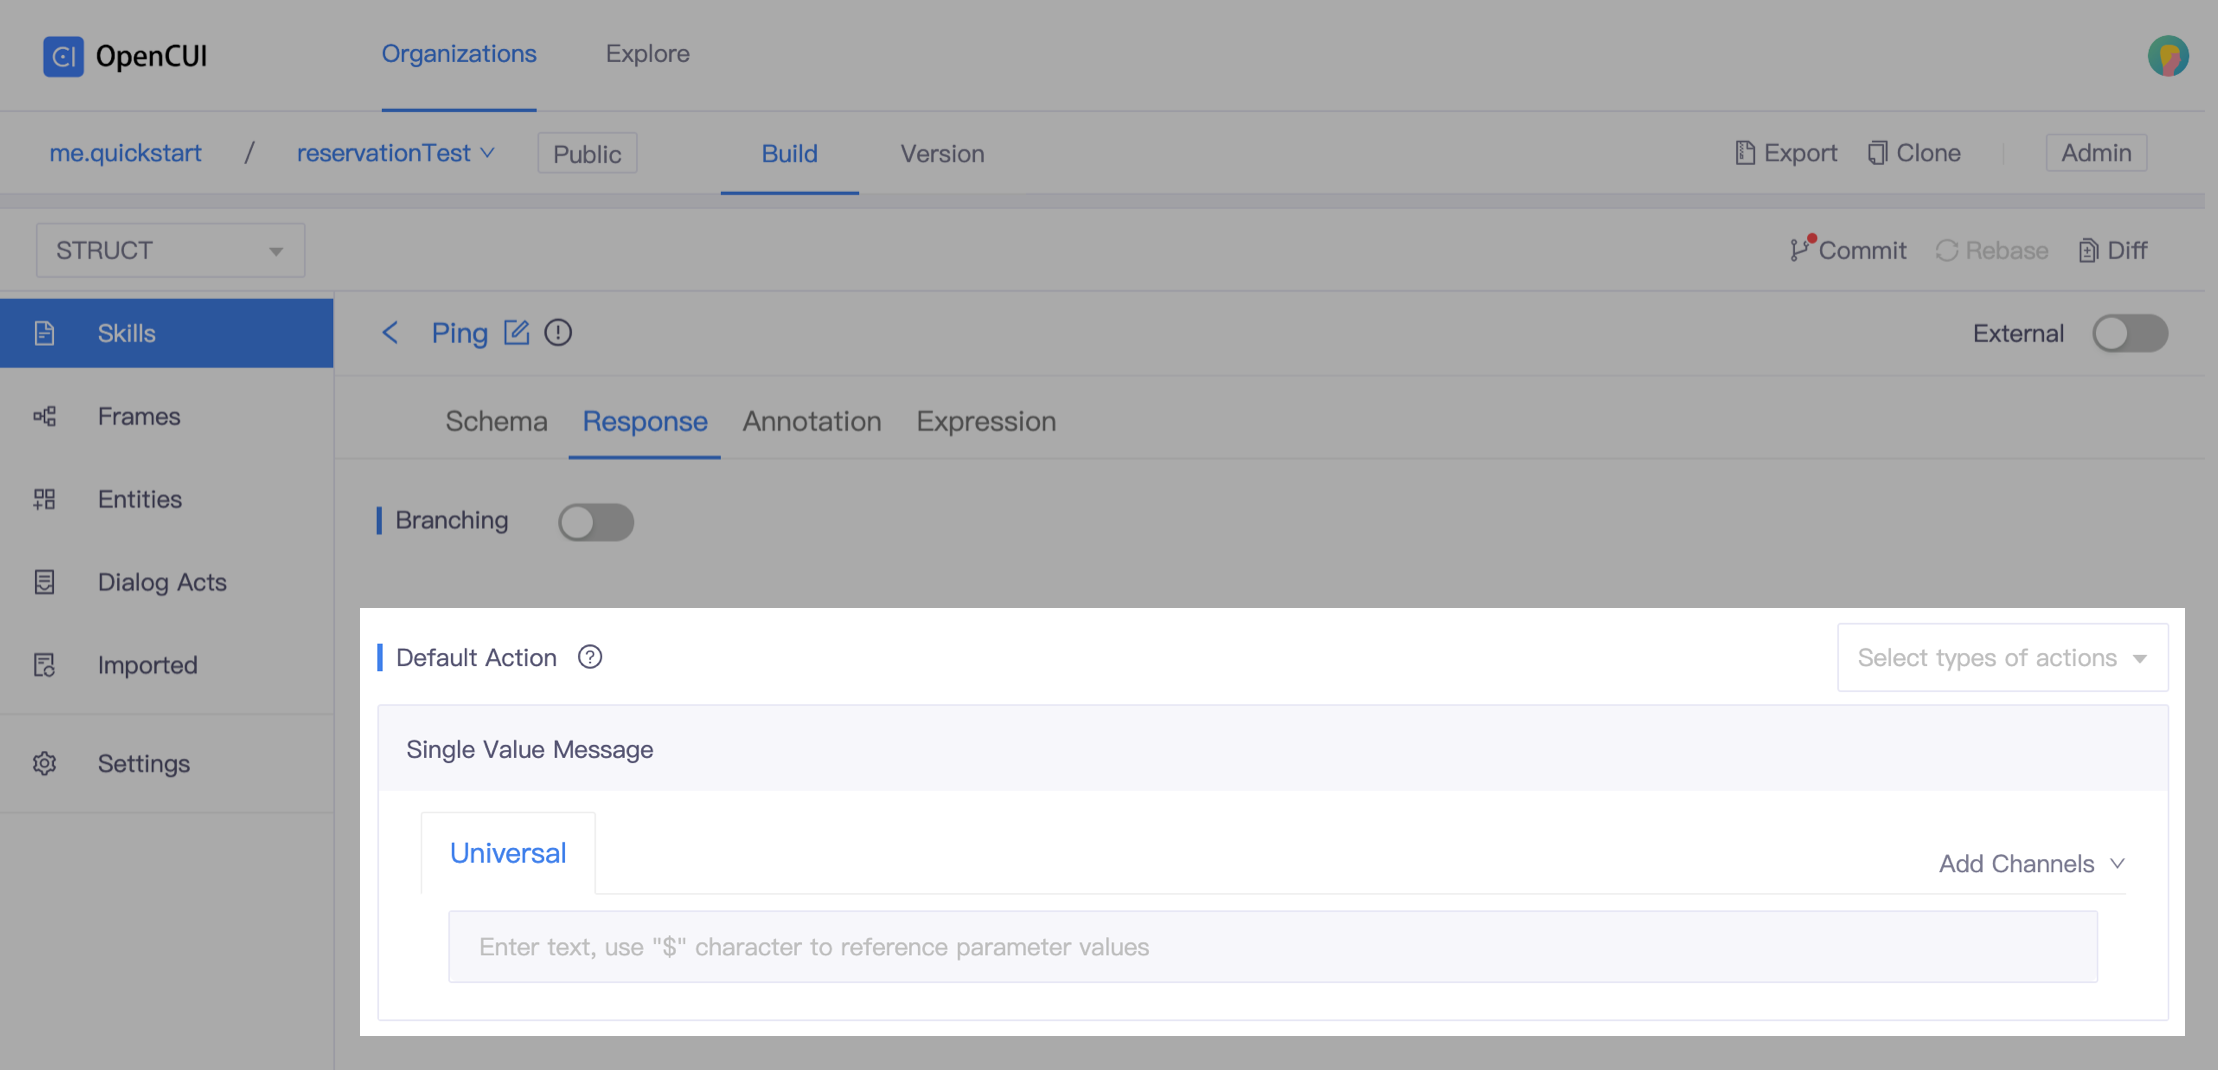
Click Commit, and switch to language level.
Add language template and exemplar:
- Go to Expression tab, add Names and Expressions.
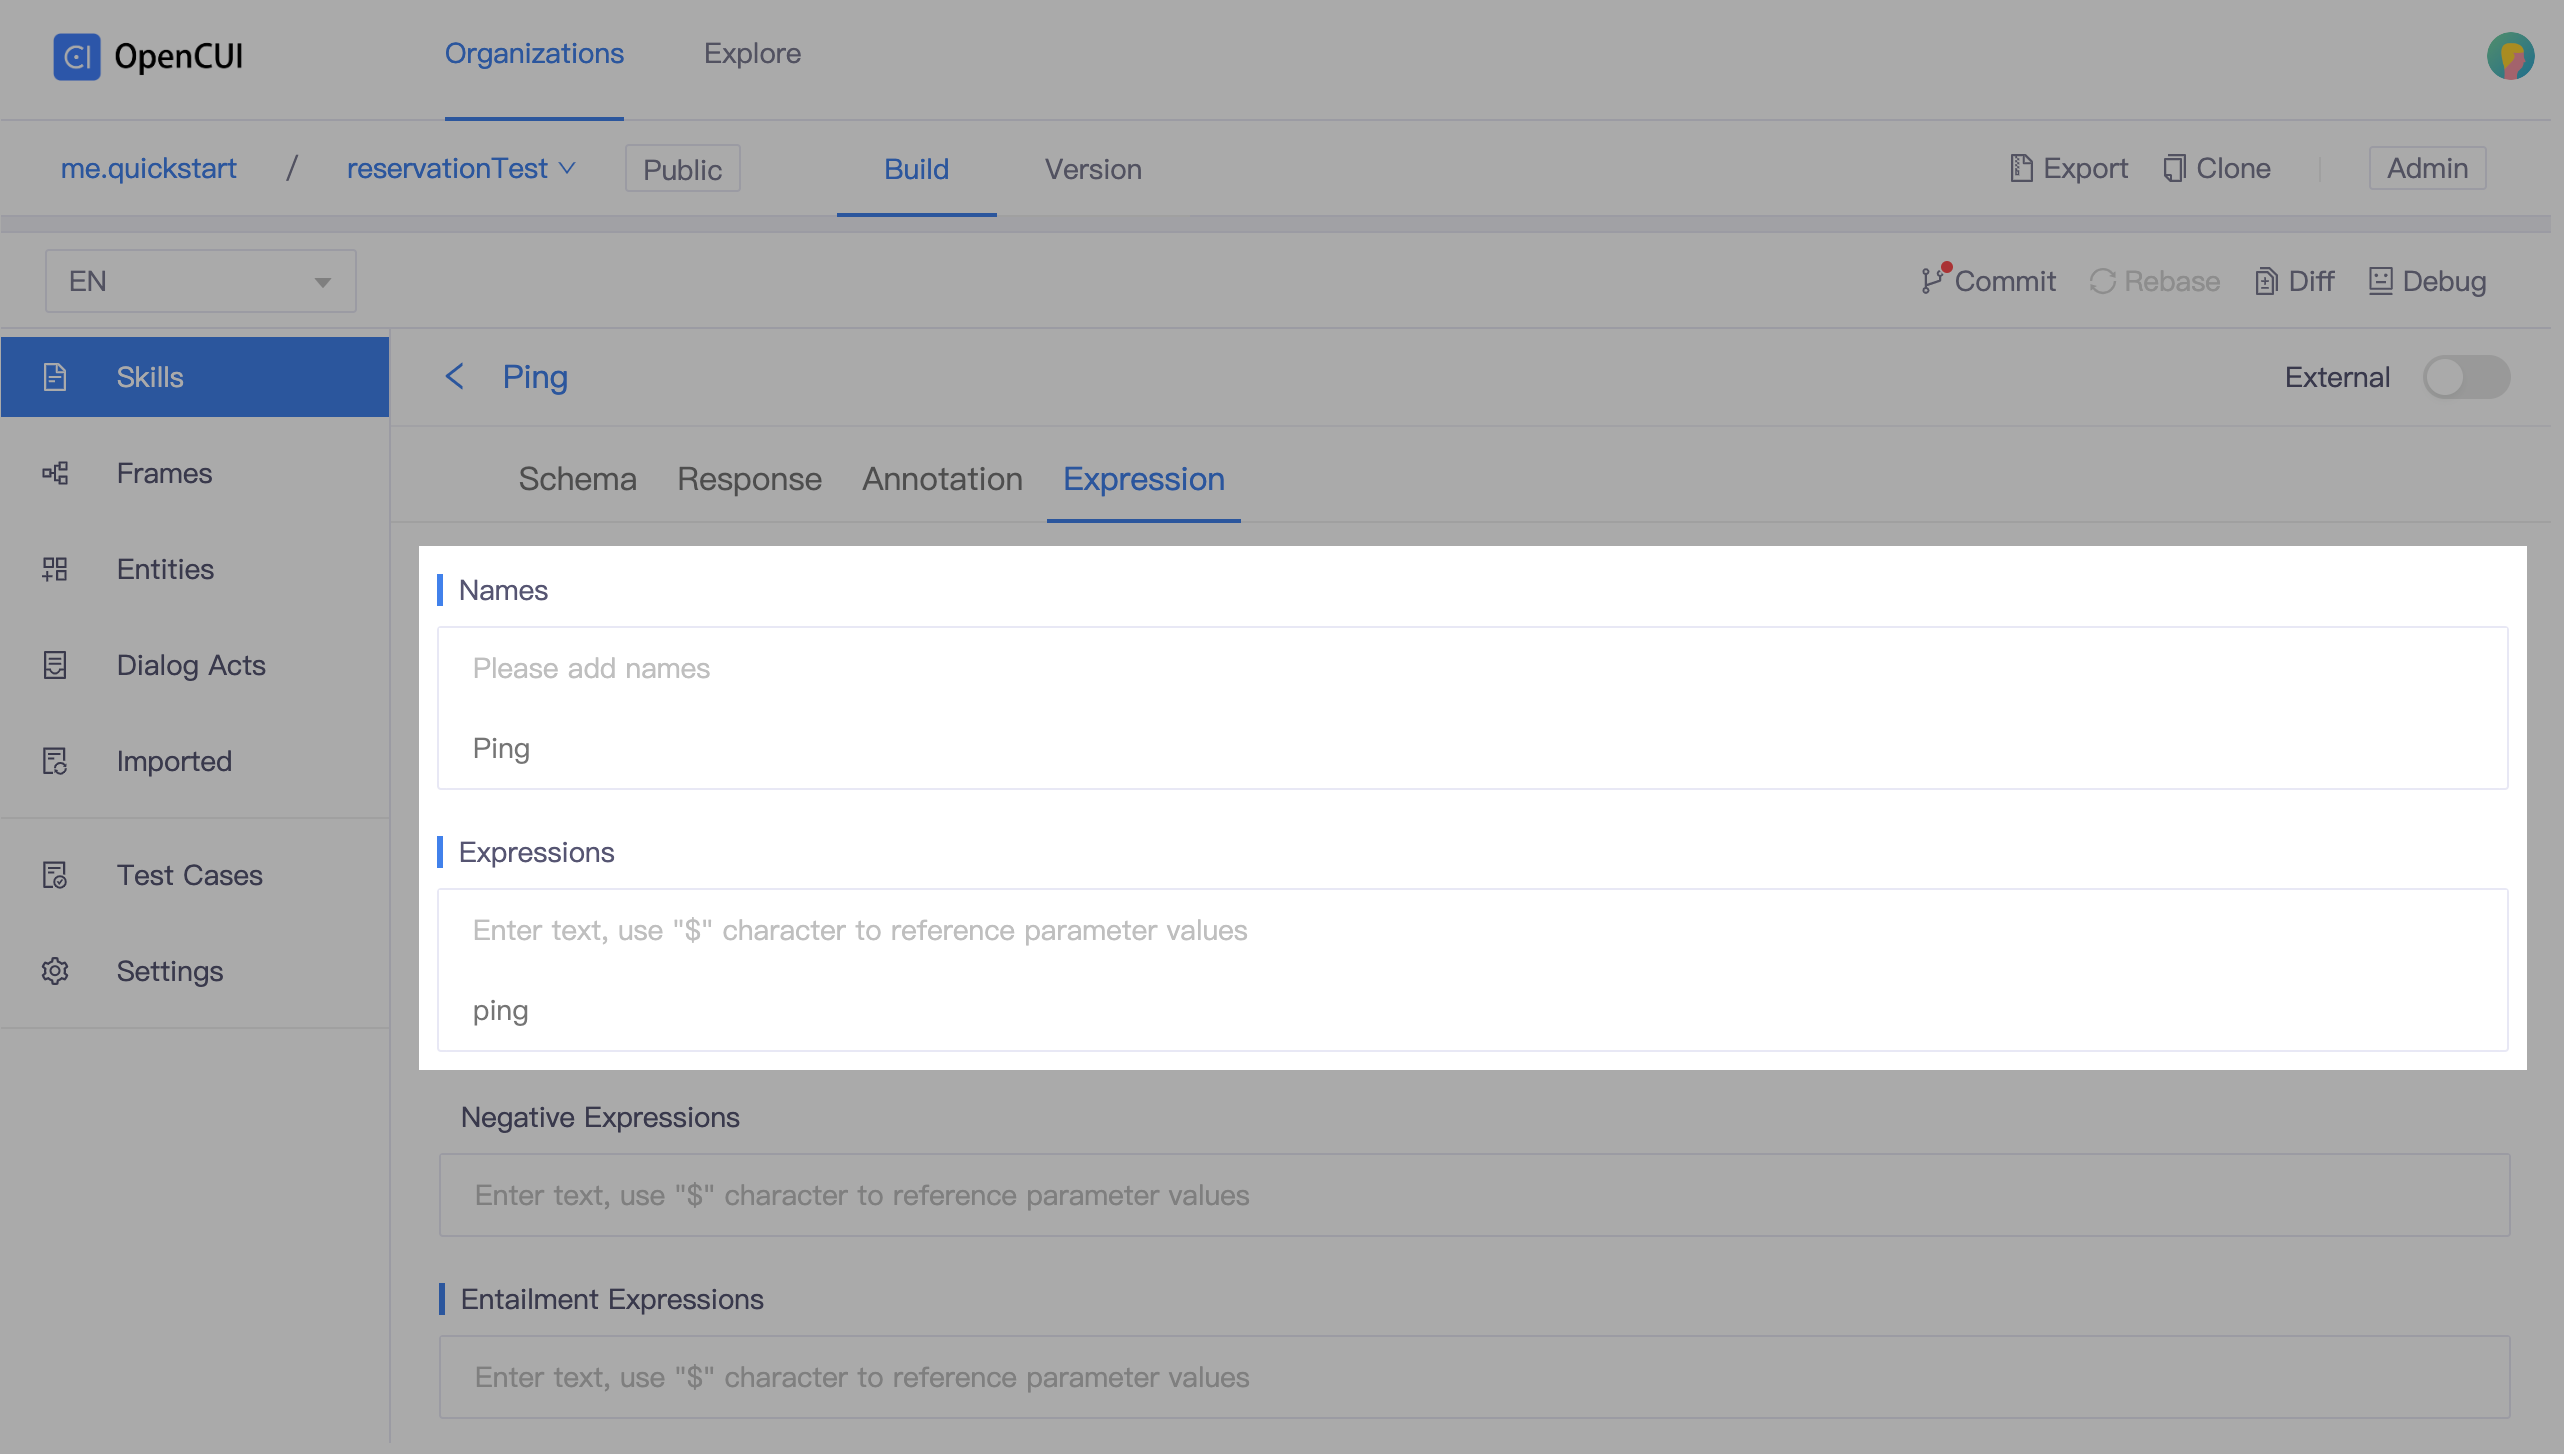
- Go to Response tab, add the reply and call the
getResourceInfofunction.
kotlin// change "xxxxxxxx" to your resource id This is Resource id xxxxxxxx's info: ${ (reservation.getResourceInfo("xxxxxxxx") as Hairdresser)!!.hairdresserName!!.expression() }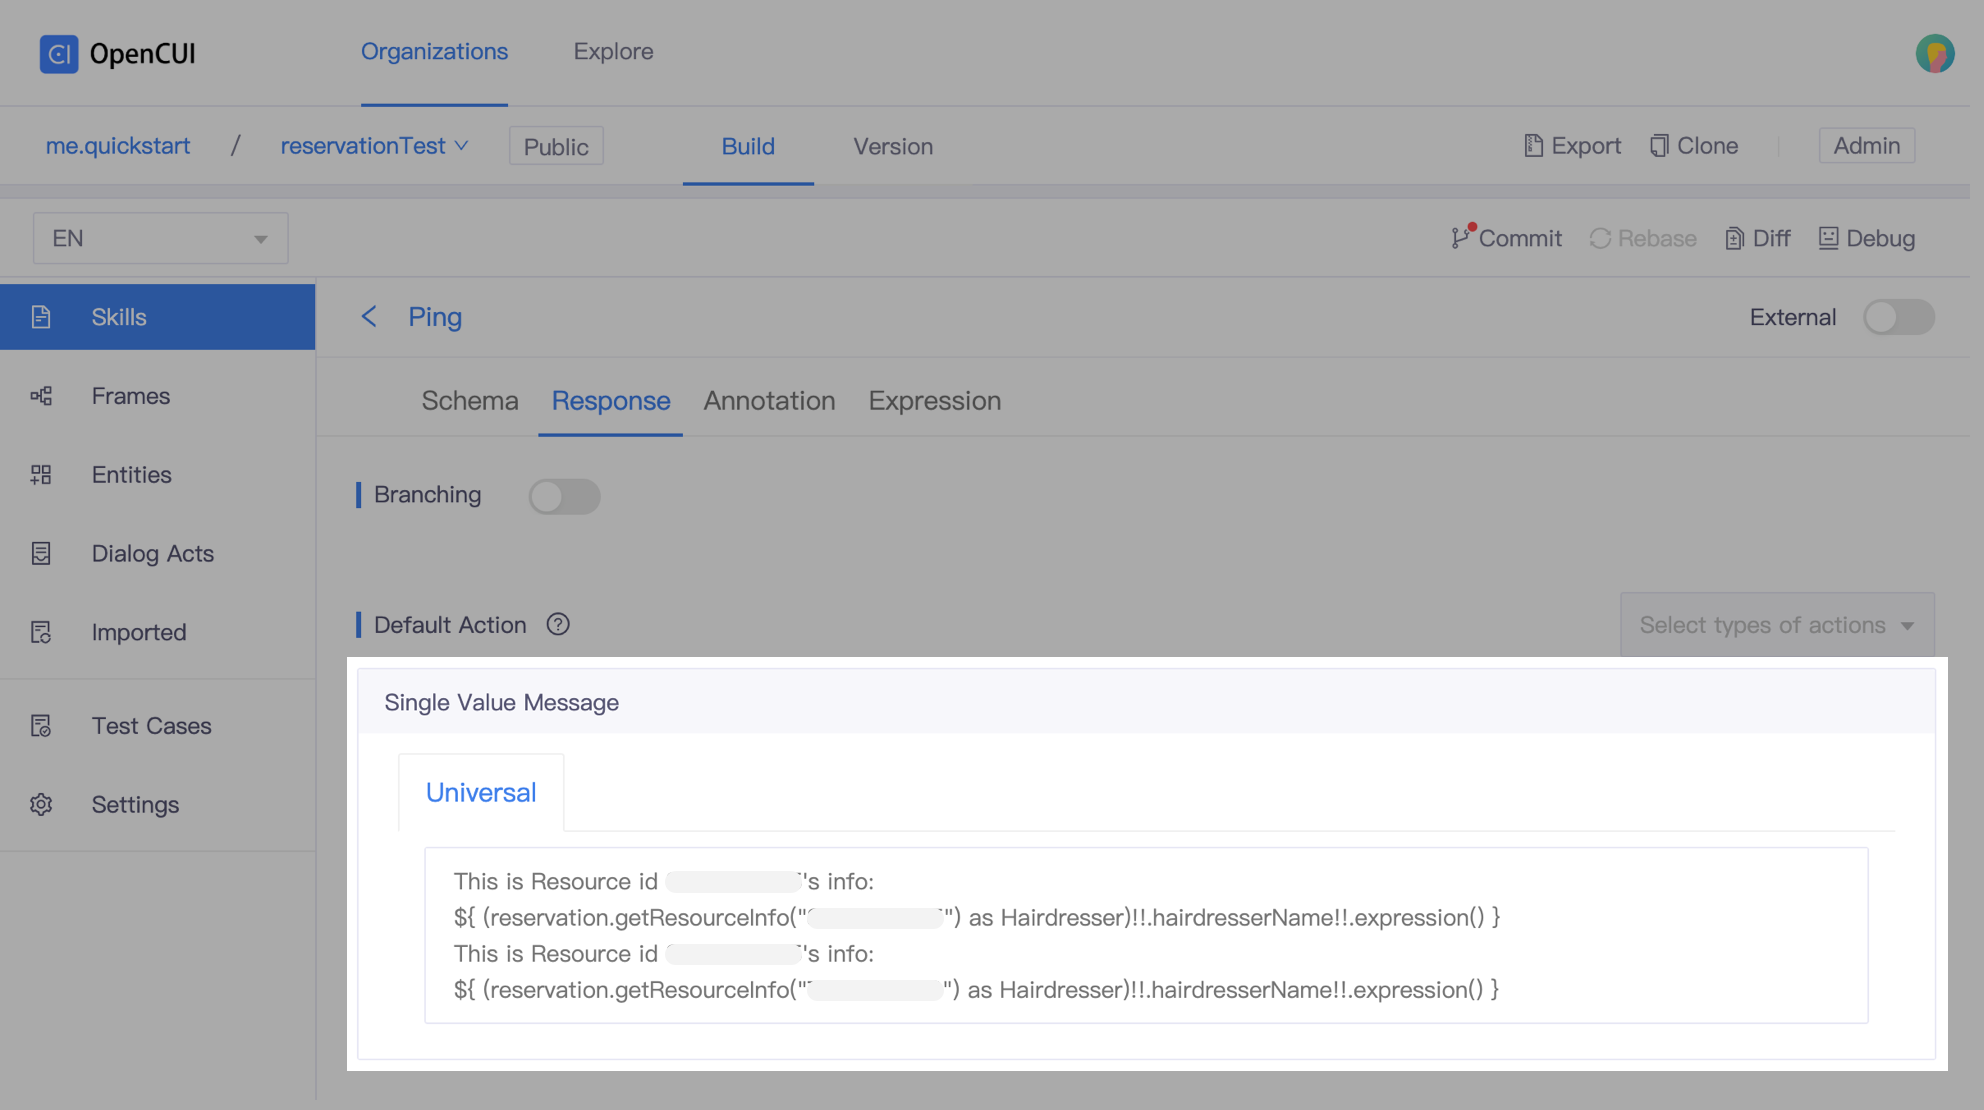
Click Commit, and test it in Debug. If you get the correct response, congratulations, you have successfully completed the configuration.